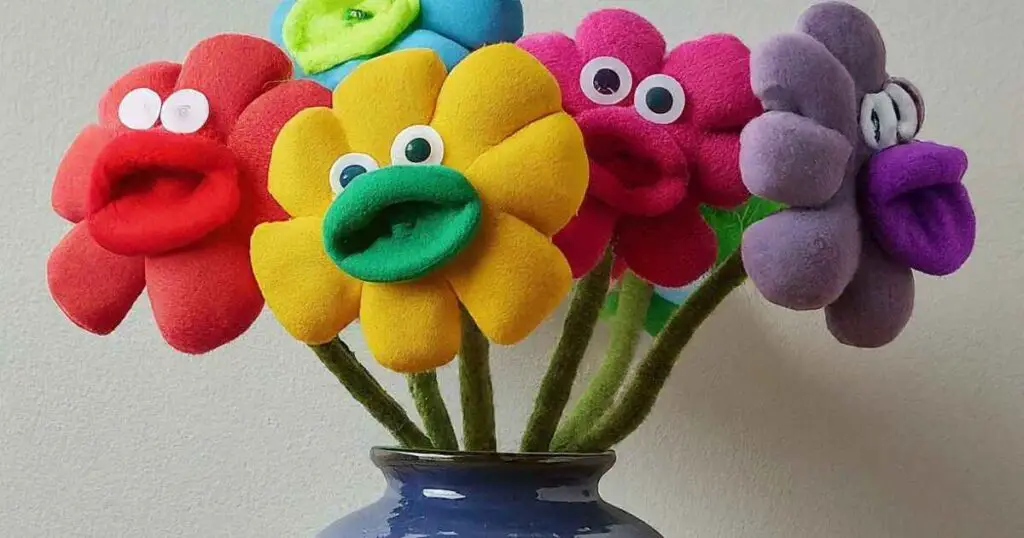
No store-bought gift can beat a handmade one. Get crafty with these 77 adorable Mother’s Day crafts that kids of all ages can make for Mom.
Stuck on a Mother’s Day gift idea? Don’t worry, you don’t need to spend a lot of money to show Mom you care. These 77 cute crafts are perfect for kids of all ages, and they use materials you might already have around the house.
They’re so fun to make, Mom will cherish them forever.
This page may contain links to affiliate websites, and I receive a commission for any purchases made on the affiliate website using such links (at no extra cost to you). & as an Amazon Associate, I earn from qualifying purchases. Thanks 🤗.
What are the Best Mother’s Day Crafts?
Below, you will do d over 70 crafts you can make today for your lovely mom.
#1 Blooming Clay Pots
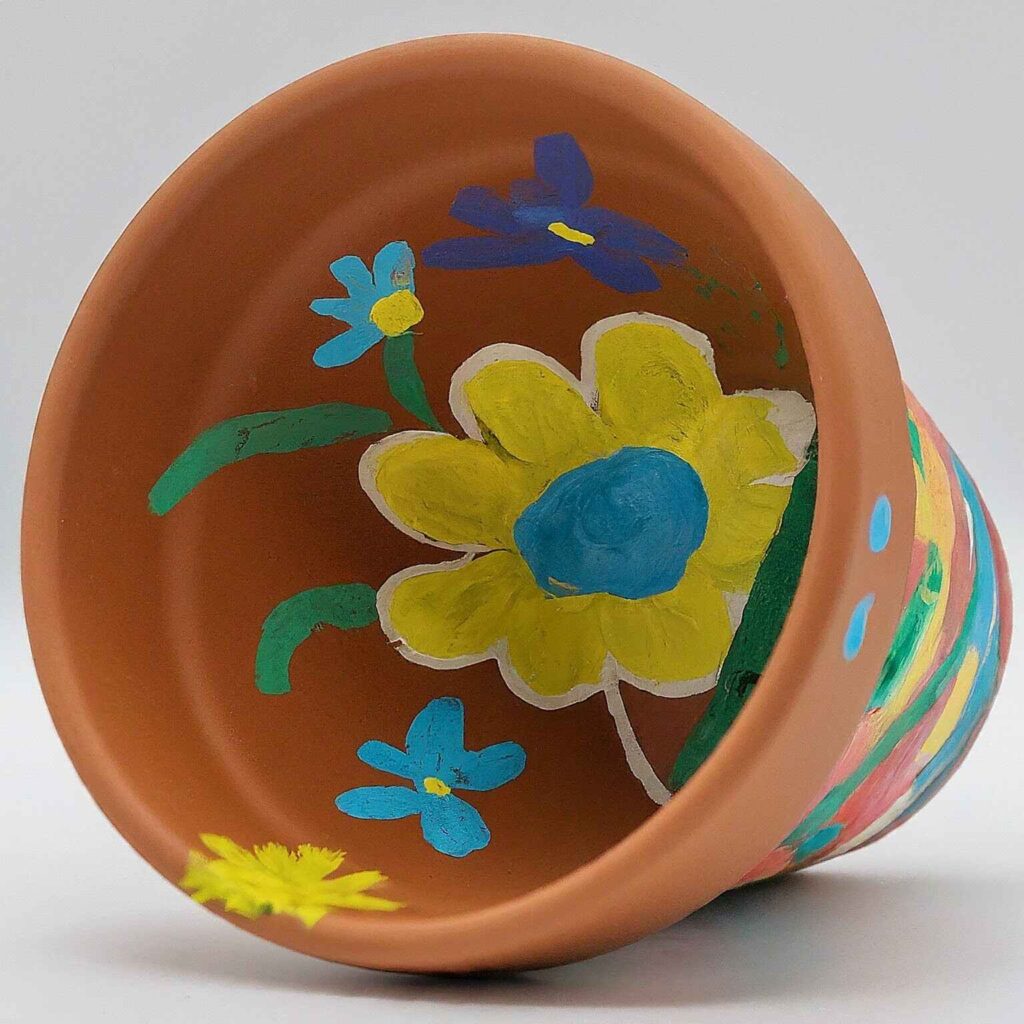
Want to give Mom a gift that keeps on giving? Transform a boring clay pot into a vibrant masterpiece.
Here’s what you’ll need:
- A plain clay pot
- Paintbrushes
- Paints (your favorite colors.)
- Real or artificial flowers (optional)
How to Make It:
- Get creative with your paints. Let your imagination bloom and paint your clay pot however you like. You can make stripes, polka dots, or even draw a special message for Mom.
- Once the paint dries, add some colorful flowers to the pot. You can use real or artificial flowers, whichever you prefer.
- Now you have a beautiful blooming pot for Mom to display in her house.
#2 Handprint Flowers
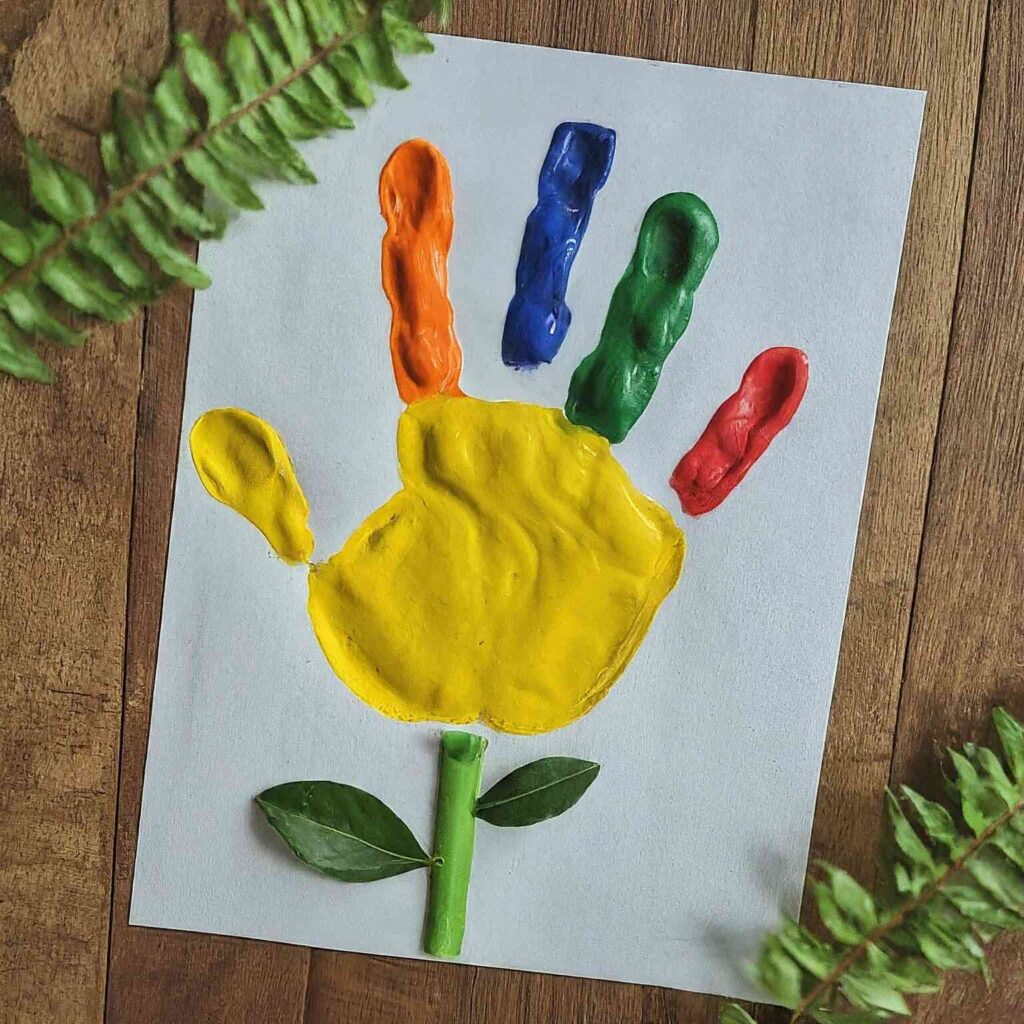
This craft is perfect for little ones. It’s a fun way to show Mom just how much you’ve grown (and how colorful your tiny fingers are.).
Here’s what you’ll need:
- Construction paper
- Paint
- Paintbrushes
- Green marker
How to Make It:
- Choose a few colors of paint that you like.
- Carefully paint your child’s hand with the paint (washable paints work best.).
- Gently press your child’s hand onto the construction paper, making sure all their fingers leave an imprint.
- Once the handprint dries, use a green marker to draw a stem and leaves coming out of the palm of the hand. Now you have a beautiful handprint flower.
- Write a sweet message for Mom next to the flower, like “We love you, Mom.”
#3 Seashell Wind Chimes
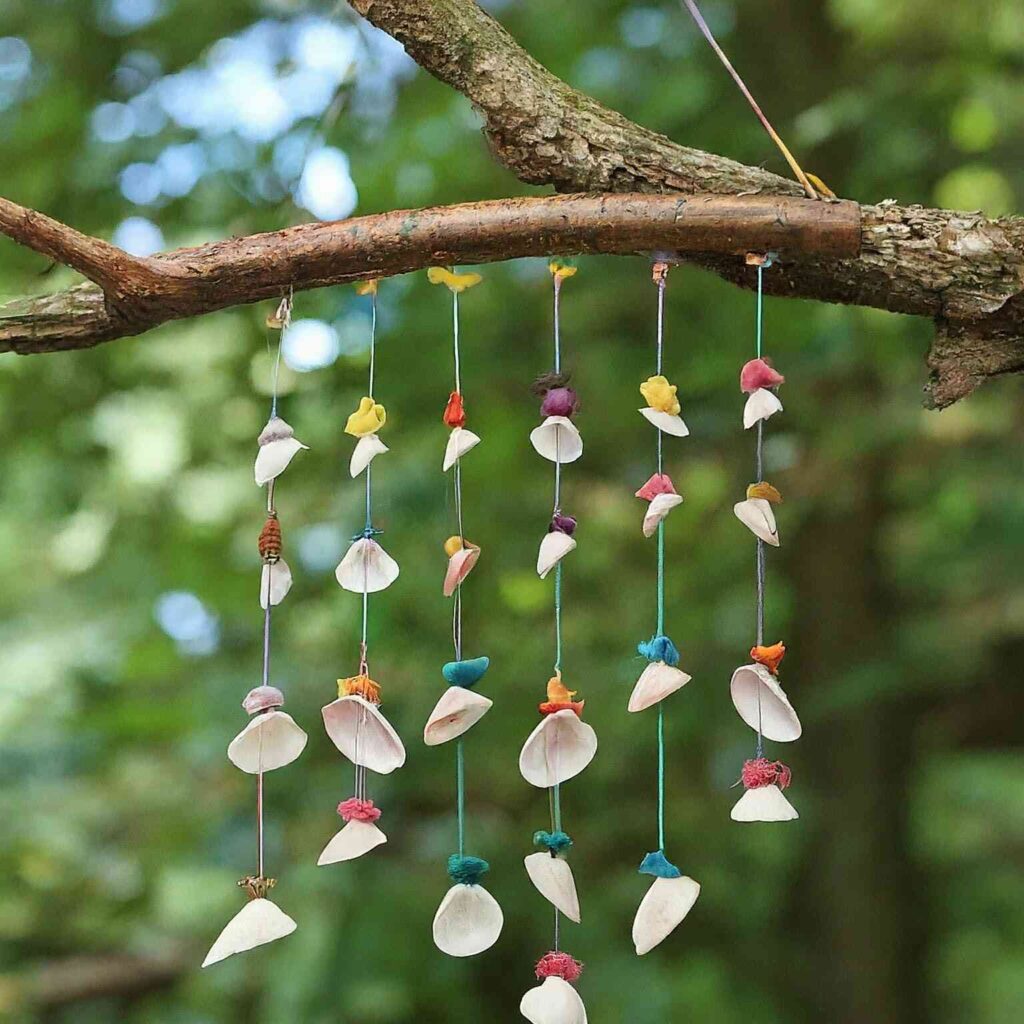
Feeling beachy? Craft a charming wind chime for Mom’s garden using seashells collected on your last adventure.
Here’s what you’ll need:
- Seashells (different sizes and shapes)
- Colorful yarn or twine
- Stick or branch
- Scissors
How to Make It:
- Carefully tie a piece of yarn or twine around the top of each seashell. Make sure the knot is secure.
- Cut different lengths of yarn or twine for each seashell, so the wind chime will make a variety of sounds when it blows.
- Tie the other end of each piece of yarn or twine to a stick or branch. Make sure the seashells are spaced evenly apart.
- Hang your seashell wind chime outside for Mom to enjoy.
#4 Cupcake Flowers
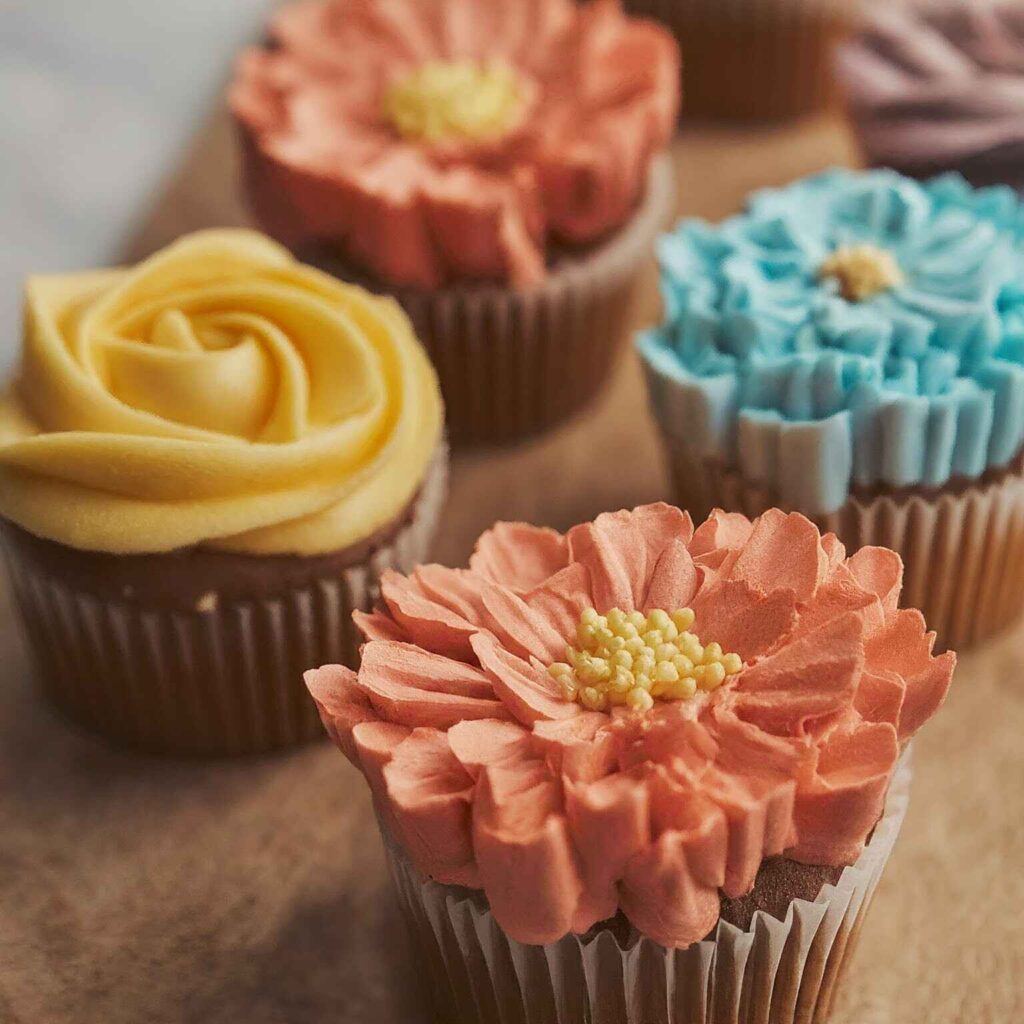
Feeling hungry (and crafty)? This craft is a delicious way to show Mom you care. Here’s what you’ll need:
- Cupcake mix (or your favorite cupcake recipe)
- Frosting (different colors)
- Sprinkles or candies (optional)
- Cupcake pan
- Cupcake liners (optional)
How to Make It:
- Bake a batch of delicious cupcakes according to the package directions or your favorite recipe.
- Get creative with your frosting. Use different colored frosting to pipe swirls onto the cupcakes, resembling blooming flowers.
- Add some sprinkles or candies for extra flair. Now you have beautiful cupcake flowers that Mom can enjoy eating.
#5 Pressed Flower Card
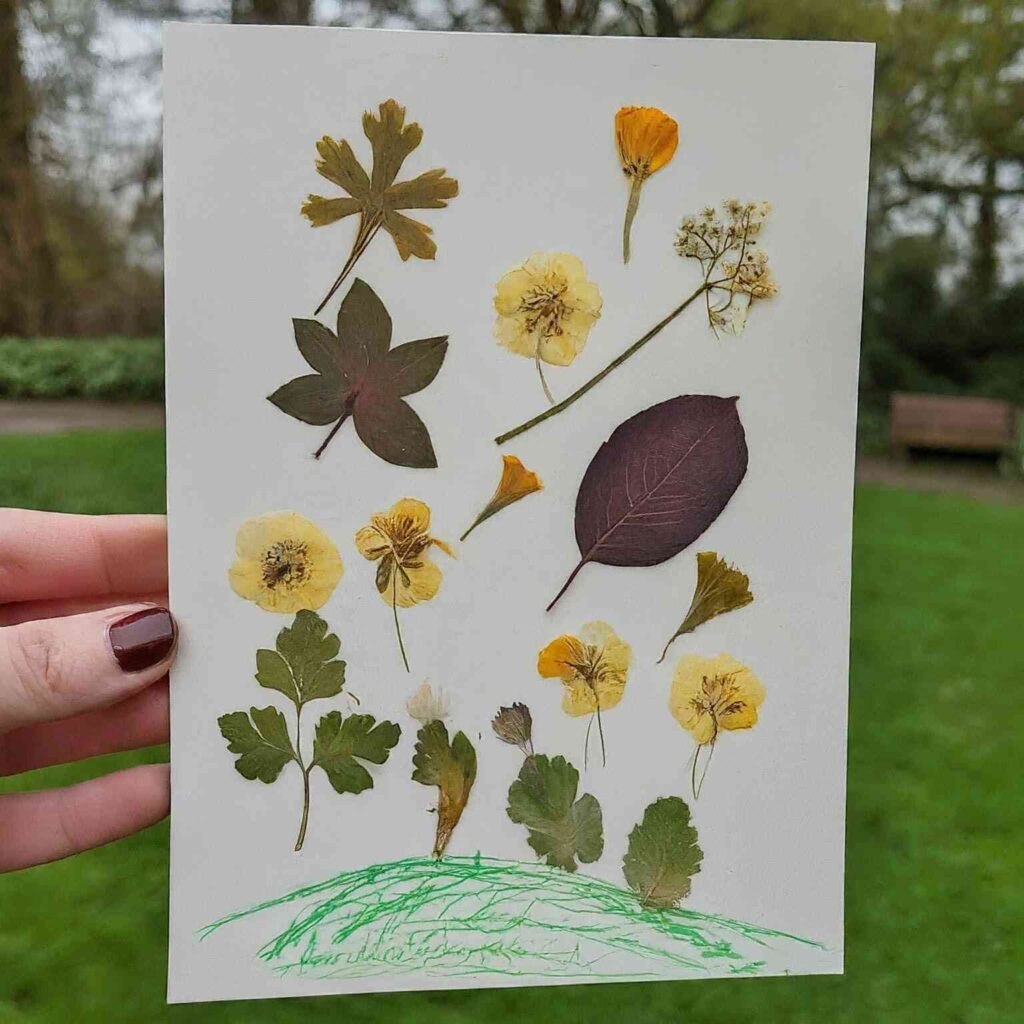
This craft is a beautiful way to preserve nature’s treasures.
Items you’ll need:
- Flowers and leaves
- Heavy book
- Construction paper
- Glue stick
- Glitter (optional)
- Markers or crayons (optional)
How to Make It:
- Take a walk with Mom and collect some beautiful flowers and leaves.
- Carefully place the flowers and leaves between the pages of a heavy book. Leave them there for a few days or weeks, until they are completely dried and flat.
- Fold a piece of construction paper in half to create a card.
- Once the flowers and leaves are dry, arrange them on the front of your card. Use glue to stick them down.
- You can add a sprinkle of glitter or use markers or crayons to draw a border or message on your card.
#6 Painted Pebble Magnets
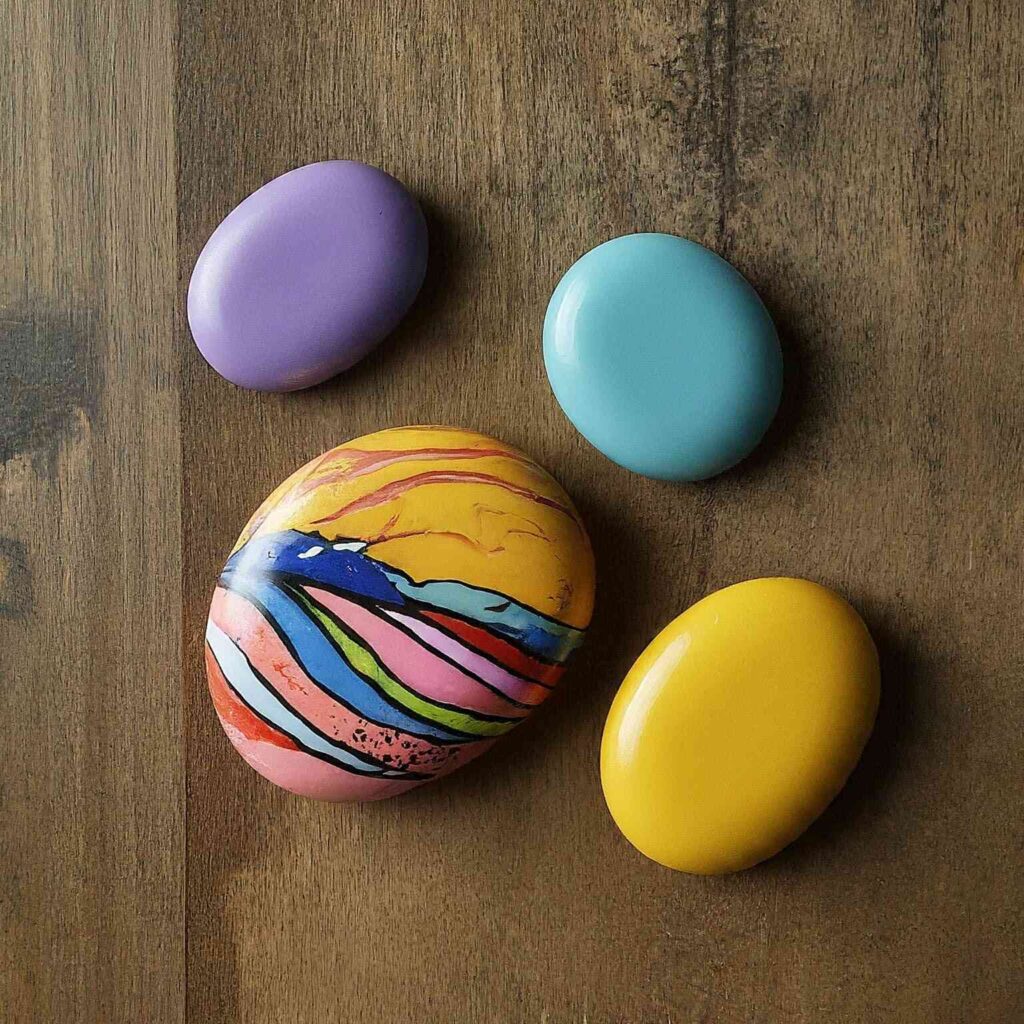
Turn ordinary pebbles into extraordinary gifts.
Items you’ll need:
- Smooth pebbles
- Acrylic paints
- Paintbrushes
- Small magnets
- Glue
How to Make It:
- Paint your pebbles with bright and colorful acrylic paints. You can paint stripes, polka dots, hearts, or anything you like.
- Let the paint dry completely.
- Once dry, add a small dab of glue to the flat side of each pebble.
- Press a small magnet onto the glue and hold it firmly for a few seconds, until secure.
#7 Button Bouquet
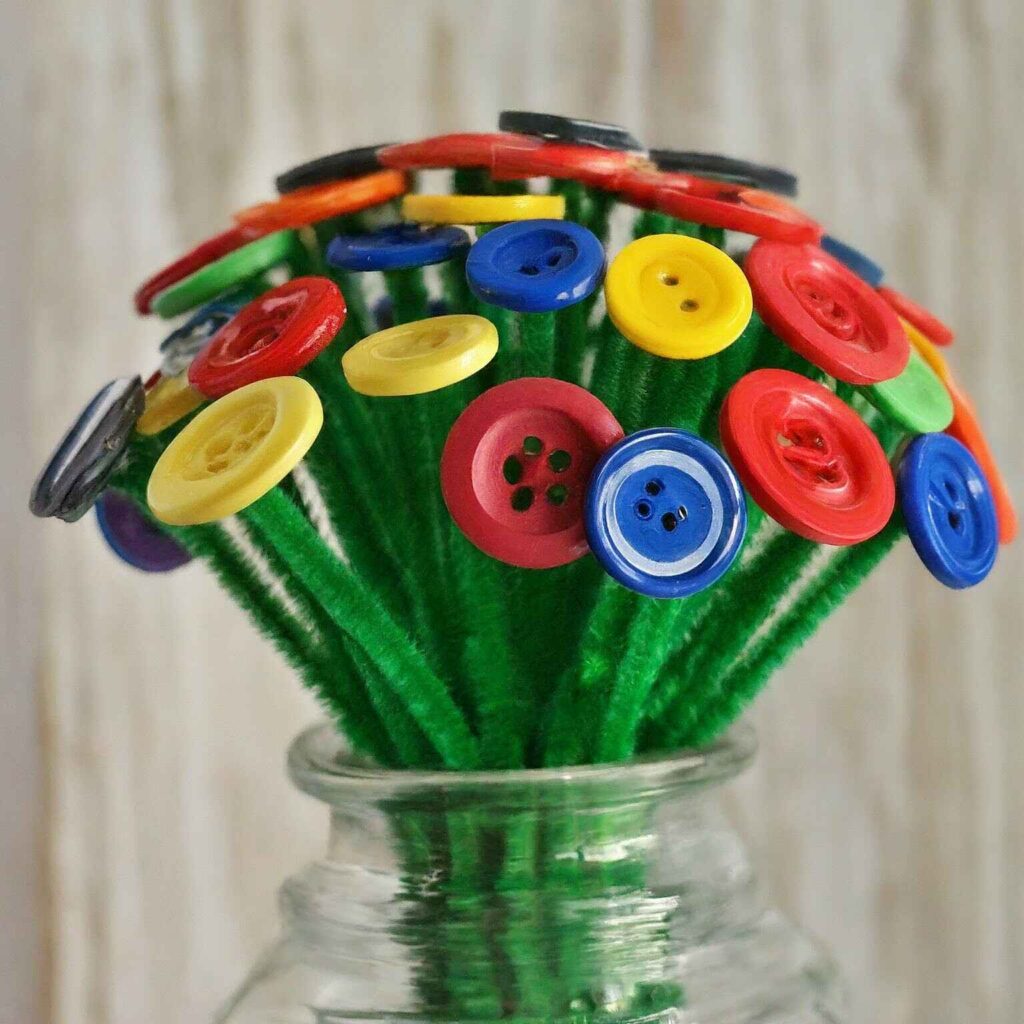
Create a blooming bouquet that will last forever.
Items you’ll need:
- Colored buttons (various sizes and colors)
- Pipe cleaners (green)
- Scissors
- Hot glue gun (adult supervision required)
- Vase (optional)
How to Make It:
- Cut the pipe cleaners into different lengths to create stems for your flowers.
- Heat up the hot glue gun with adult supervision. (Be careful, hot glue can burn.)
- Dab a small amount of hot glue onto the back of a button and press it onto the top of a pipe cleaner stem. Hold for a few seconds until secure.
- Repeat step 3 with different colored buttons to create your flower bouquet.
- You can arrange your button flowers in a vase for Mom to display.
#8 Yarn-Wrapped Picture Frame
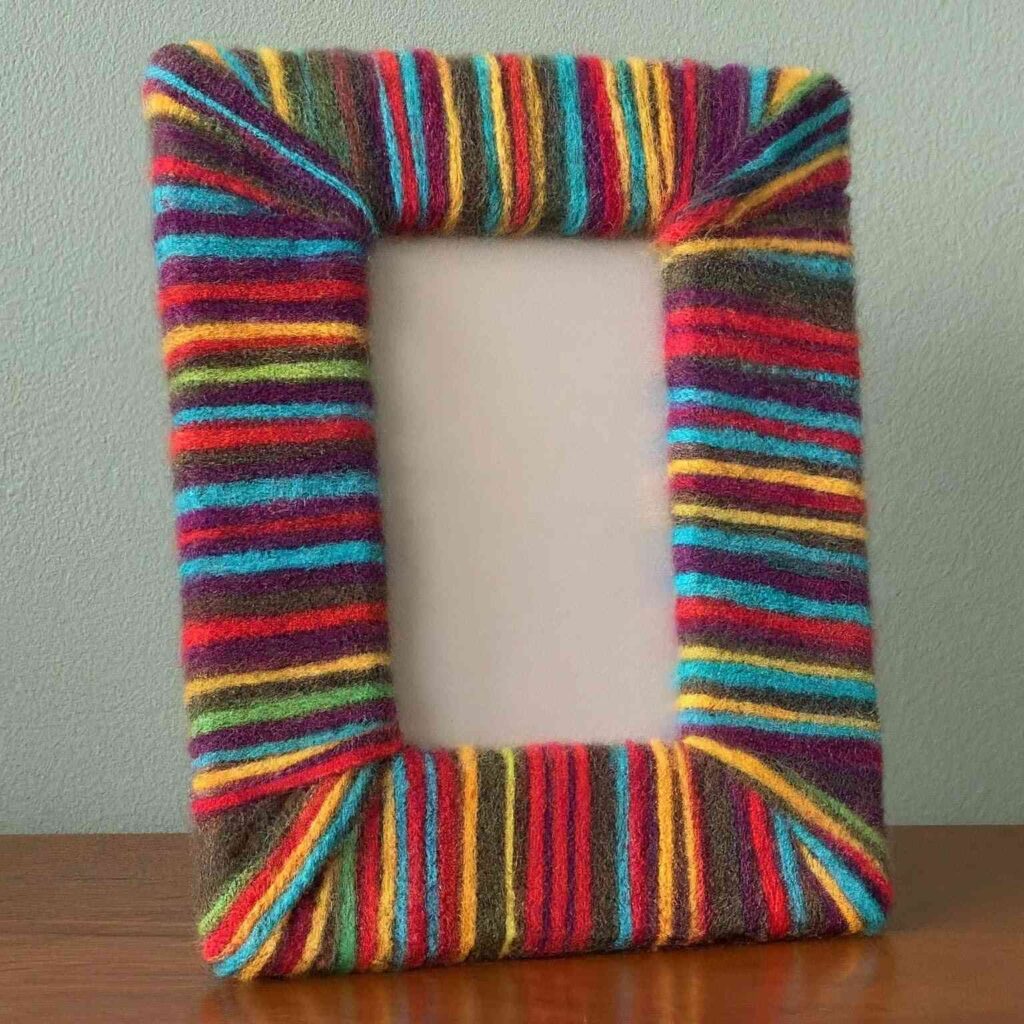
Transform a plain picture frame into a work of art.
Items you’ll need:
- Picture frame (any size or shape)
- Yarn (various colors)
- Scissors
- Glue stick
How to Make It:
- Cut your yarn into long pieces.
- Apply a small amount of glue to the edge of the picture frame.
- Carefully wrap the yarn around the frame, covering the entire surface. You can use one color of yarn or alternate colors to create a pattern.
- Once the entire frame is wrapped, secure the end of the yarn with a dab of glue.
- You can now insert a special photo of you and Mom inside the frame.
#9 Fingerprint Heart Tree
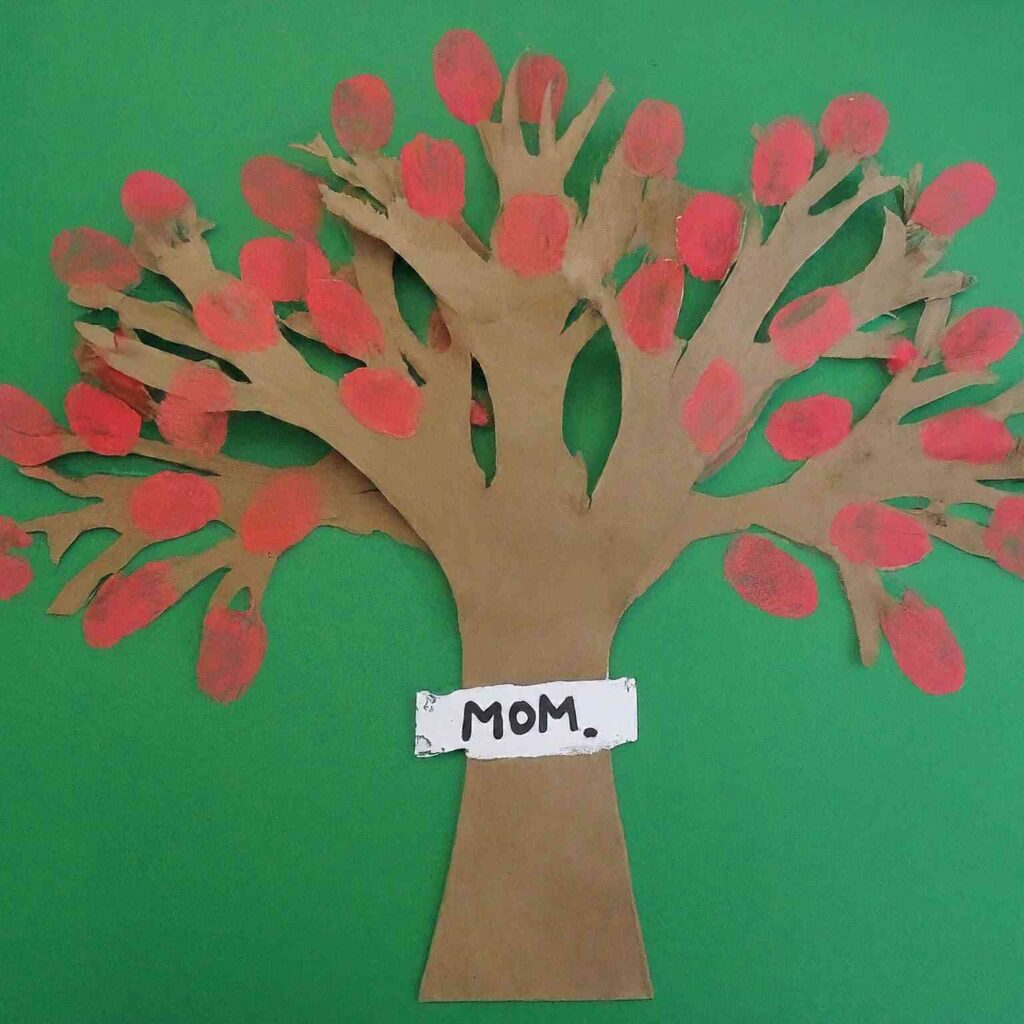
This craft shows Mom how much you love her with every fingerprint.
Items you’ll need:
- Construction paper (brown and green)
- Paint (red or pink)
- Paintbrushes
- Cotton swabs
- Marker (brown)
How to Make It:
- Draw the trunk and branches of a tree on a brown piece of construction paper.
- Use a paintbrush to dab red or pink paint onto your child’s fingertip.
- Gently press your child’s fingerprint onto the branches of the tree, creating leaves.
- Use cotton swabs dipped in paint to add smaller fingerprint details for flowers or extra leaves.
- Glue the tree onto a piece of green construction paper for a background.
- With a marker, draw a message for Mom on the green paper, like “Happy Mother’s Day.”
#10 DIY Bath Fizzes
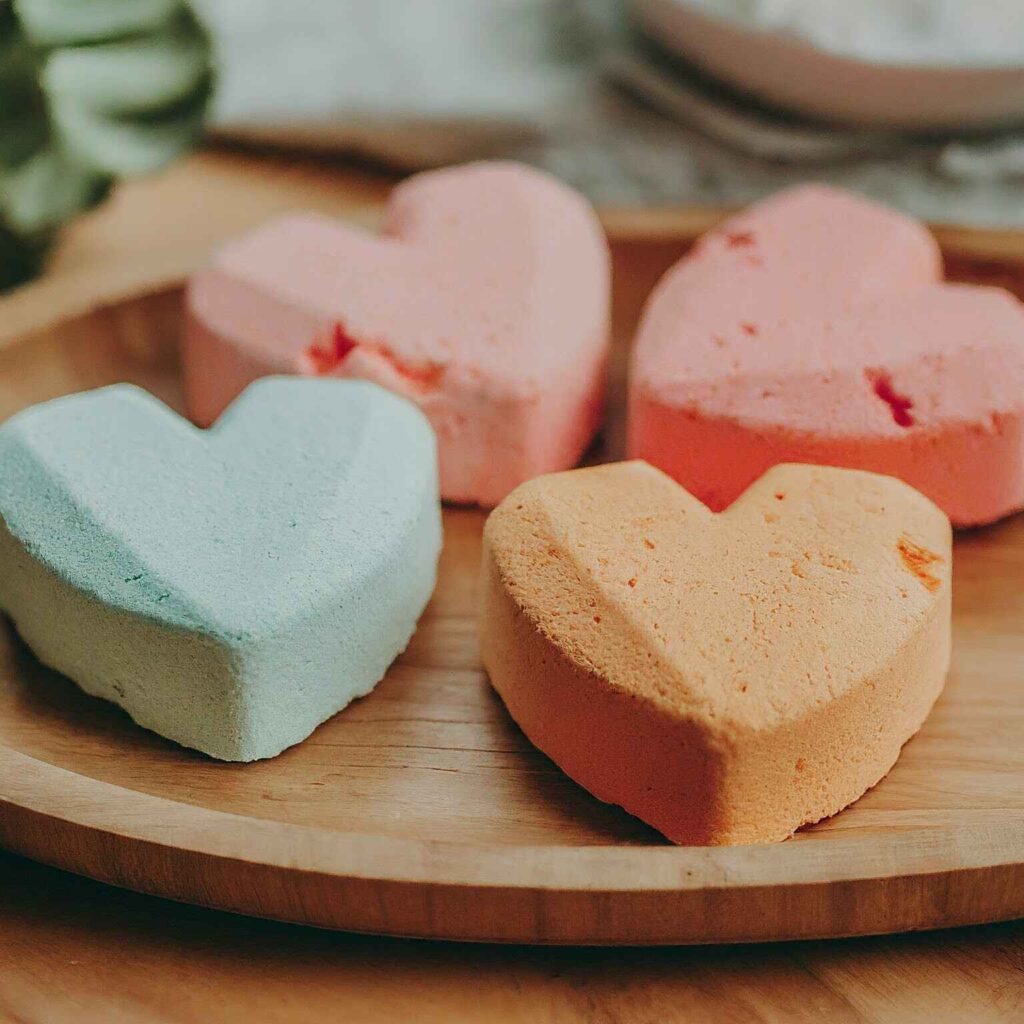
Fizz, fizz, hooray. Make Mom’s bath extra relaxing with these fizzy bath bombs. (Adult supervision recommended)
Items you’ll need:
- Baking soda (1 cup)
- Citric acid (1/2 cup)
- Epsom salts (1/2 cup)
- Cornstarch (1/4 cup)
- Food coloring (a few drops)
- Essential oil (optional, a few drops of a relaxing scent like lavender)
- Silicone molds (fun shapes like hearts or flowers)
- Spray bottle with water
How to Make It:
(Note: Adult supervision is recommended for this craft)
- In a large bowl, mix together the baking soda, citric acid, Epsom salts, and cornstarch.
- Add a few drops of food coloring and essential oil (if using) and mix well until the color is evenly distributed.
- Lightly spray the mixture with water from a spray bottle, a little at a time, until the mixture can hold its shape when squeezed. Be careful not to add too much water.
- Pack the mixture firmly into your silicone molds.
- Let the bath fizzes dry completely in the molds for several hours or overnight.
- Pop the bath fizzes out of the molds and they’re ready to use.
#11 Painted Pasta Necklace
Turn ordinary pasta into an extraordinary necklace for Mom.
Items you’ll need:
- Pasta (different shapes and sizes)
- Acrylic paints
- Paintbrushes
- String or yarn
- Needle (optional, for threading)
How to Make It:
- Paint your pasta shapes with bright and colorful acrylic paints. You can paint stripes, polka dots, or anything you like.
- Let the paint dry completely.
- Once dry, you can thread the pasta onto a string or yarn using a needle (adult supervision recommended for threading with a needle) or simply tie the string or yarn through the larger holes in the pasta.
- Create a necklace length that fits Mom.
#12 Memory Jar
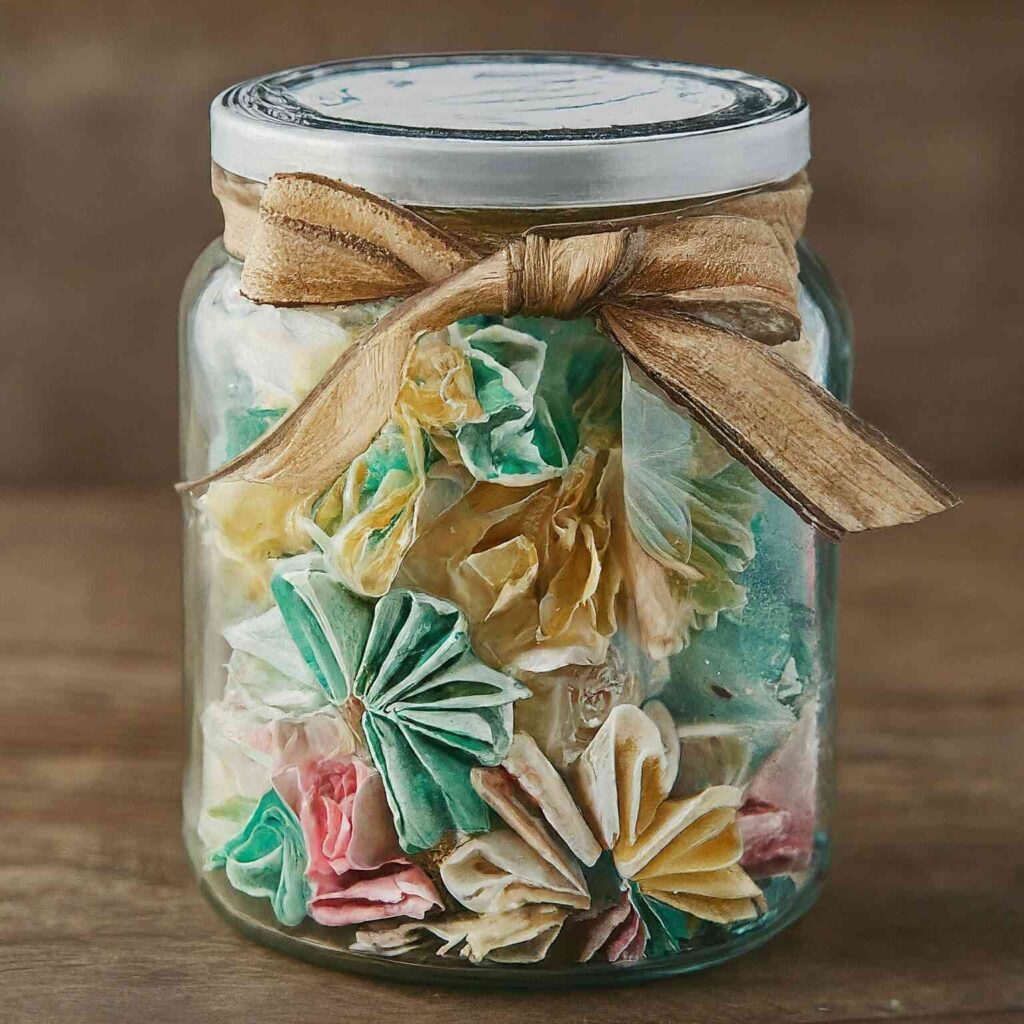
Fill a jar with special memories for Mom to cherish.
Items you’ll need:
- Glass jar with a lid
- Construction paper
- Markers or crayons
- Scissors
- Ribbon or twine (optional)
- Small trinkets or photos (optional)
How to Make It:
- Decorate the outside of your jar with construction paper. You can cut out hearts, flowers, or write a message for Mom.
- Write down special memories you have with Mom on small pieces of construction paper. These can be funny moments, things you love to do together, or just how much you appreciate her.
- Fold the memory papers and place them inside the jar.
- You can also add small trinkets or photos that remind you of special times with Mom.
- Tie a ribbon or twine around the lid for a finishing touch.
#13 Sock Puppet Flowers
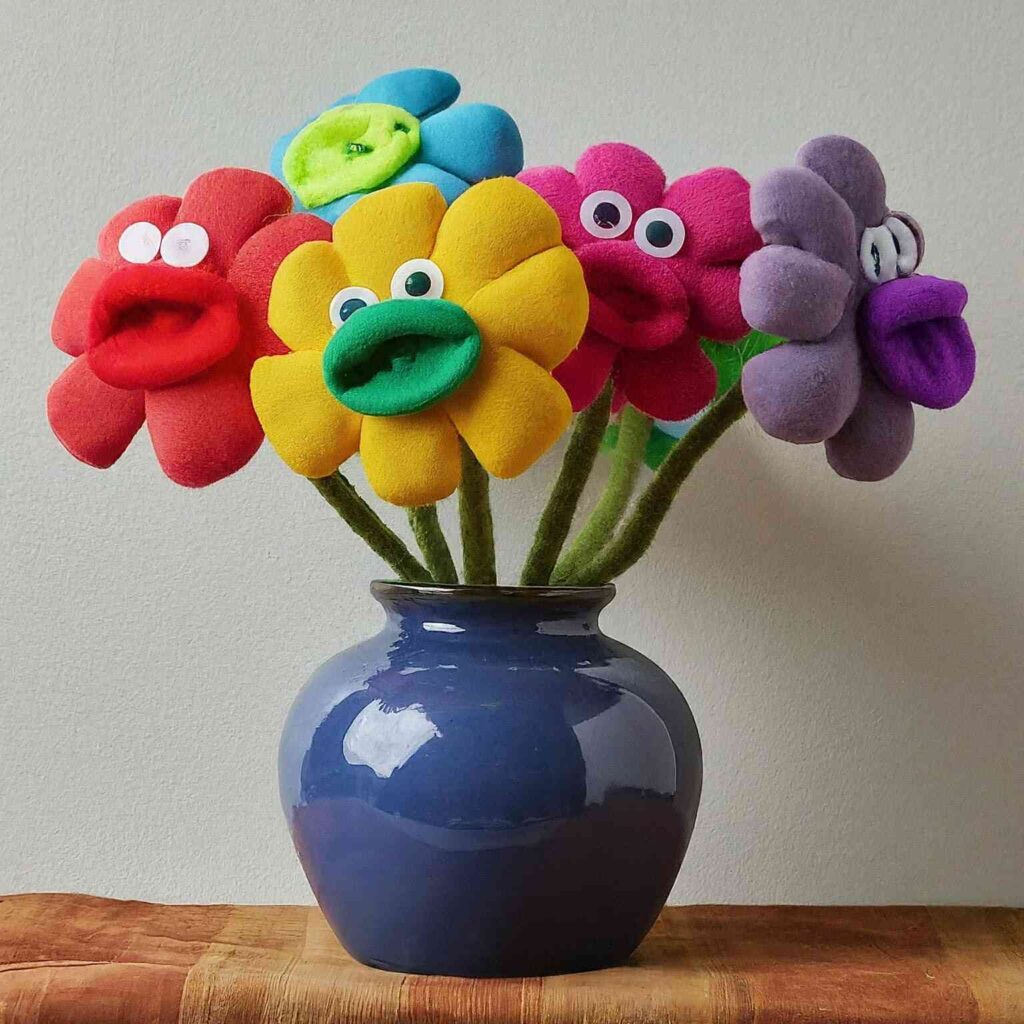
Turn old socks into a blooming bouquet of fun.
Items you’ll need:
- Old socks (different colors and patterns)
- Buttons (various sizes and colors)
- Googly eyes (optional)
- Pipe cleaners (green)
- Scissors
- Glue
How to Make It:
- Cut off the toe portion of the sock.
- Turn the sock inside out and stuff it with cotton balls or fabric scraps to create a round shape.
- Tie a piece of yarn or string around the closed end of the sock to secure the stuffing.
- Decorate the front of the sock puppet flower with buttons for eyes and a mouth. You can also add googly eyes if you like.
- Cut a pipe cleaner in half and glue one end to the bottom of the sock puppet flower. This will be the stem.
- Repeat steps 1-5 to create a bouquet of sock puppet flowers in different colors and patterns.
#14 Confetti Cookies
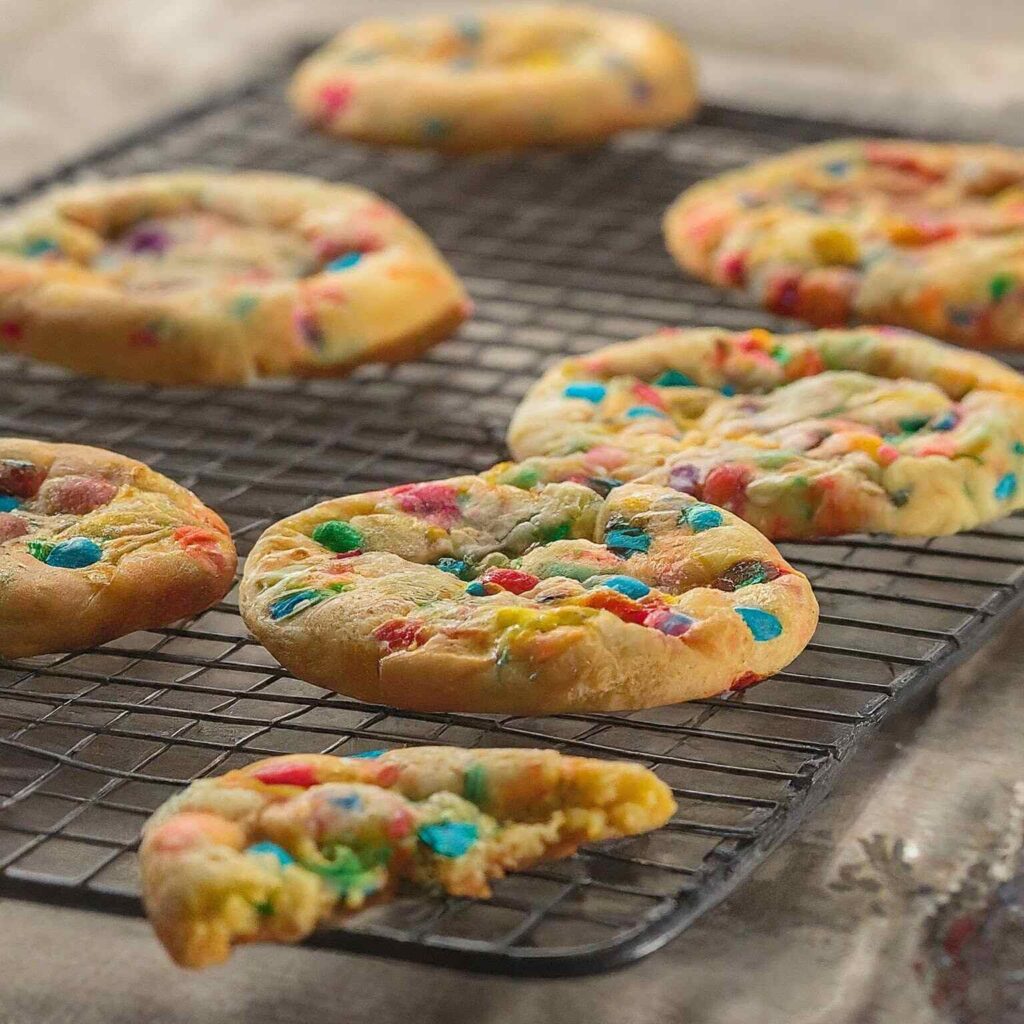
Make Mom a sweet treat with a colorful surprise inside.
Items you’ll need:
- Sugar cookie dough (homemade or store-bought)
- Sprinkles (various colors and shapes)
- Rolling pin
- Cookie cutters (optional)
- Baking sheet
- Parchment paper
How to Make It:
- Preheat your oven according to the cookie dough instructions.
- Roll out the cookie dough on a lightly floured surface.
- Cut out shapes from the dough using cookie cutters, or simply cut squares or circles.
- Sprinkle half of the cookie dough cutouts with your favorite sprinkles.
- Gently press a plain cookie dough cutout on top of the sprinkled cutout, creating a sandwich with the sprinkles in the middle.
- Place the cookie dough sandwiches on a baking sheet lined with parchment paper.
- Bake the cookies according to the package directions or your recipe.
- Let the cookies cool completely before enjoying.
#15 DIY Tissue Paper Flowers
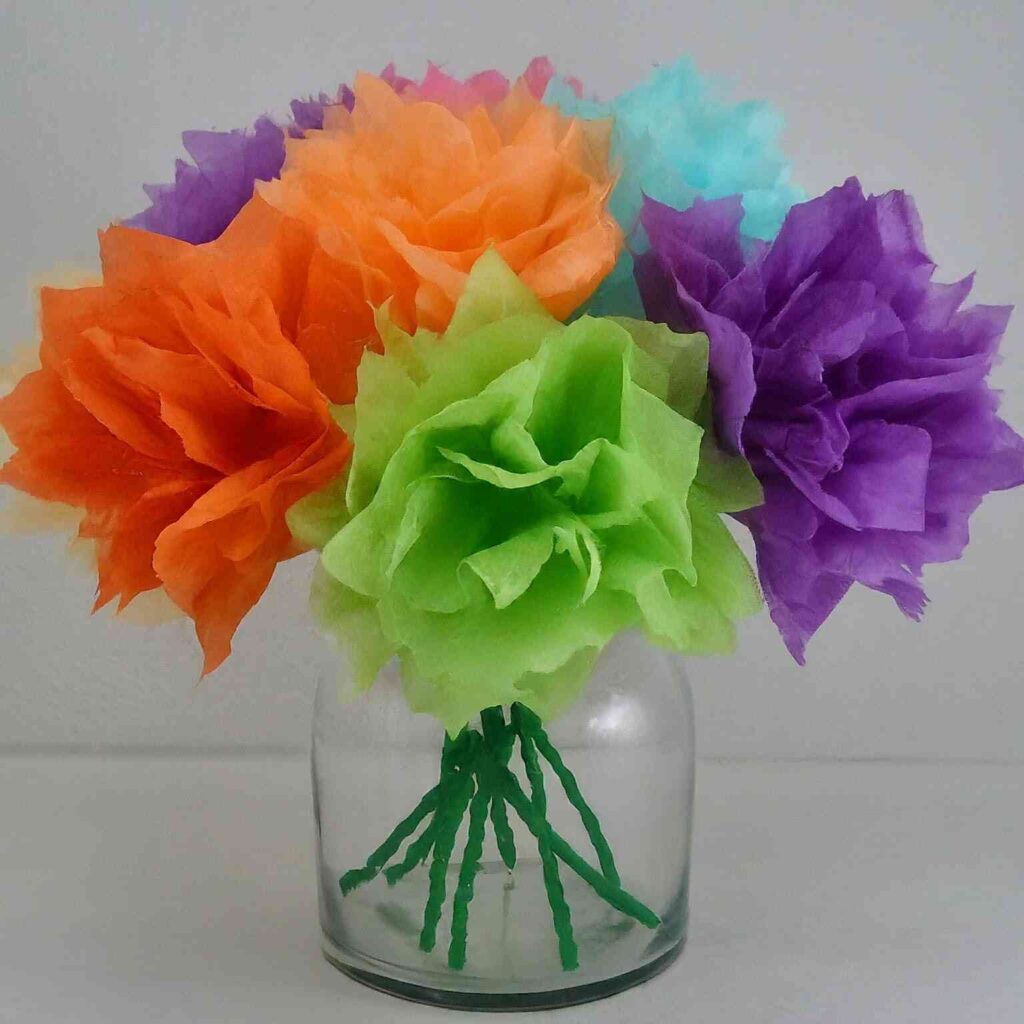
Create a bouquet of beautiful blooms using colorful tissue paper.
Items you’ll need:
- Tissue paper (various colors)
- Pipe cleaners (green)
- Scissors
- Tape
- Ribbon or twine (optional)
How to Make It:
- Cut several squares of tissue paper in different colors. 20-30 squares per flower will work well.
- Stack the squares of tissue paper on top of each other.
- Fold the stacked tissue paper in half like a book, then fold it again in half the other way.
- Pinch the center of the folded tissue paper and secure it tightly with a piece of tape.
- Cut rounded edges on the open ends of the folded tissue paper to create flower petals.
- Gently fan out the layers of tissue paper to create a blooming flower shape.
- Wrap the bottom of the flower with a pipe cleaner and secure it with tape. This will be the stem.
- Repeat steps 1-7 to create a bouquet of tissue paper flowers in different colors.
- You can tie a ribbon or twine around the stems of the flowers for a finishing touch (optional).
#16 Scented Bath Salts
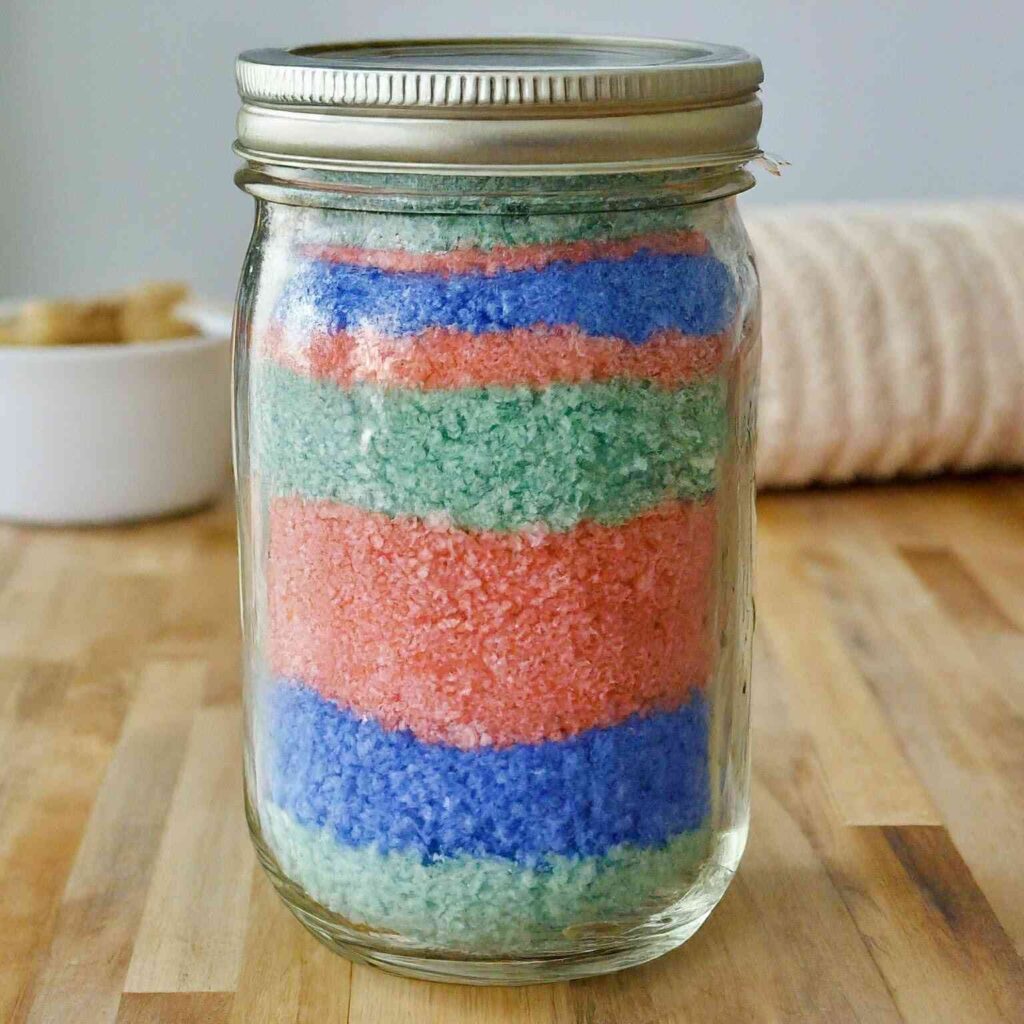
Relax Mom with a homemade spa treatment. (Adult supervision recommended)
Items you’ll need:
- Epsom salts (2 cups)
- Baking soda (1 cup)
- Dried lavender or other fragrant herbs (optional)
- Essential oil (a few drops of a relaxing scent like lavender or chamomile) (optional)
- Food coloring (a few drops, optional)
- Airtight container
How to Make It:
(Note: Adult supervision is recommended for this craft)
- In a large bowl, mix together the Epsom salts and baking soda.
- Add dried lavender or other fragrant herbs (optional) and a few drops of essential oil (optional) if using.
- Add a few drops of food coloring (optional) to create a light pastel color. Mix well until the color is evenly distributed.
- Let the mixture air dry for a few hours, stirring occasionally.
- Once dry, store the scented bath salts in an airtight container.
#17 Mom’s Coupon Book of Love
Can’t afford a store-bought gift? No problem. Create a “Coupon Book of Love” filled with coupons for chores Mom hates (like washing dishes or taking out the trash). Mom can redeem these coupons for some well-deserved relaxation.
Items you’ll need:
- Construction paper
- Markers or crayons
- Scissors
- Stapler (optional)
- Ribbon or twine (optional)
How to Make It:
- Fold several pieces of construction paper in half to create small coupon booklets.
- Decorate the front covers of the booklets with drawings or messages for Mom.
- Inside each booklet, write down “coupons” for chores Mom dislikes. Here are some ideas:
- “One Free Dishwashing Break”
- “One Laundry Folding Extravaganza (Done by You.)”
- “Good for One Movie Night (Your Choice.)”
- “Free Back Rub Coupon”
- “One Get-Out-of-Chore-Free Pass”
- You can personalize the coupons with cute drawings or funny messages.
- Staple the folded pieces of construction paper together to create a booklet.
- Tie a ribbon or twine around the booklet for a finishing touch (optional).
#18 Button Bookmark
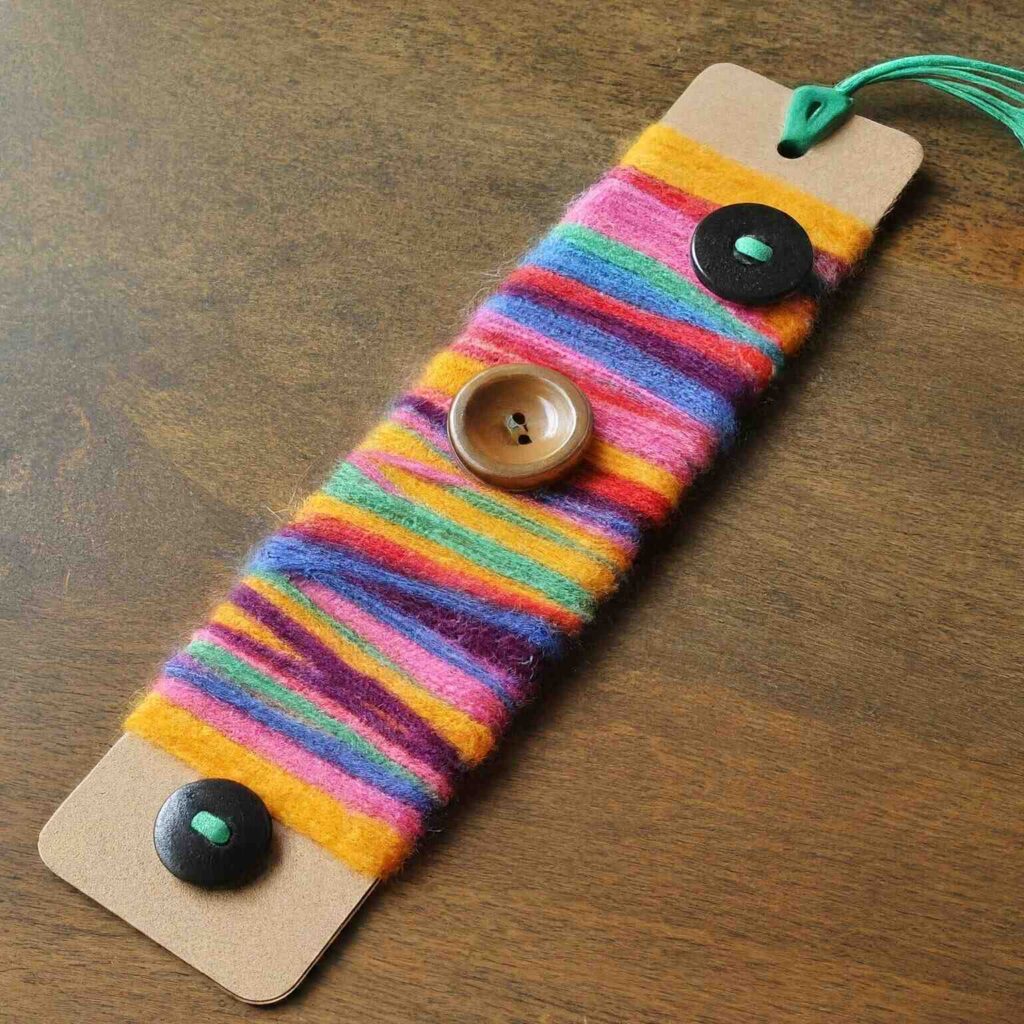
Create a colorful and personalized bookmark for Mom to mark her place in her favorite book.
Items you’ll need:
- Cardboard (cut into small rectangles)
- Yarn (various colors)
- Buttons (various sizes and colors)
- Glue stick
- Scissors (adult supervision recommended)
How to Make It:
- (Adult supervision recommended) Carefully cut out small rectangles from cardboard. These will be the base of your bookmarks.
- Cut yarn into pieces of various lengths.
- Apply glue to the cardboard bookmark and carefully wrap the yarn around it, covering the entire surface. You can use one color of yarn or alternate colors to create a pattern.
- Once the bookmark is completely wrapped in yarn, glue a few buttons onto the front for decoration.
- Let the glue dry completely.
#19 Nature Collage Frame
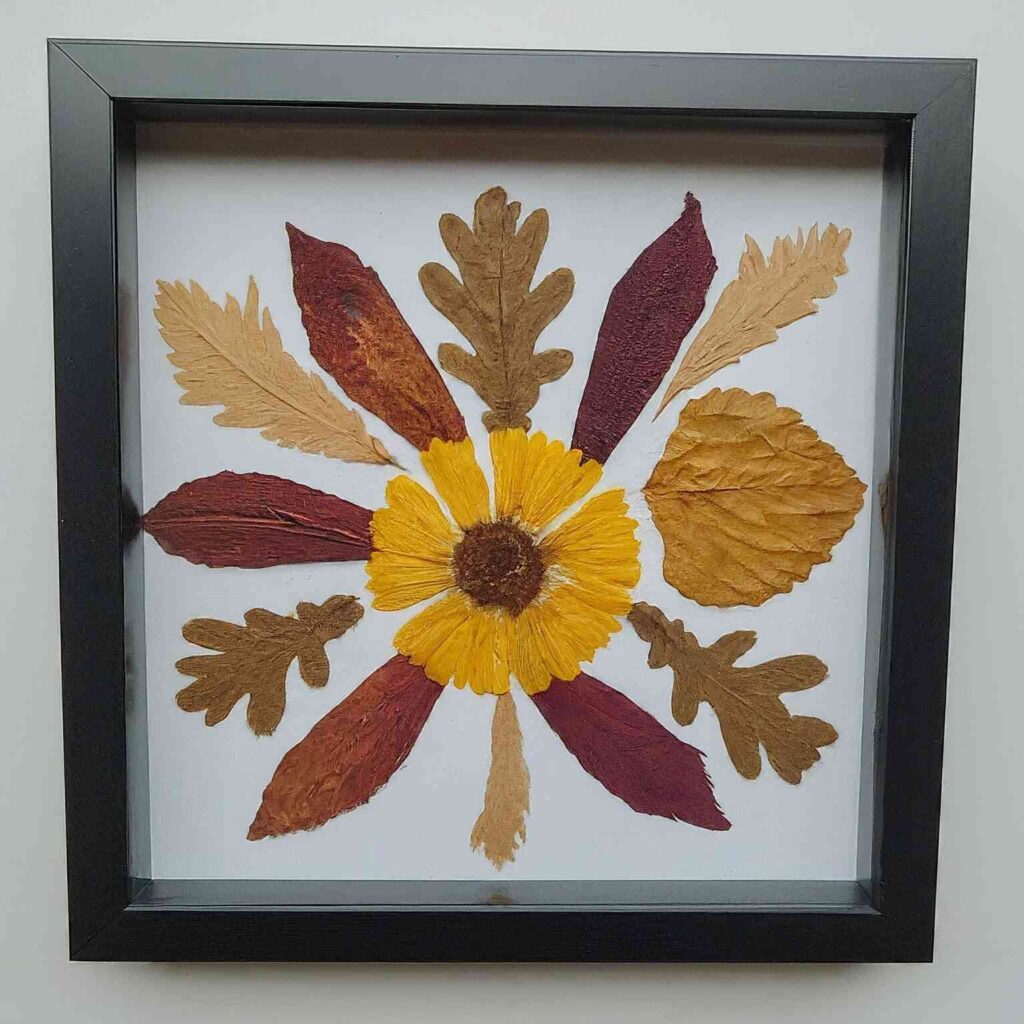
Turn a walk in nature into a beautiful gift for Mom.
Items you’ll need:
- Picture frame (any size or shape)
- Glue stick
- Dried flowers, leaves, and other natural materials (collected on a walk)
- Cardboard (optional, cut to fit the frame)
How to Make It:
- If the picture frame has glass, remove it carefully (adult supervision recommended). You can use cardboard cut to the size of the frame to replace the glass (optional).
- Arrange the dried flowers, leaves, and other natural materials on the inside of the picture frame to create a collage design.
- Once you’re happy with the arrangement, use a glue stick to secure everything in place.
- Let the glue dry completely.
- Put the glass (or cardboard) back into the frame and secure it (adult supervision recommended if using glass).
#20 Grow Mom a garden with a plantable card
Note: This craft is best suited for spring or summer
Items you’ll need:
- Recycled paper (torn into small pieces)
- Blender
- Water
- Wildflower seeds (or other small seeds)
- Cookie cutters (optional)
- Mesh screen (optional)
- Rolling pin
How to Make It:
- Tear the recycled paper into small pieces and place them in a blender.
- Add enough water to the blender to create a pulp consistency. Blend until smooth.
- Pour the paper pulp into a bowl and mix in a few tablespoons of wildflower seeds (or other small seeds).
- If you want to create shaped seed paper cards, use cookie cutters. Dip the mesh screen (optional) into the seed paper pulp and gently press it onto a cookie cutter shape. Lift the screen and place the seed paper shape on a flat surface lined with a paper towel. Repeat with more seed paper pulp and cookie cutters to create multiple cards.
- If you’re not using cookie cutters, simply spread the seed paper pulp onto a flat surface lined with a paper towel. Use a rolling pin to roll out the pulp into a thin sheet.
- Let the seed paper cards air dry completely for a few days.
- Once dry, decorate the seed paper cards with markers or crayons (optional).
- Write a message for Mom on the seed paper card.
- When Mom is ready to plant her seed paper card, she can soak it in water for a few minutes and then plant it in a pot or in her garden.
#21 Painted Rock Photo Holder
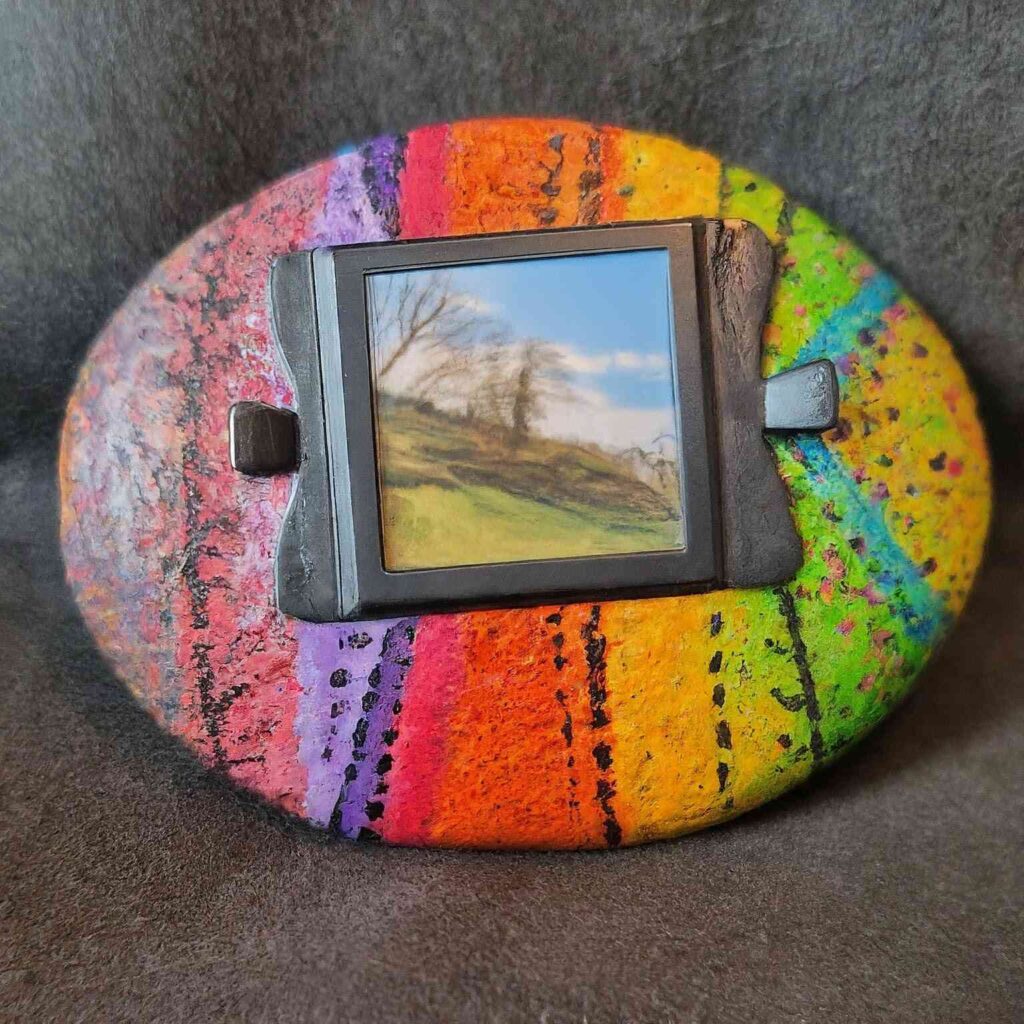
Turn a simple rock into a unique photo holder for Mom’s desk.
Items you’ll need:
- Smooth, flat rocks
- Acrylic paints
- Paintbrushes
- Clear gloss sealant (optional)
- Small photos (optional)
- Glue (optional)
How to Make It:
- Paint your rocks with bright and colorful acrylic paints. You can paint stripes, polka dots, hearts, or anything you like.
- Let the paint dry completely.
- Once dry, you can add a coat of clear gloss sealant (optional) to protect the paint.
- If you want to use the rock photo holder right away, you can prop a small photo against the painted rock.
- You can also glue a small photo holder clip (found at craft stores) onto the back of the painted rock for a more
#22 Handprint Bouquet Card
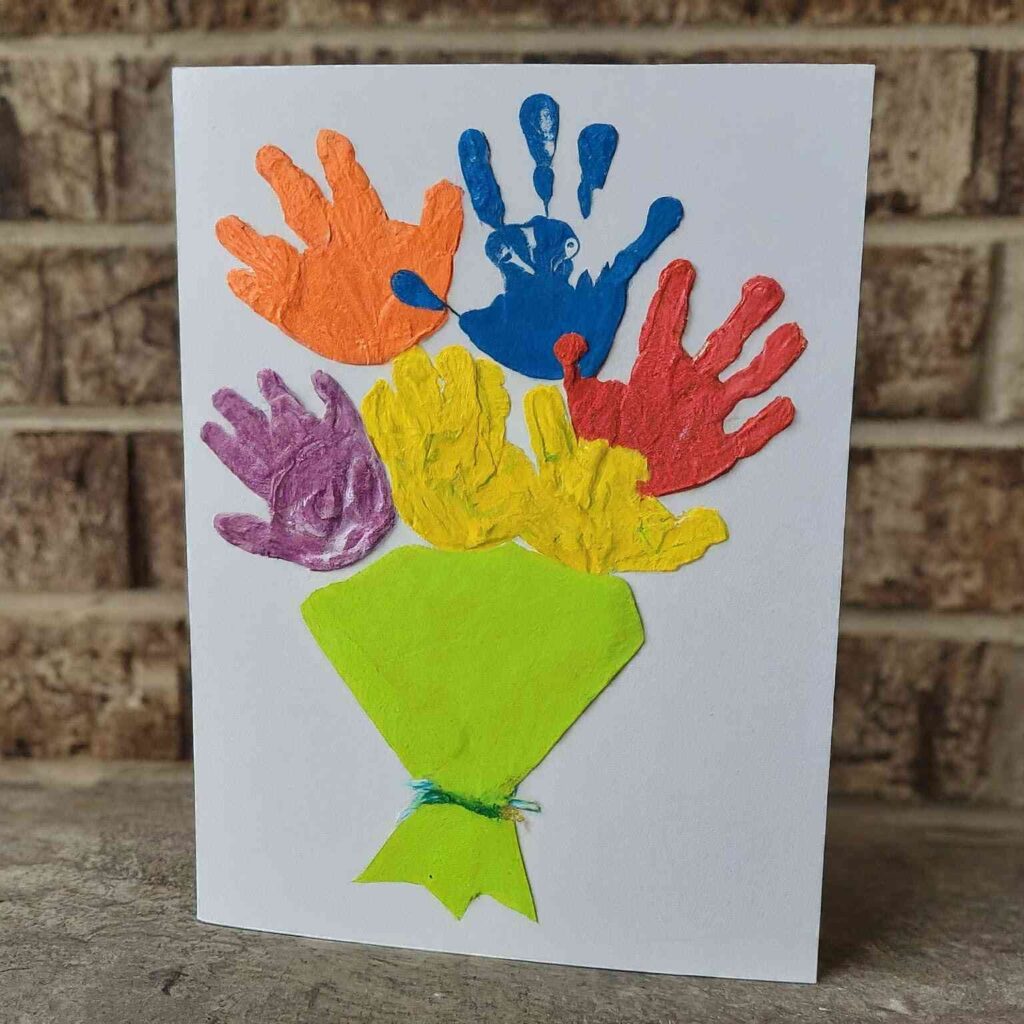
This craft is a sweet and personalized way for Mom to keep a reminder of your little hands forever.
Items you’ll need:
- Construction paper (various colors)
- Paint (various colors)
- Paintbrushes
- Scissors
- Markers or crayons (optional)
How to Make It:
- Fold a piece of construction paper in half to create a card.
- Choose paint colors for the flowers and paint your child’s hand with those colors.
- Gently press your child’s hand onto the front of the card, creating a handprint flower bouquet.
- Once the paint dries, use markers or crayons (optional) to draw stems and leaves for the flowers.
- You can write a message for Mom on the inside of the card.
#23 DIY Cupcake Liner Flowers
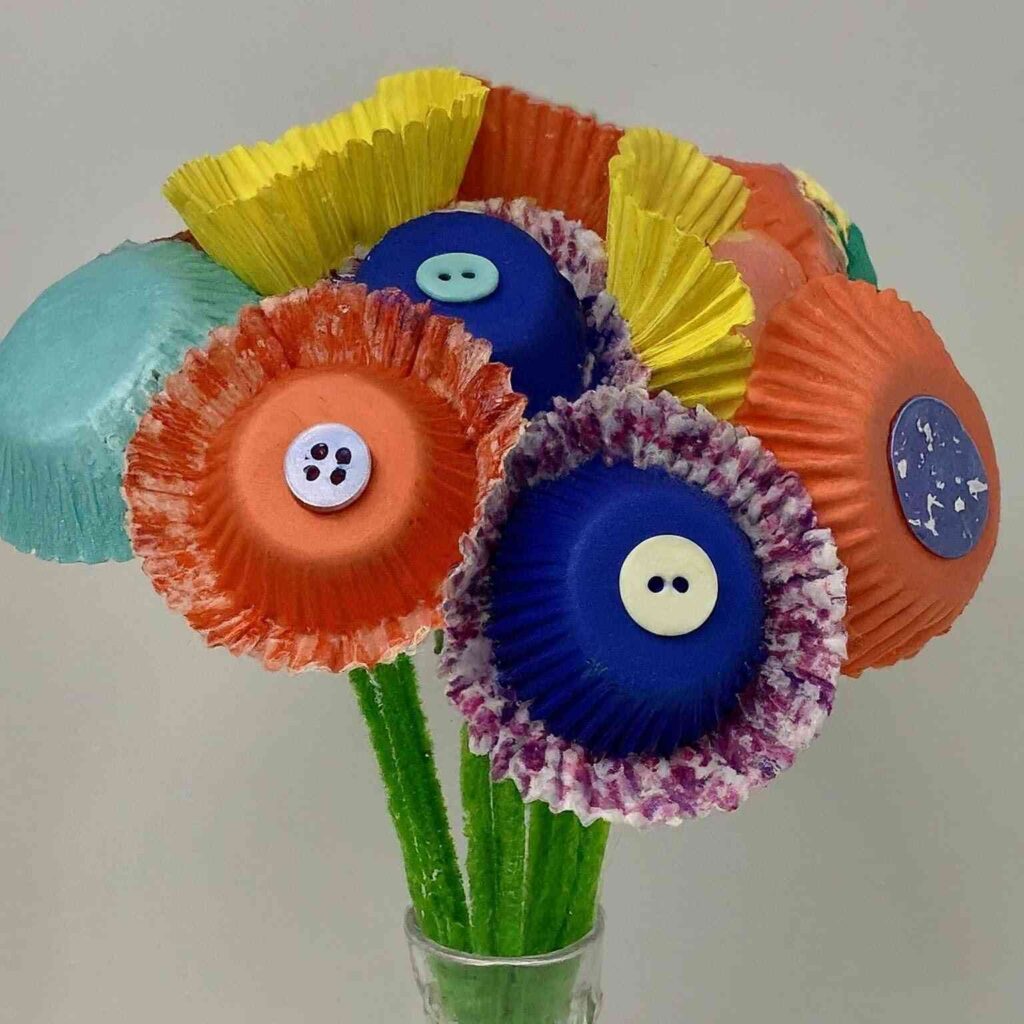
These cheerful flowers are a fun and easy way to add a pop of color to Mom’s home.
Items you’ll need:
- Cupcake liners (various colors and patterns)
- Pipe cleaners (green)
- Buttons (optional)
- Hot glue gun (adult supervision required)
- Scissors (adult supervision recommended)
How to Make It:
(Note: Adult supervision is required for hot glue gun)
- (Adult supervision recommended) Carefully cut apart the cupcake liners at the bottom seam to create flat circles.
- Stack several cupcake liner circles on top of each other (around 5-7 circles work well).
- Pinch the center of the stacked cupcake liners and secure them tightly with a twist tie or pipe cleaner.
- Gently separate the cupcake liner layers to create a flower shape.
- Wrap a pipe cleaner around the bottom of the flower and secure it with tape or hot glue (adult supervision required) to create the stem.
- You can add a button to the center of the flower for decoration (use hot glue for this step, adult supervision required).
- Repeat steps 1-6 to create a bouquet of cupcake liner flowers in different colors and patterns.
#24 Mom’s Coupon Book of Relaxing Activities
Can’t afford a store-bought gift? No problem. Create a “Coupon Book of Relaxing Activities” filled with coupons for things Mom enjoys doing.
Items you’ll need:
- Construction paper
- Markers or crayons
- Scissors
- Stapler (optional)
- Ribbon or twine (optional)
How to Make It:
- Fold several pieces of construction paper in half to create small coupon booklets.
- Decorate the front covers of the booklets with drawings or messages for Mom.
- Inside each booklet, write down “coupons” for relaxing activities Mom enjoys. Here are some ideas:
- “One Free Back Rub”
- “Foot Massage Extravaganza (Done by You.)”
- “Good for One Movie Night (Your Choice.)”
- “Quiet Time Coupon (No Interruptions.)”
- “Help with Chores Coupon”
- You can personalize the coupons with cute drawings or funny messages.
- Staple the folded pieces of construction paper together to create a booklet.
- Tie a ribbon or twine around the booklet for a finishing touch (optional).
#25 Salt Dough Handprint Keepsake
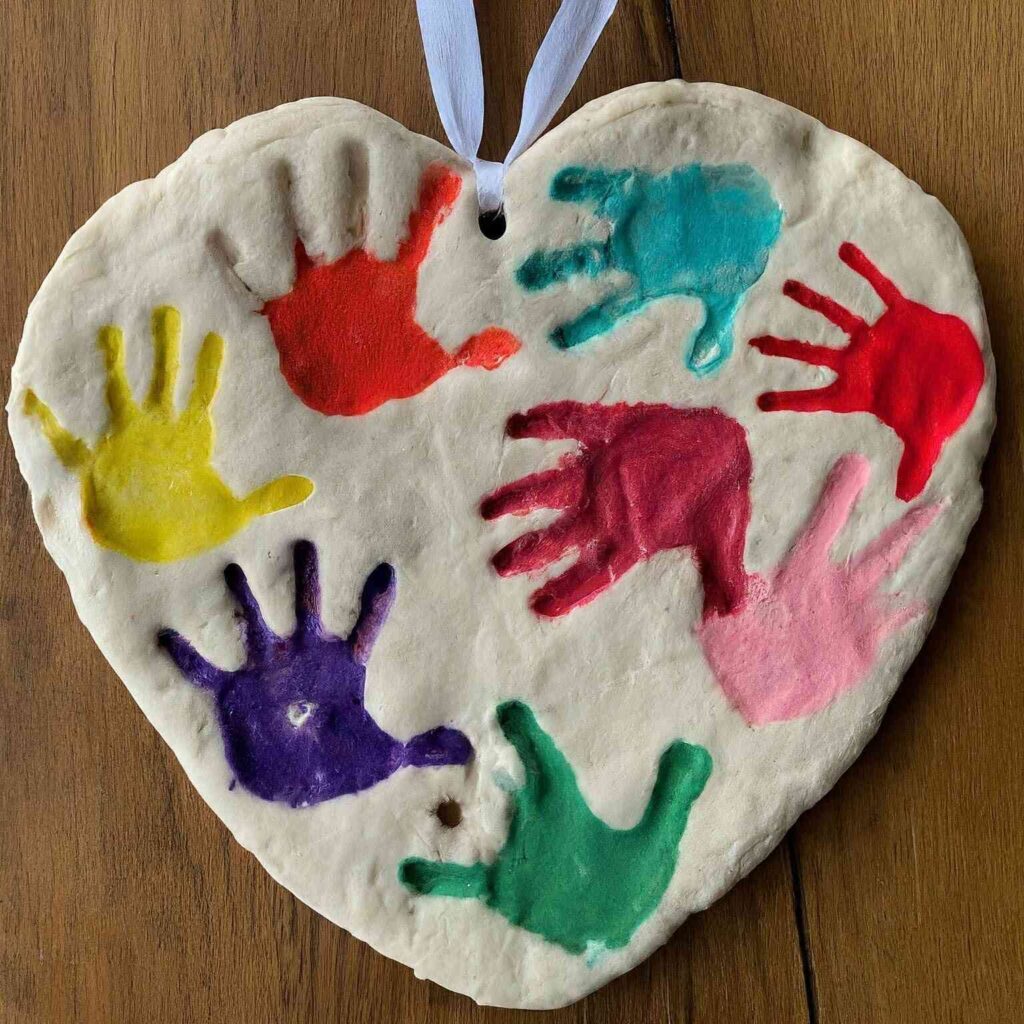
This air-dry clay craft creates a lasting memory of your child’s handprint for Mom to cherish.
Items you’ll need:
- All-purpose flour (1 cup)
- Salt (1/2 cup)
- Warm water (1/2 cup)
- Rolling pin
- Cookie sheet
- Parchment paper
- Acrylic paints (optional)
- Paintbrushes (optional)
- Ribbon or twine (optional)
- Cookie cutter (heart shape, optional)
How to Make It:
- In a large bowl, combine the flour and salt.
- Slowly add the warm water to the dry ingredients and mix until a dough forms. You may need to add a little more water or flour to get the right consistency – the dough should be smooth and pliable, not sticky.
- Knead the dough for a few minutes on a lightly floured surface.
- Roll out the dough on a lightly floured surface to a thickness of about 1/4 inch.
- Gently press your child’s hand onto the dough, making sure to get fingerprints and details. You can use a cookie cutter (like a heart shape) to cut out a specific shape around the handprint (optional).
- Carefully transfer the handprint dough creation to a baking sheet lined with parchment paper.
- If desired, decorate the handprint with acrylic paints and let them dry completely.
- Let the salt dough air dry completely for 24-48 hours. You can flip it over halfway through the drying process.
- Once dry, the salt dough will be hard and lightweight. You can thread a ribbon or twine through a hole at the top (optional) for hanging.
#26 DIY Painted Flower Pots
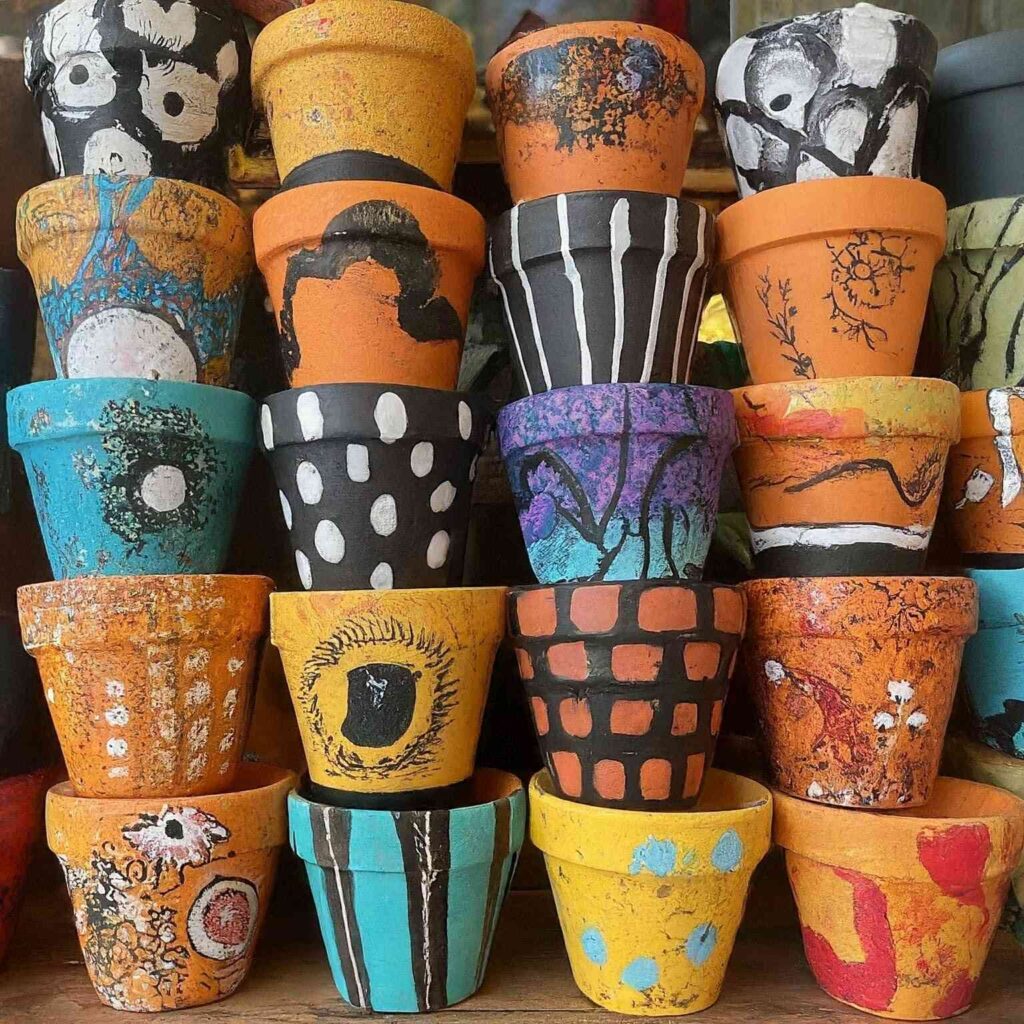
Transform plain terra cotta pots into colorful and personalized planters for Mom’s favorite flowers.
Items you’ll need:
- Terra cotta pots (various sizes)
- Acrylic paints (various colors)
- Paintbrushes
- Markers (optional)
- Stickers (optional)
- Potting soil (optional)
- Small plants (optional)
How to Make It:
- Paint your terra cotta pots with bright and colorful acrylic paints. You can paint stripes, polka dots, designs, or anything you like.
- Let the paint dry completely.
- Once dry, you can add details with markers (optional) or stickers (optional).
- If you want to give Mom a complete gift, fill the painted pots with potting soil and plant small flowers or herbs (optional).
#27 Mom’s Recipe Book of Memories
Create a special recipe book filled with memories and stories instead of ingredients.
Items you’ll need:
- Notebook or blank recipe cards
- Markers or crayons
- Scissors (optional)
- Pictures (optional)
- Ribbon or twine (optional)
How to Make It:
- Decorate the front of the notebook or recipe cards with drawings or messages for Mom.
- Inside each page, write down a special memory you have with Mom. You can also include recipes for dishes that remind you of her or that you enjoy making together.
- You can add pictures (optional) or cut out pictures from magazines that represent the memories or recipes.
- Personalize the pages with funny stories, inside jokes, or anything that reminds you of Mom’s love and care.
- Tie a ribbon or twine around the notebook or recipe cards to create a finished book (optional).
#28 Yarn Wall Hanging with Pom Poms
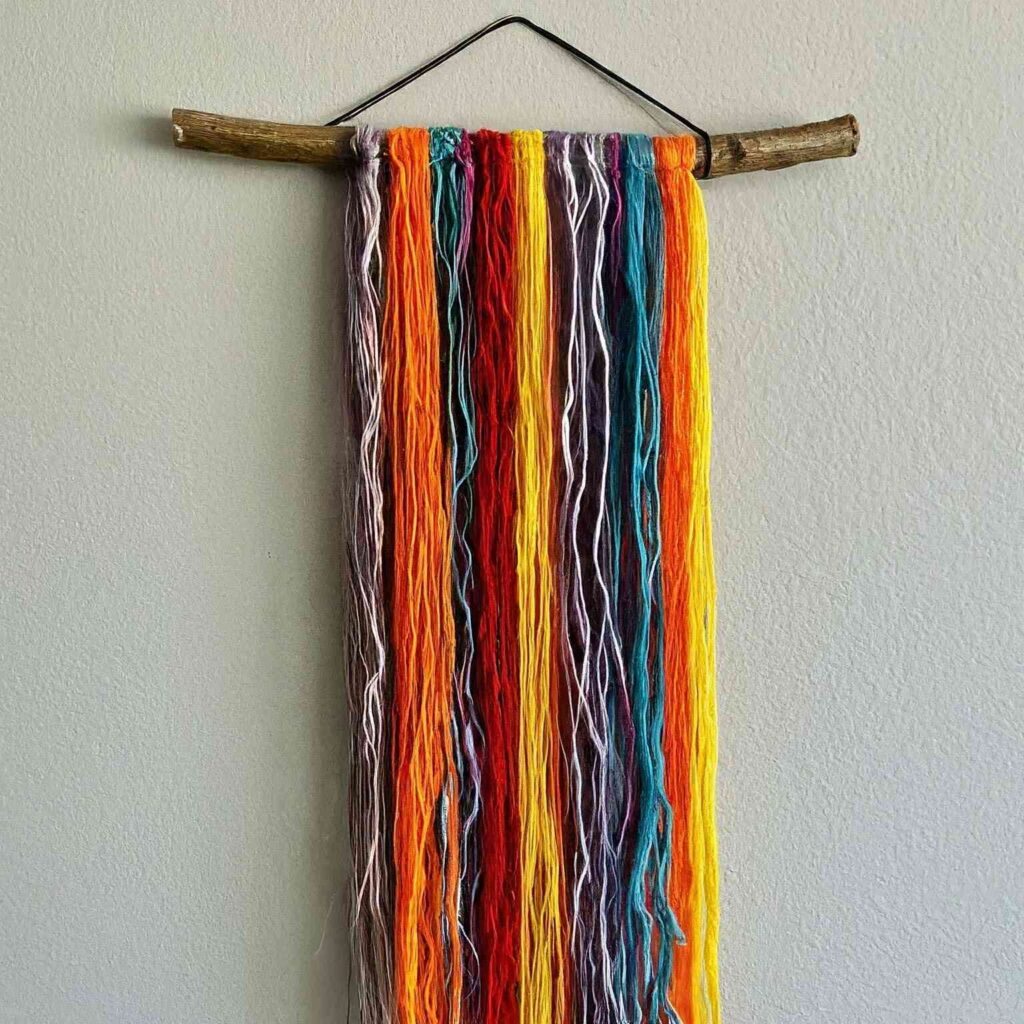
Create a vibrant and textured wall hanging for Mom to decorate her space.
Items you’ll need:
- Cardboard (cut into a rectangular shape)
- Yarn (various colors)
- Scissors
- Ruler (optional)
How to Make It:
- Cut a rectangular piece of cardboard to be the base of your wall hanging. You can choose any size you like.
- Wrap yarn tightly around the cardboard, leaving space at the top for a hanging loop. You can use a single color of yarn or alternate colors to create stripes or patterns.
- Once the cardboard is completely wrapped in yarn, carefully cut the yarn loops along one long edge (use scissors).
- (Optional) You can use a ruler to measure and ensure the cut yarn loops are all similar lengths.
- Tie a loop of yarn at the top of the cardboard for hanging.
#29 Tissue Paper Stained Glass Art
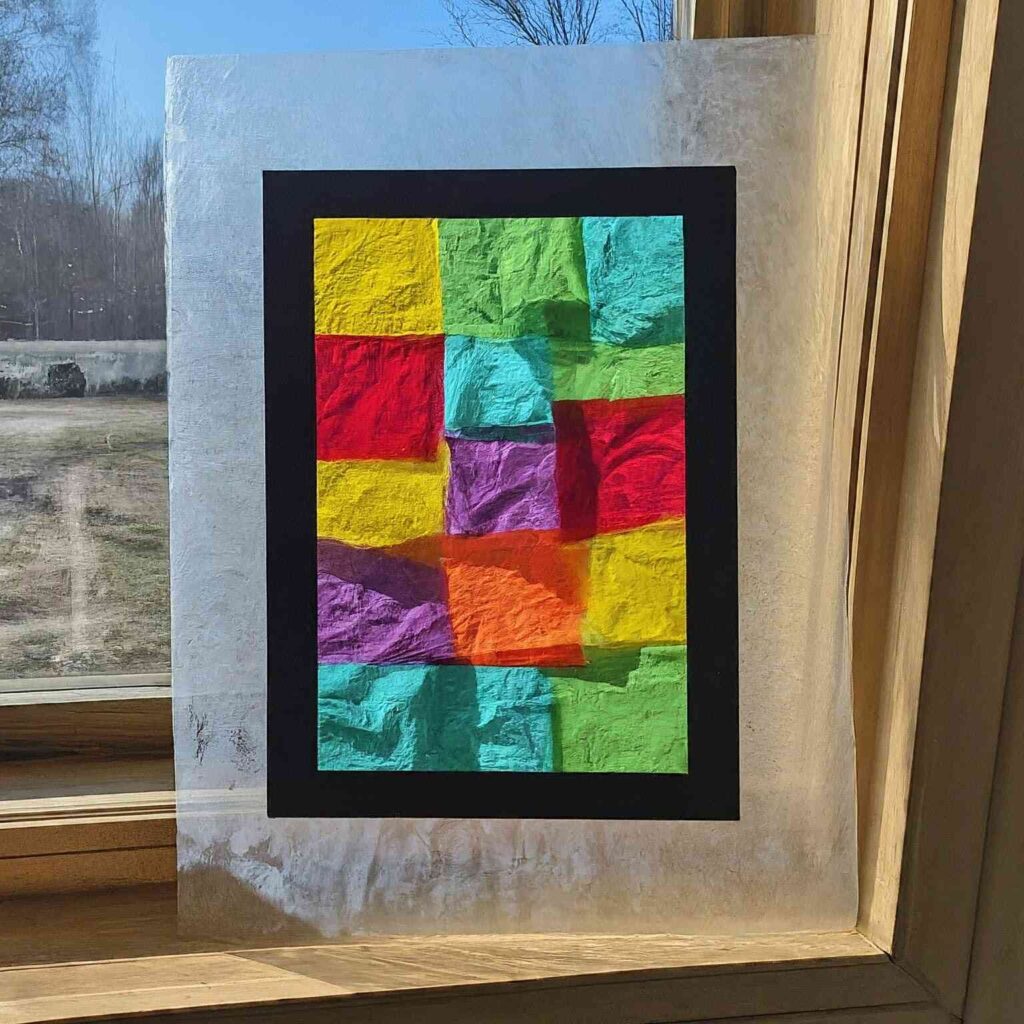
Transform plain contact paper into a beautiful and colorful stained glass art piece for Mom’s window.
Items you’ll need:
- Contact paper (clear)
- Tissue paper (various colors)
- Scissors
- Black construction paper (optional)
How to Make It:
- Cut a piece of clear contact paper to the desired size for your stained glass art.
- Cut squares or other shapes from colorful tissue paper.
- Carefully peel the backing off the contact paper and arrange the tissue paper pieces on the sticky side, creating a stained glass design.
- Once you’re happy with the design, press another piece of clear contact paper on top to secure the tissue paper pieces.
- (Optional) Cut out shapes from black construction paper to create outlines for the stained glass design and stick them onto the outside of the contact paper.
- Trim off any excess contact paper around the edges.
#30 DIY Button Coasters
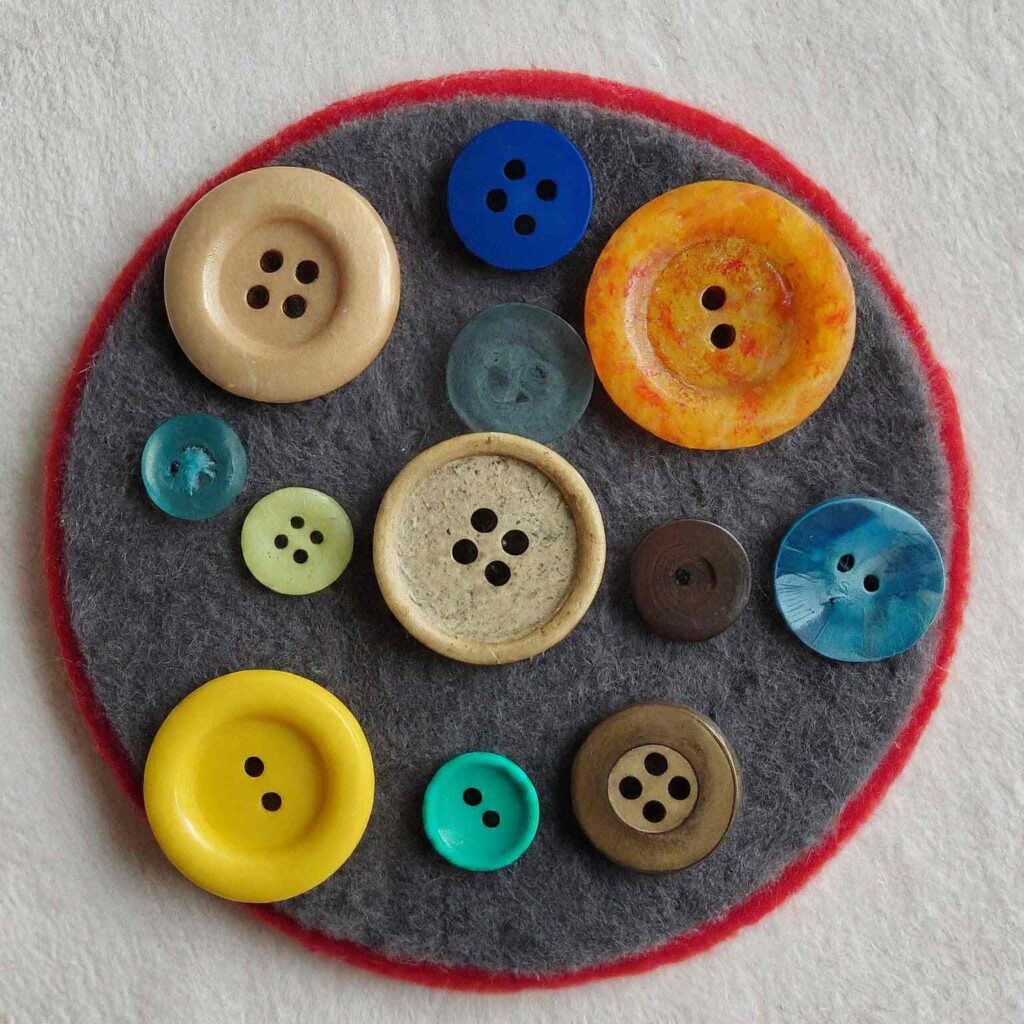
Create unique and practical coasters for Mom to protect her furniture.
Items you’ll need:
- Cardboard circles (cut out or use drink coasters)
- Felt circles (slightly larger than the cardboard circles)
- Buttons (various sizes and colors)
- Glue gun (adult supervision required)
How to Make It
(Note: Adult supervision required for hot glue gun)
- Cut out cardboard circles or use pre-cut drink coasters as the base for your button coasters.
- Cut felt circles slightly larger than the cardboard circles.
- Use a hot glue gun (with adult supervision) to adhere the felt circles to the cardboard circles, covering the entire cardboard surface.
- Get creative and arrange your buttons on the felt surface. You can create patterns, designs, or simply glue buttons randomly.
- Once you’re happy with the design, use the hot glue gun (with adult supervision) to securely glue the buttons onto the felt.
#31 Nature Mobile
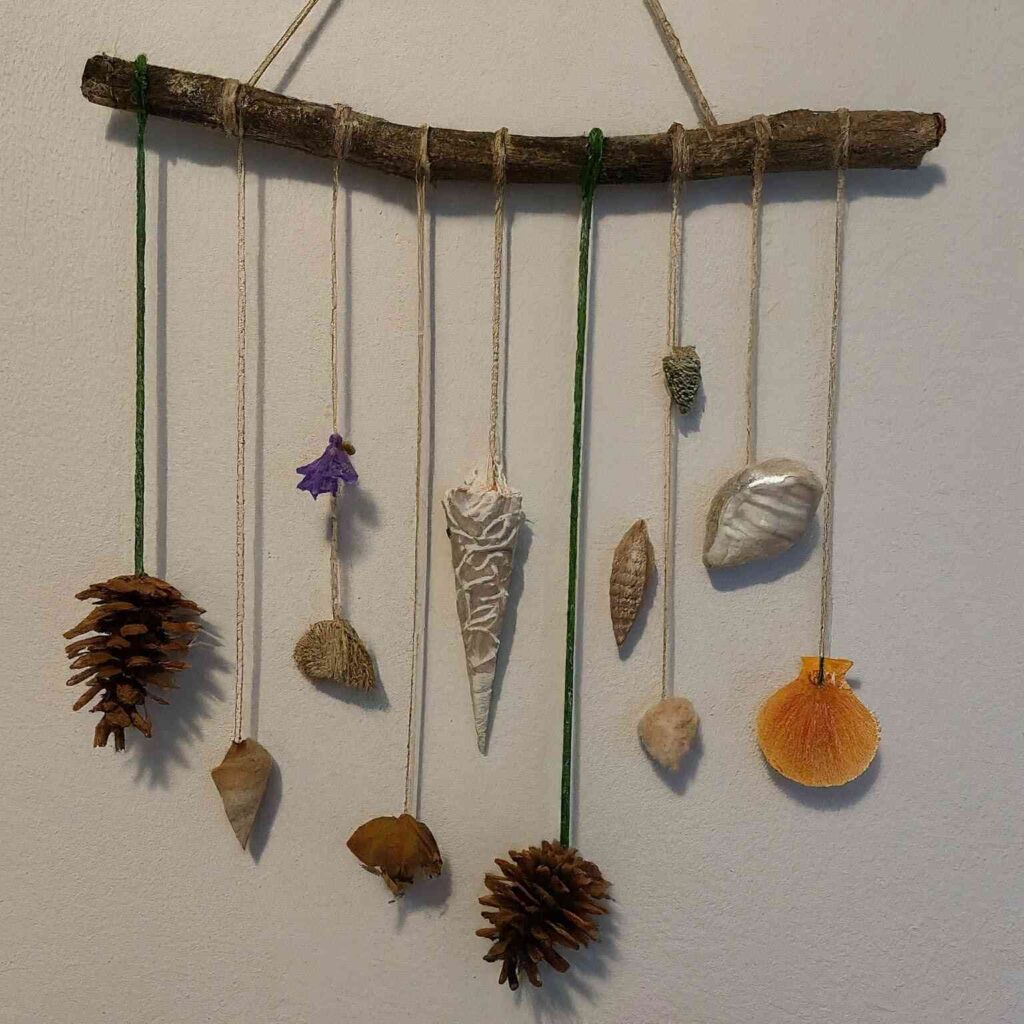
Create a calming and beautiful mobile for Mom to decorate her home with natural elements.
Items you’ll need:
- Branch (driftwood or sturdy stick)
- Yarn or string
- Scissors
- Shells, pinecones, dried flowers, or other natural materials
How to Make It:
- Cut several pieces of yarn or string in varying lengths.
- Tie one end of each piece of yarn or string to a different natural material (shell, pinecone, dried flower, etc.).
- Tie the other ends of the yarn or string to different spots along the branch, creating a balanced mobile design.
- Hang the mobile from the ceiling or a hook for Mom to enjoy.
#32 Painted Pebble Magnets
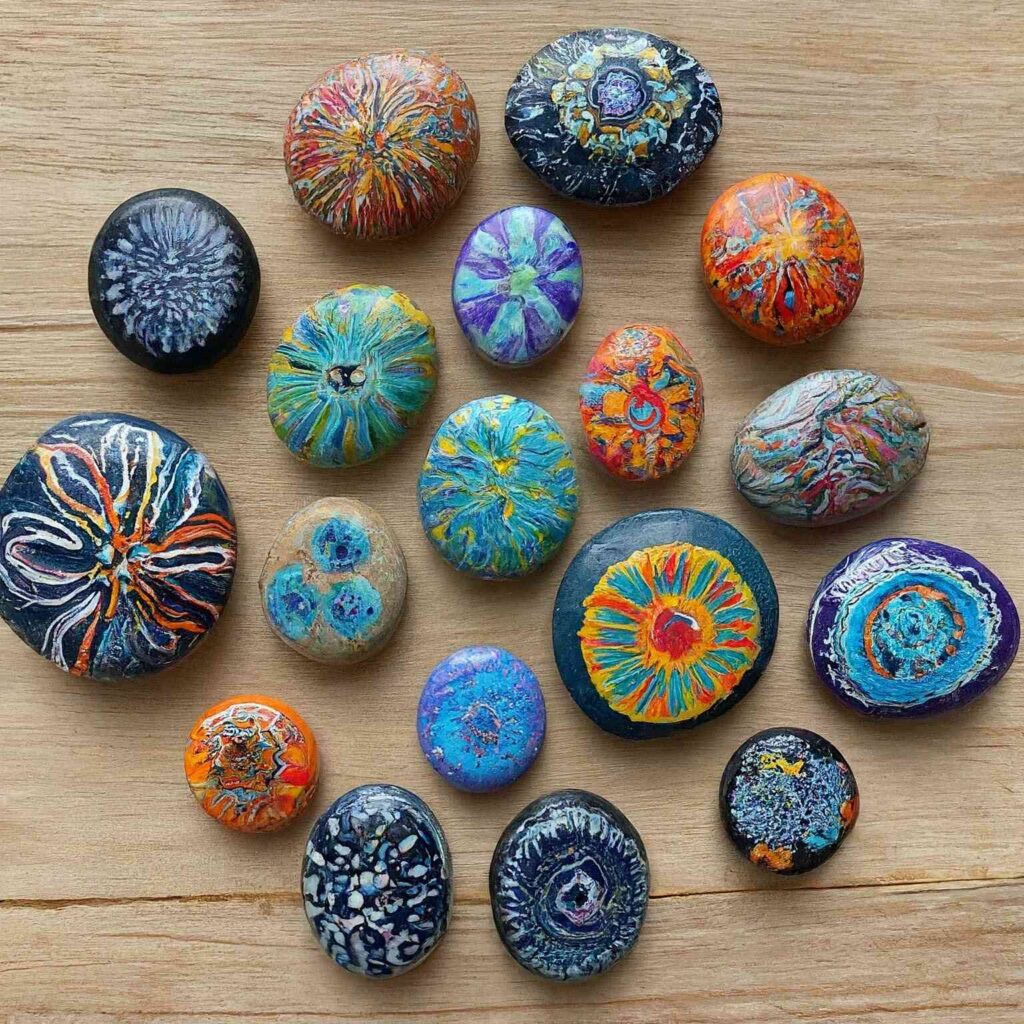
Turn smooth pebbles into colorful and functional refrigerator magnets for Mom.
Items you’ll need:
- Smooth pebbles (washed and dried)
- Acrylic paints (various colors)
- Paintbrushes
- Clear gloss sealant (optional)
- Small craft magnets (adhesive or glue-on)
How to Make It:
- Paint your pebbles with bright and colorful acrylic paints. You can paint stripes, polka dots, designs, or anything you like.
- Let the paint dry completely.
- Once dry, you can add a coat of clear gloss sealant (optional) to protect the paint.
- Attach small craft magnets (adhesive or glue-on) to the back of the painted pebbles.
#33 DIY Bath Bombs with Essential Oils
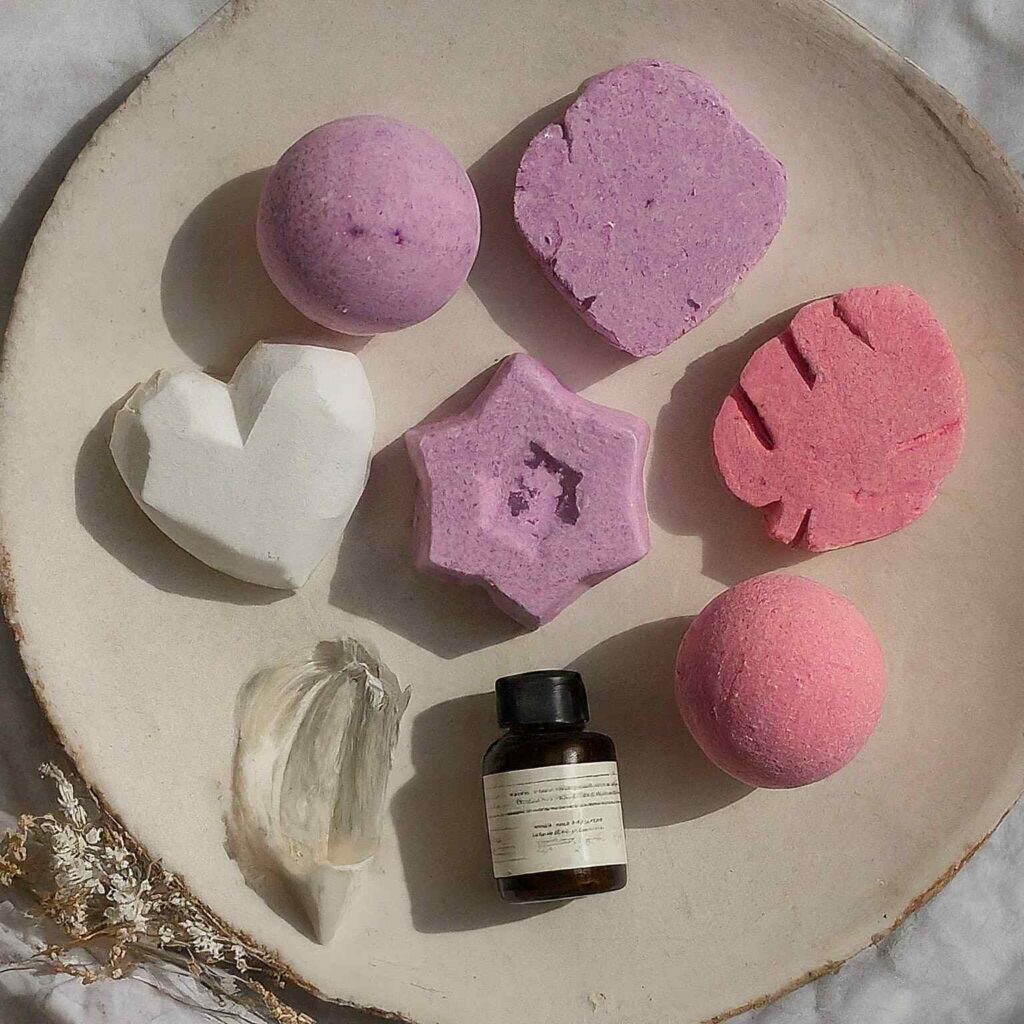
Create relaxing and fizzy bath bombs for Mom to enjoy a spa-like experience at home (Note: Adult supervision recommended for essential oils)
Items you’ll need:
- Baking soda (1 cup)
- Citric acid (1/2 cup)
- Epsom salts (1/2 cup)
- Cornstarch (1/4 cup)
- Carrier oil (like coconut oil or almond oil) (1 tablespoon)
- Essential oil (a few drops of a relaxing scent like lavender or chamomile) (optional)
- Water (in a spray bottle)
- Silicone molds (various shapes)
How to Make It:
(Note: Adult supervision recommended for essential oils)
- In a large bowl, whisk together the baking soda, citric acid, Epsom salts, and cornstarch.
- Add the carrier oil and essential oil (optional) to the dry ingredients and mix well.
- Slowly mist the mixture with water from a spray bottle, a little at a time, and mix until the consistency resembles wet sand. Be careful not to add too much water.
- Once the mixture is moldable, pack it firmly into silicone molds.
- Let the bath bombs dry completely in the molds for several hours or overnight.
- Once dry, carefully remove the bath bombs from the molds.
#34 Pressed Flower Coasters
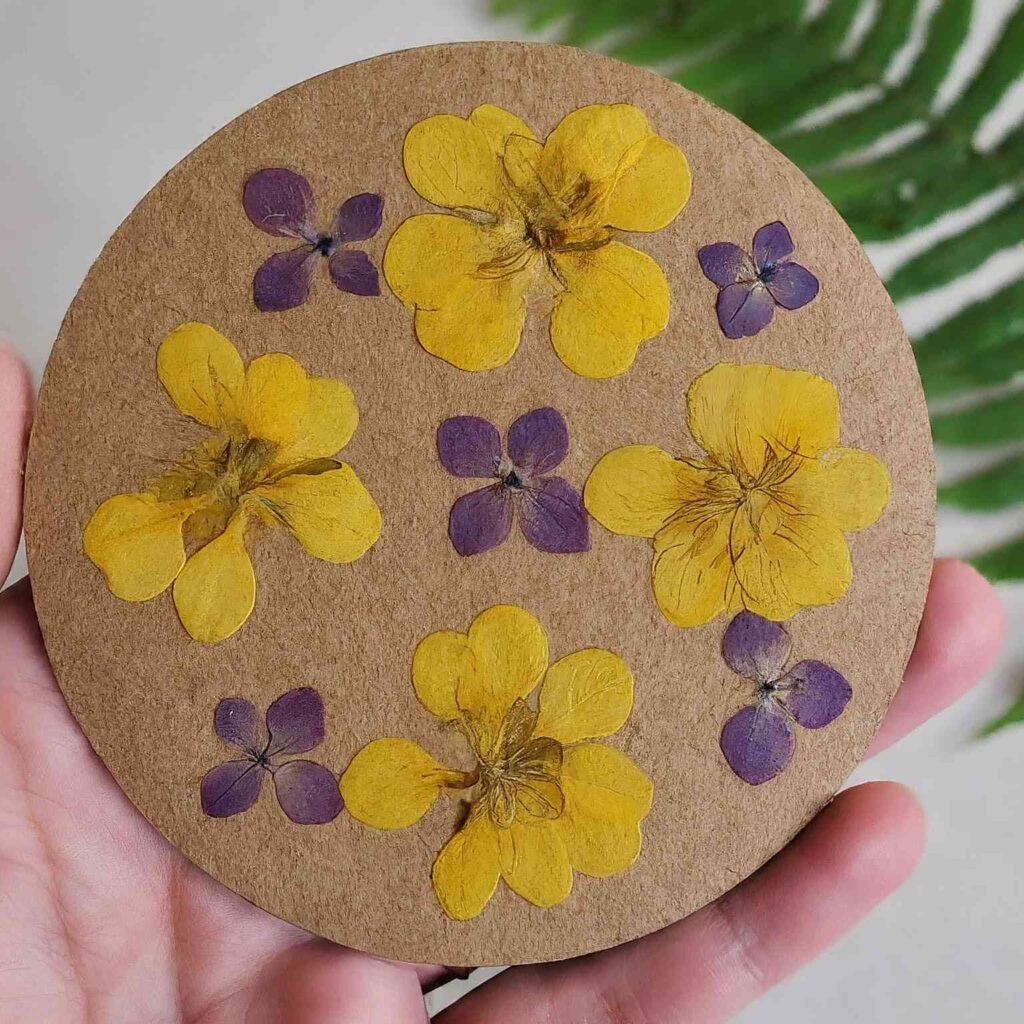
Create beautiful and natural coasters for Mom to protect her furniture.
Items you’ll need:
- Cardboard circles (cut out or use drink coasters)
- Parchment paper
- Iron (optional)
- Clear gloss sealant (optional)
- Felt circles (optional, slightly larger than the cardboard circles)
How to Make It:
- Collect a variety of colorful pressed flowers.
- Cut out cardboard circles or use pre-cut drink coasters as the base for your coasters.
- Arrange the pressed flowers on the cardboard circles in a pleasing design.
- (Optional) If you want to preserve the flowers further, place a sheet of parchment paper over them and iron gently on low heat for a few seconds.
- (Optional) Cut felt circles slightly larger than the cardboard circles and glue them to the back of the coasters to cover the cardboard surface and create a smooth finish.
- Apply a coat of clear gloss sealant (optional) to protect the flowers and design.
#35 DIY Scented Bath Salts with Herbs

Create relaxing and fragrant bath salts for Mom to enjoy a spa-like experience at home.
Items you’ll need:
- Epsom salts (2 cups)
- Dried lavender or other fragrant herbs (optional)
- Food coloring (a few drops, optional)
- Airtight container
How to Make It:
- In a large bowl, combine the Epsom salts.
- If you’d like to add some extra fragrance, gently fold in dried lavender or other fragrant herbs of your choice.
- (Optional) Add a few drops of food coloring to create beautiful pastel-colored bath salts.
- Mix everything well until evenly distributed.
- Transfer the bath salts to an airtight container. This will help them retain their fragrance and freshness.
#36 Confetti Soap Bars
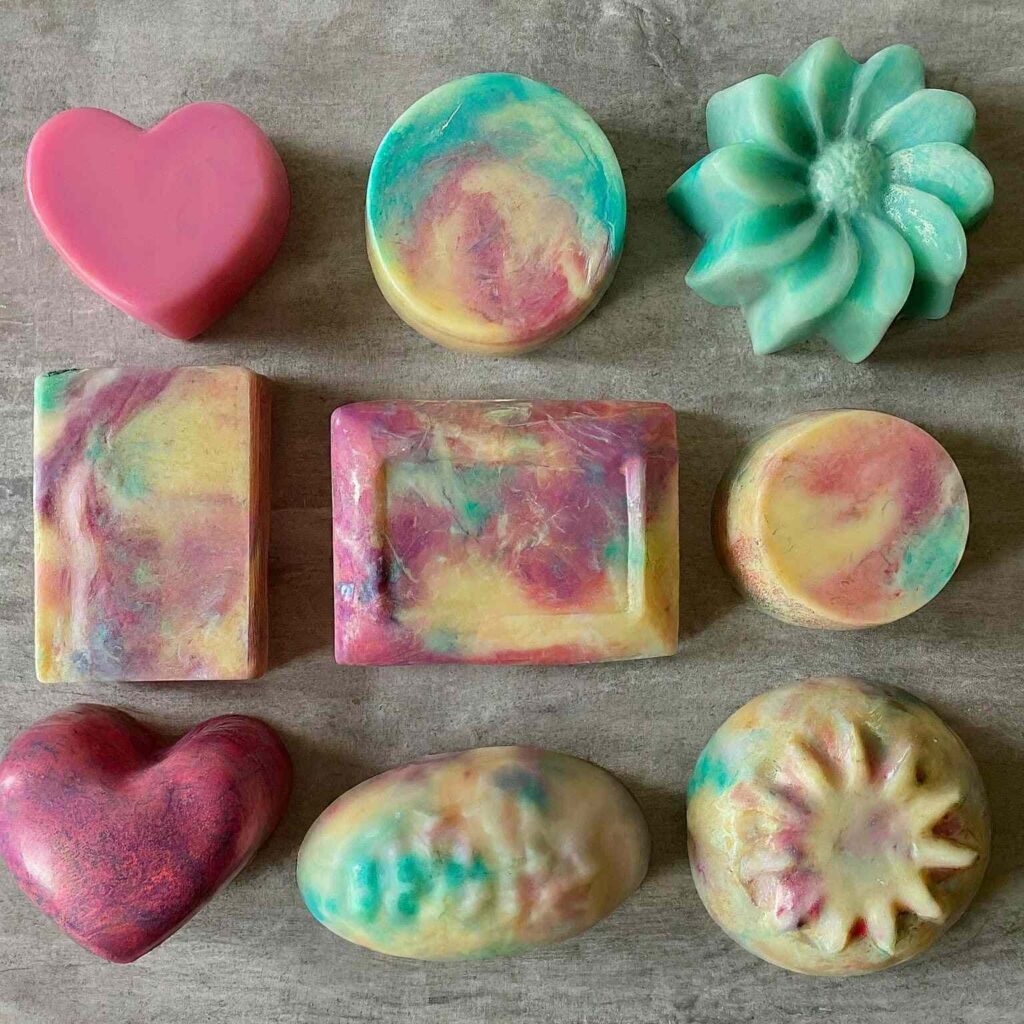
Create colorful and festive soap bars for Mom to add a touch of fun to her bath routine.
Items you’ll need:
- Melt and pour soap base (clear or white)
- Soap molds (various shapes)
- Mica powder (various colors)
- Spray bottle with rubbing alcohol (optional)
How to Make It:
(Note: Adult supervision recommended when handling hot soap)
- Following the manufacturer’s instructions, carefully melt the soap base using a double boiler or microwave (adult supervision recommended).
- While the soap base is melting, prepare your soap molds. You can lightly mist the molds with rubbing alcohol (optional) to help prevent air bubbles.
- Once melted, remove the soap base from heat and divide it into separate containers if you want to create multicolored soap bars.
- Add a small amount of mica powder to each container of melted soap and stir well to disperse the color evenly.
- Carefully pour the colored soap base into the prepared molds. If creating layered soap bars, allow each layer to cool slightly before pouring the next color.
- Let the soap bars cool completely in the molds for several hours or overnight.
- Once hardened, gently remove the soap bars from the molds.
#37 DIY Seed Bombs with Wildflowers
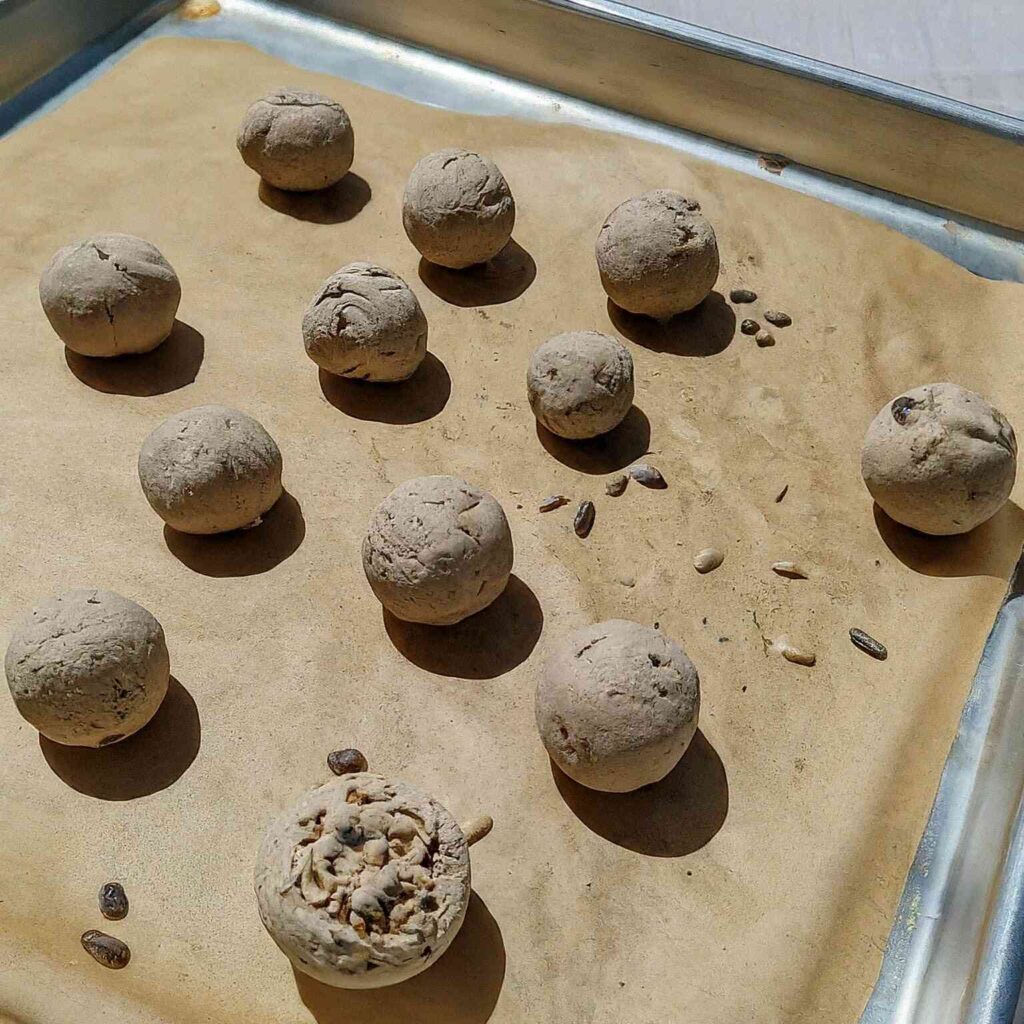
Create beautiful and eco-friendly seed bombs that Mom can plant to grow wildflowers. (Note: This craft is best suited for spring or summer)
Items you’ll need:
- Clay powder (air-dry clay)
- Wildflower seeds (or other small seeds)
- Water
- Bowl
- Spoon or gloves (optional)
How to Make It:
- In a bowl, mix the clay powder with water according to the manufacturer’s instructions to create a moldable consistency. You can use a spoon or wear gloves (optional) for mixing.
- Once the clay mixture is ready, add a small amount of wildflower seeds (or other small seeds) and mix them in gently.
- Roll the clay mixture into small balls, about the size of marbles.
- Place the seed bombs on a baking sheet lined with parchment paper and let them air dry completely for a day or two.
- Once dry, the seed bombs are ready to be planted. Mom can plant them in a pot or directly in her garden.
#38 Painted Flower Pot Portrait
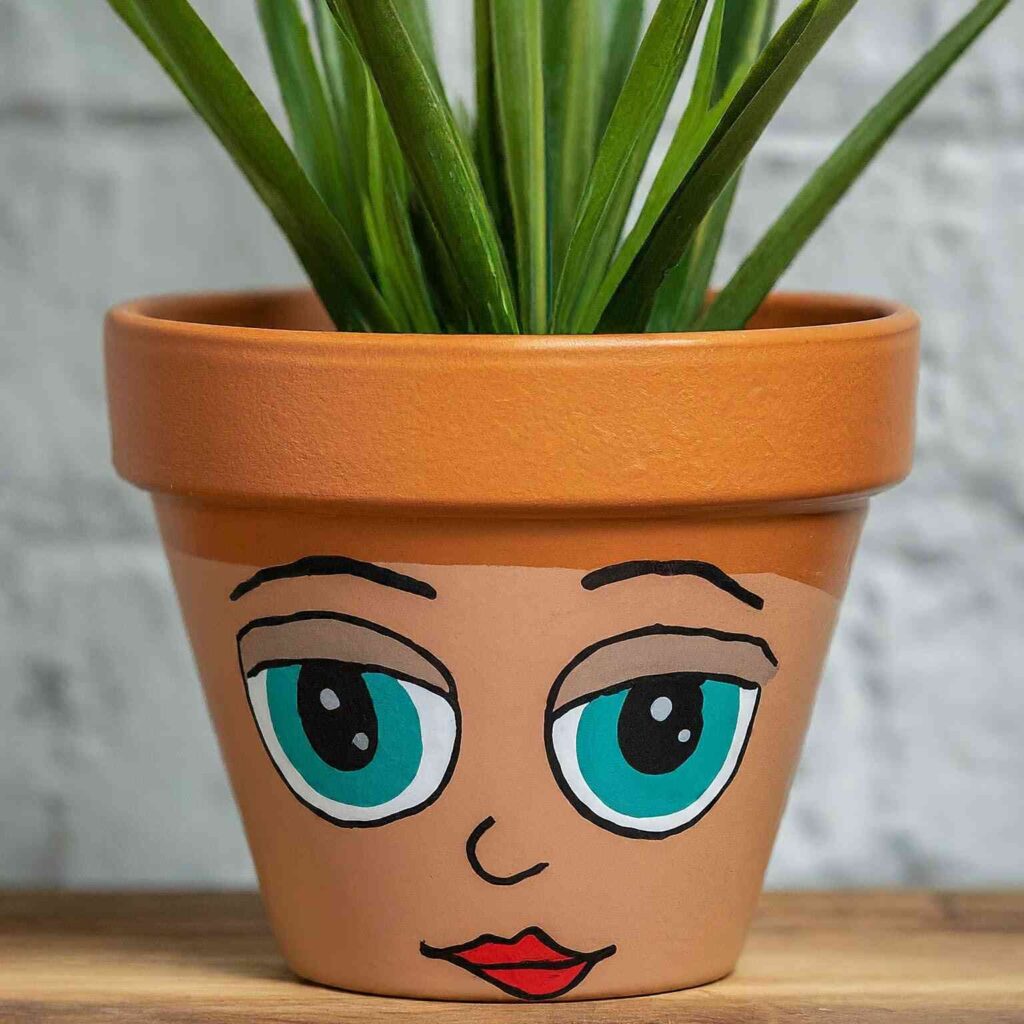
Transform a plain terracotta pot into a personalized portrait for Mom to cherish.
Items you’ll need:
- Terra cotta pot (any size)
- Acrylic paints (various colors)
- Paintbrushes
- Markers (optional)
How to Make It:
- Paint the terra cotta pot with a base coat of skin-tone colored acrylic paint.
- Let the base coat dry completely.
- Once dry, use other paint colors to create facial features like eyes, nose, and a mouth. You can also add details like hair or glasses.
- Get creative and personalize the portrait. You can add flowers, hearts, or other designs around the face.
- Use markers (optional) to add details or outlines to the facial features.
#39 Paper Bag Puppet Show
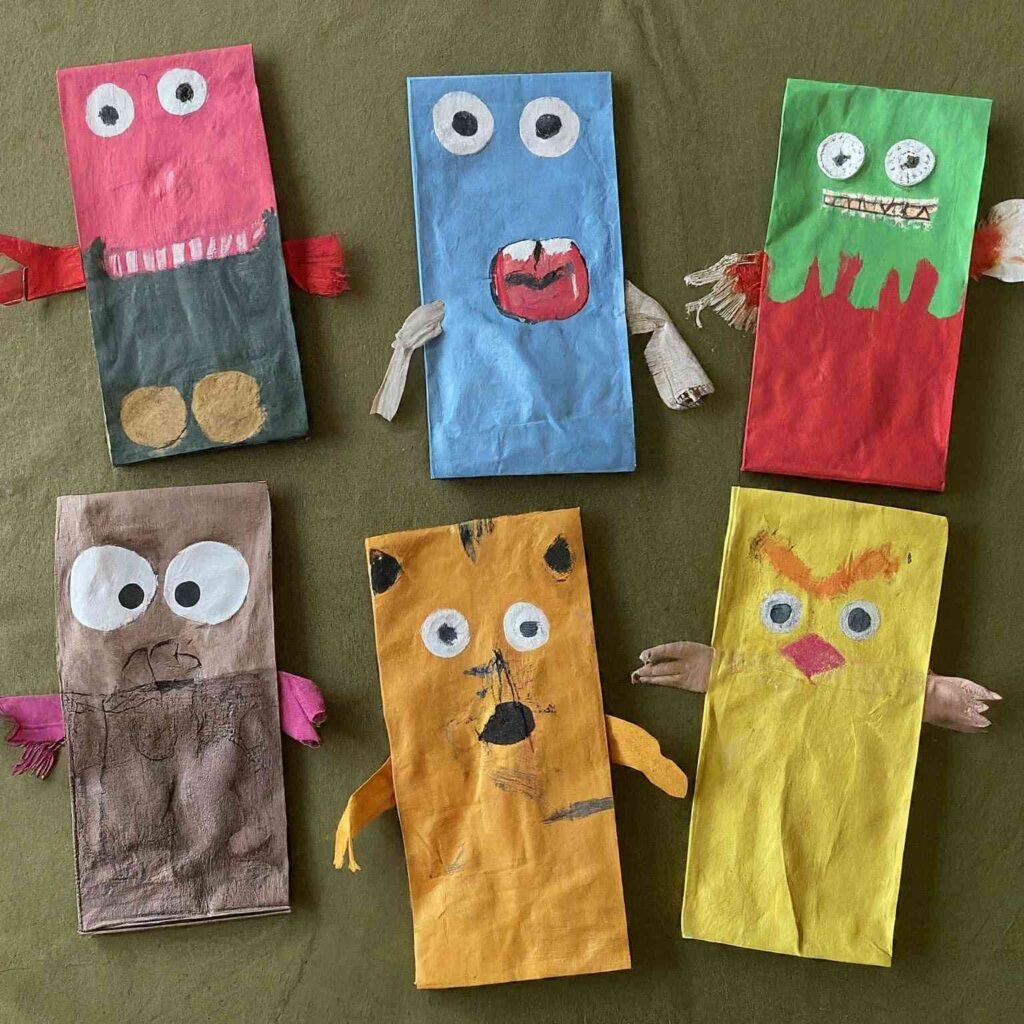
Put on a fun and entertaining puppet show for Mom starring her favorite characters.
Items you’ll need:
- Paper bags (various sizes)
- Markers, crayons, or paint
- Scissors
- Construction paper (optional)
- Yarn or string (optional)
- Popsicle sticks or craft sticks (optional)
How to Make It:
- Decorate the paper bags with markers, crayons, or paint to create your favorite characters (animals, superheroes, family members, etc.). You can draw facial features, clothes, and any other details.
- (Optional) Cut out additional shapes from construction paper to add details to your puppets, like hair, hats, or accessories. Glue them onto the paper bags.
- If you want finger puppets, simply leave the paper bags intact.
- If you want hand puppets, cut hand holes at the bottom of the paper bags.
- (Optional) To create stick puppets, attach yarn or string to the top of the paper bag and tie it to a popsicle stick or craft stick.
#40 DIY Cupcake Liner Flowers in a Teacup
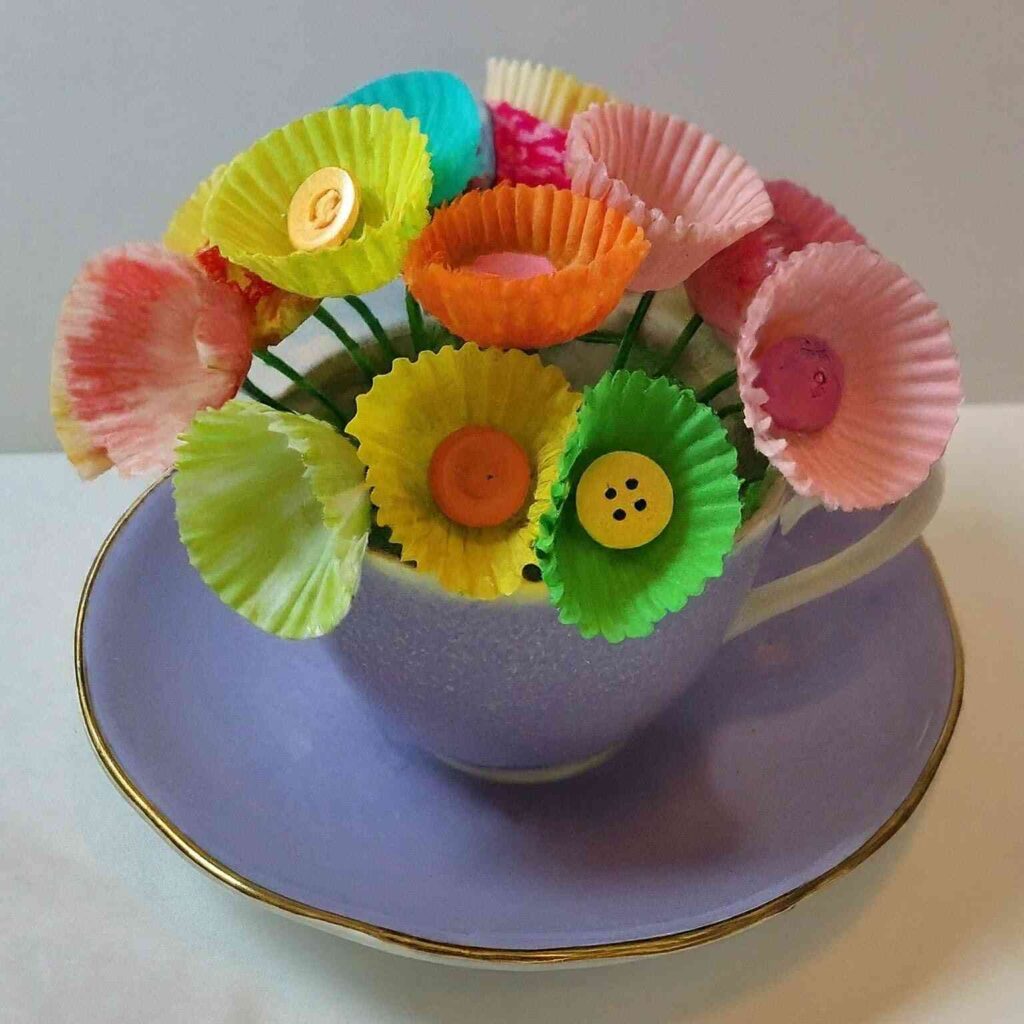
Turn a teacup and cupcake liners into a charming and colorful flower arrangement for Mom.
Items you’ll need:
- Teacup (or small mug)
- Cupcake liners (various colors and patterns)
- Pipe cleaners (green)
- Scissors (adult supervision recommended)
- Buttons (optional)
- Hot glue gun (adult supervision required)
How to Make It:
(Note: Adult supervision recommended for hot glue gun and scissors)
- (Adult supervision recommended) Carefully cut apart the cupcake liners at the bottom seam to create flat circles.
- Stack several cupcake liner circles on top of each other (around 5-7 circles work well).
- Pinch the center of the stacked cupcake liners and secure them tightly with a twist tie or pipe cleaner.
- Gently separate the cupcake liner layers to create a flower shape.
- Wrap a pipe cleaner around the bottom of the flower and secure it with tape or hot glue (adult supervision required) to create the stem.
- You can add a button to the center of the flower for decoration (use hot glue for this step, adult supervision required).
- Repeat steps 1-6 to create multiple cupcake liner flowers in different colors and patterns.
- Arrange the cupcake liner flowers in the teacup to create a colorful bouquet.
#41 Mom’s Coupon Book of Chores
Instead of a traditional coupon book for relaxing activities, create a fun twist – coupons offering to help Mom with chores.
Items you’ll need:
- Construction paper
- Markers or crayons
- Scissors
- Stapler (optional)
- Ribbon or twine (optional)
How to Make It:
- Fold several pieces of construction paper in half to create small coupon booklets.
- Decorate the front covers of the booklets with drawings or messages for Mom.
- Inside each booklet, write down “coupons” offering to help Mom with chores she might dislike. Here are some ideas:
- “One Free Dishwashing Extravaganza.”
- “Laundry Folding Fiesta (Done by You.)”
- “Vacuuming Voucher (Let’s Make the Dust Disappear.)”
- “Gardening Assistant for a Day”
- “Help with Errands Coupon”
- You can personalize the coupons with cute drawings or funny messages about how much you enjoy helping Mom.
- Staple the folded pieces of construction paper together to create a booklet.
- Tie a ribbon or twine around the booklet for a finishing touch (optional).
#42 Button Heart Wreath
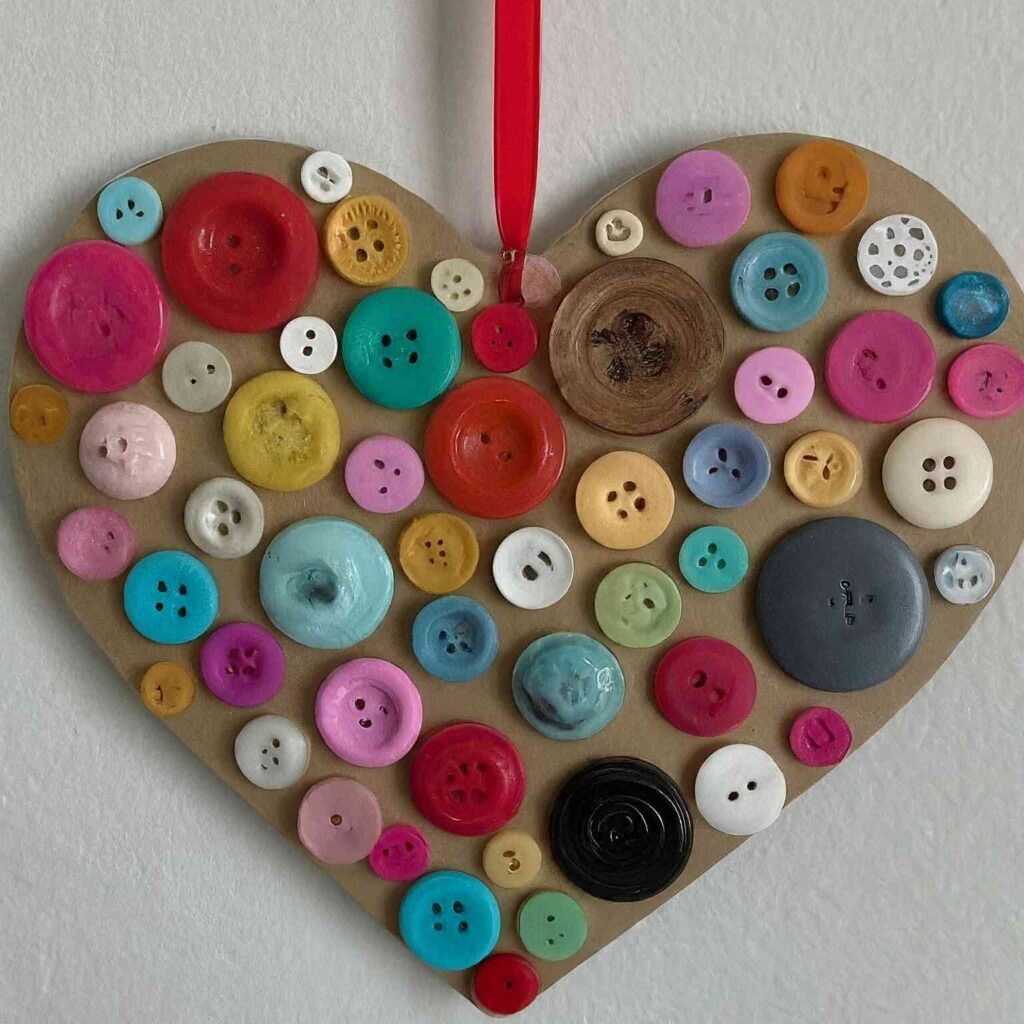
Create a charming and heartfelt wreath for Mom to decorate her door.
Items you’ll need:
- Cardboard wreath form (any size)
- Buttons (various sizes and colors)
- Hot glue gun (adult supervision required)
- Ribbon or twine (optional)
How to Make It:
(Note: Adult supervision required for hot glue gun)
- Use the hot glue gun (with adult supervision) to adhere buttons of various sizes and colors all over the cardboard wreath form, covering the entire surface.
- You can create a solid button design or arrange the buttons in a heart shape for an extra special touch.
- Once all the buttons are glued on, tie a ribbon or twine to the top of the wreath for hanging (optional).
#43 DIY Scented Sugar Scrub
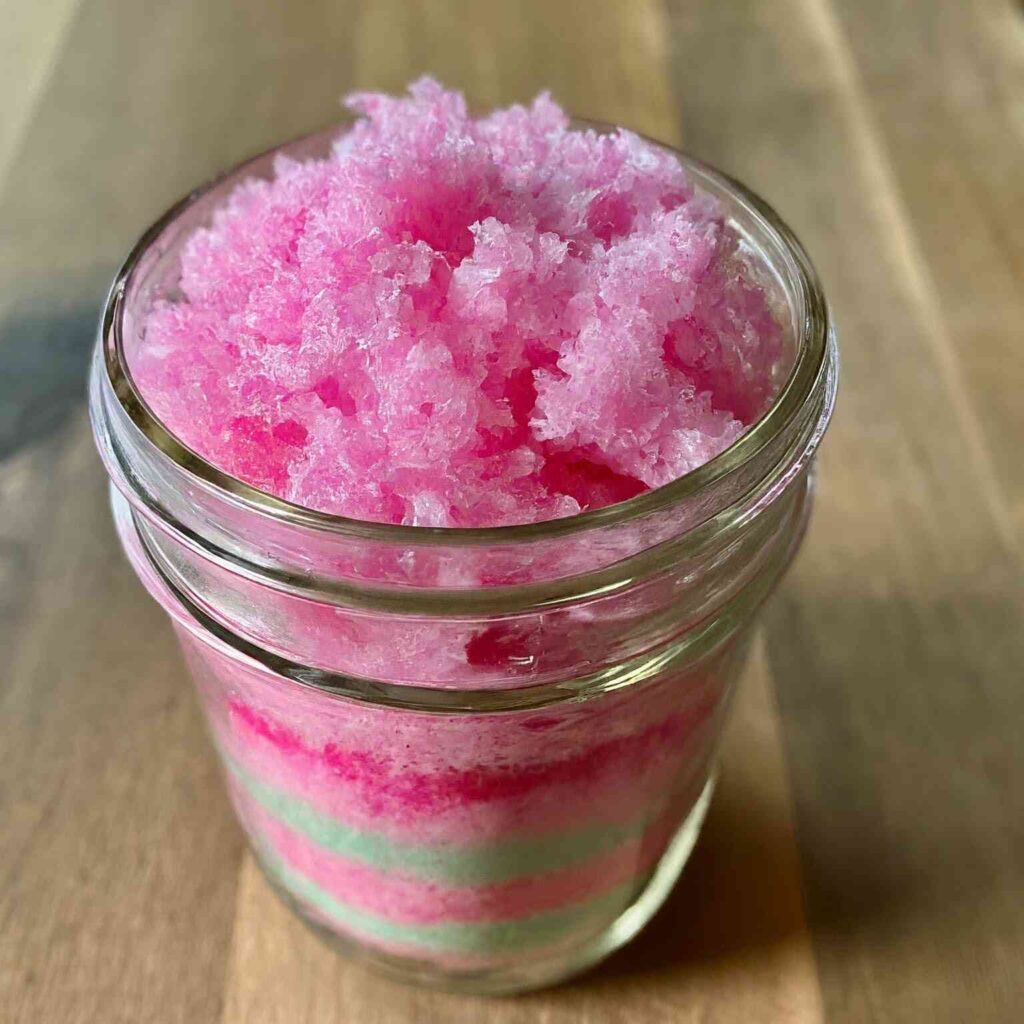
Create a luxurious and relaxing sugar scrub for Mom to pamper herself.
Items you’ll need:
- Granulated sugar (1 cup)
- Coconut oil (1/2 cup)
- Essential oil (a few drops of a relaxing scent like lavender or vanilla) (optional)
- Food coloring (a few drops, optional)
- Airtight container
How to Make It:
- In a large bowl, combine the granulated sugar and coconut oil. Mix well until the sugar is evenly coated with the oil.
- If you’d like to add some fragrance, add a few drops of essential oil of your choice. Mix well to distribute the scent evenly.
- (Optional) Add a few drops of food coloring to create a pastel-colored sugar scrub.
- Mix everything well until evenly combined.
- Transfer the sugar scrub to an airtight container. This will help it retain its moisture and fragrance.
#44 Pressed Flower Bookmark
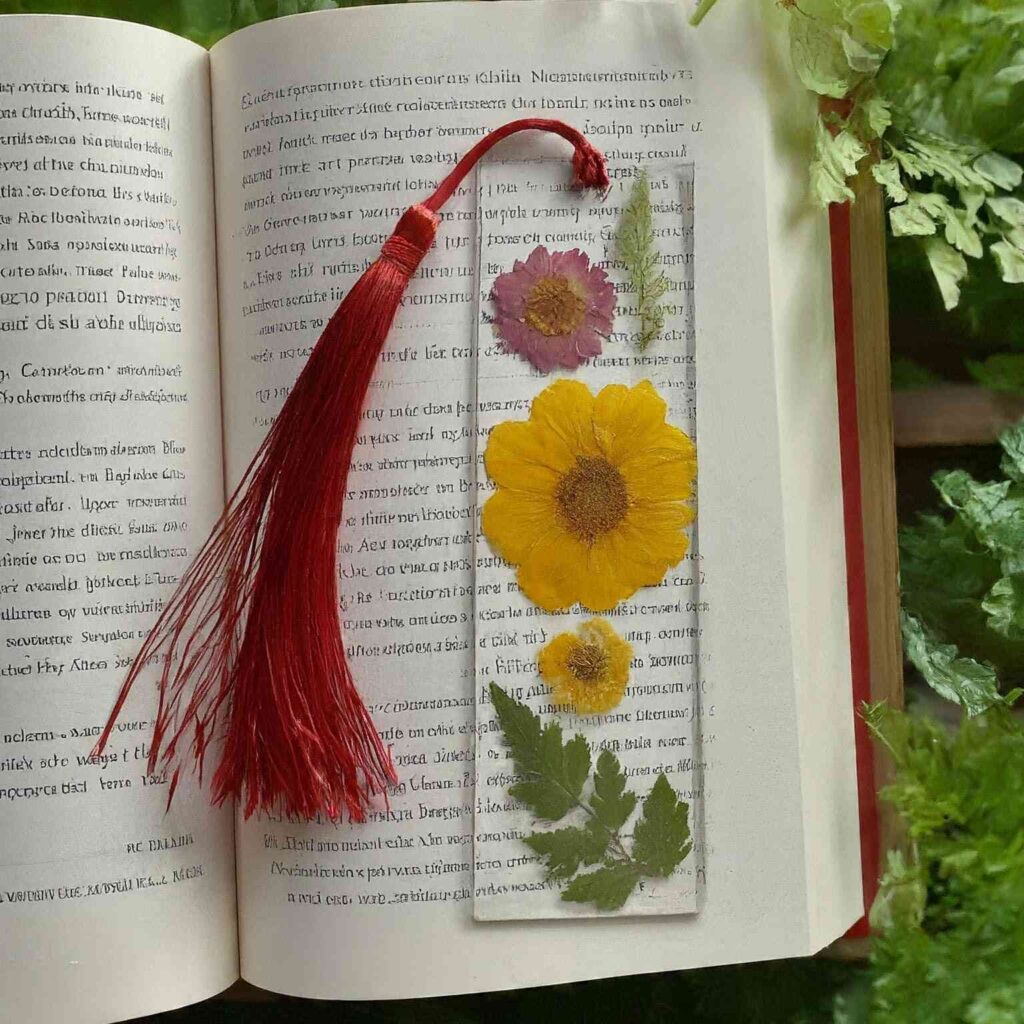
Create a beautiful and personalized bookmark for Mom to mark her place in her favorite book.
Items you’ll need:
- Parchment paper
- Iron (optional)
- Laminating sheets (optional)
- Ribbon or yarn
- Scissors
- Dried flowers (flat and small)
How to Make It:
- Collect a variety of flat and small dried flowers.
- Place the dried flowers between two sheets of parchment paper.
- (Optional) You can iron gently on low heat for a few seconds to help flatten the flowers further.
- Cut out a bookmark shape from a piece of cardstock or laminate a sheet of paper (optional) to create a sturdier bookmark.
- Arrange the dried flowers on the bookmark in a pleasing design.
- If you laminated the bookmark, carefully cut away any excess laminate around the edges.
- Punch a hole at the top of the bookmark and thread a ribbon or yarn through it to create a decorative tassel (optional).
#45 Fingerprint Flower Bouquet
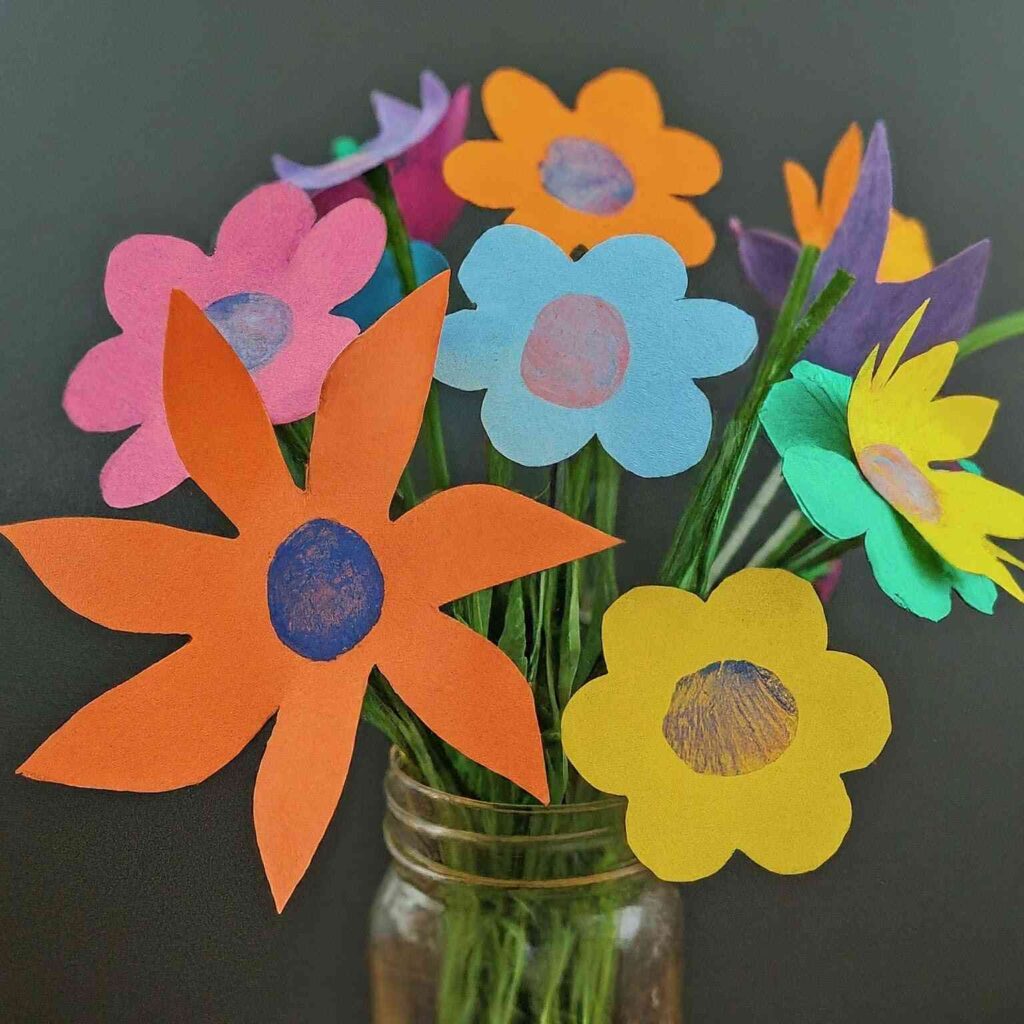
Create a personalized and adorable bouquet of flowers made with your child’s fingerprints.
Items you’ll need:
- Construction paper (various colors)
- Green pipe cleaners
- Scissors
- Markers (optional)
How to Make It:
- Cut out flower shapes from different colored construction paper. You can use a variety of shapes and sizes for a diverse bouquet.
- Use different colored markers (optional) to draw details on the flower shapes, like stems and leaves.
- Dip your child’s finger in paint ( washable paint recommended) and gently press it onto the center of each flower shape to create a fingerprint “bloom.” You can use different colors for each fingerprint.
- Once the paint dries, cut pipe cleaners into stem lengths and secure them to the back of each flower shape using tape or glue.
#46 DIY Scented Play Dough for Mom to Relax
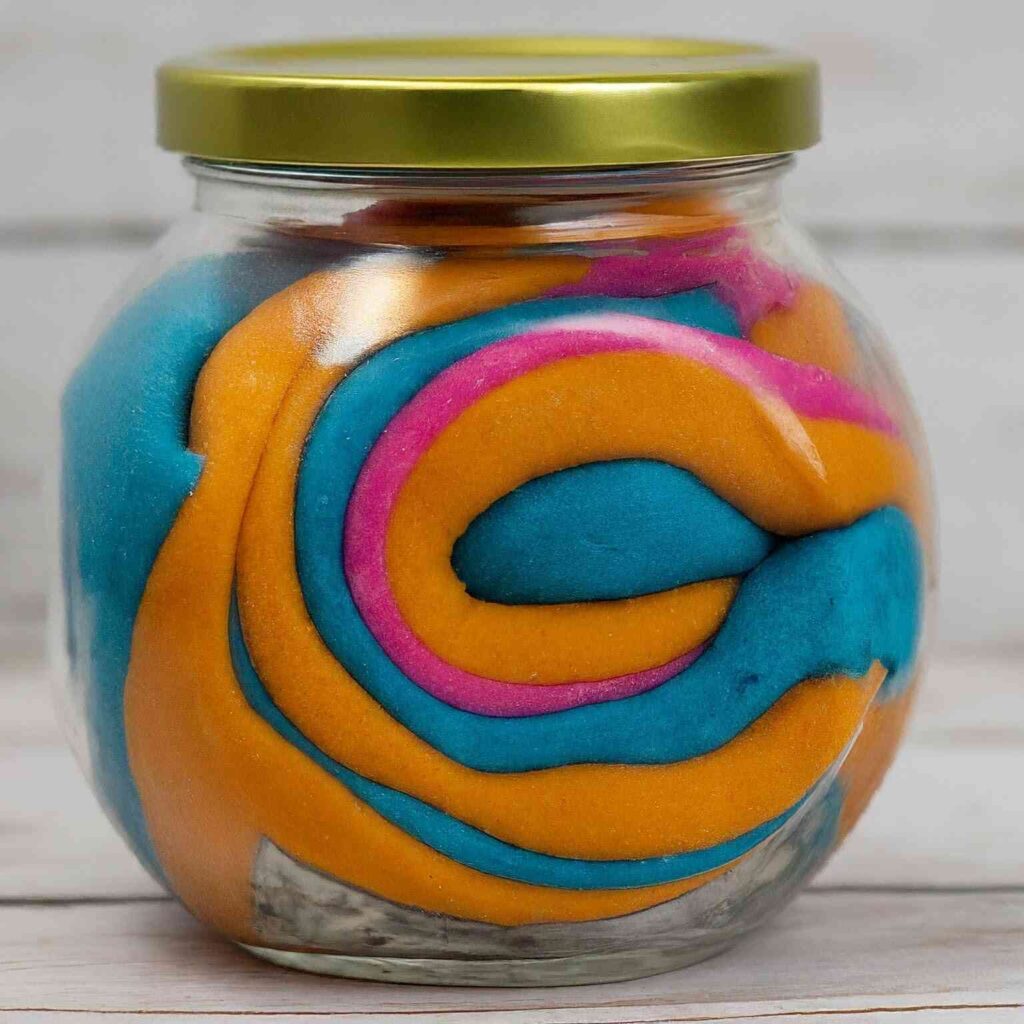
Create calming and fragrant play dough for Mom to enjoy a sensory experience.
Items you’ll need:
- Unscented play dough (store-bought or homemade)
- Essential oil (a few drops of a relaxing scent like lavender or chamomile) (optional)
- Food coloring (a few drops, optional)
- Airtight container
How to Make It:
- If using store-bought play dough, skip to step 2. If making homemade play dough, follow a recipe that uses safe and non-toxic ingredients for children.
- Knead a few drops of essential oil (optional) into the play dough until the scent is evenly distributed.
- (Optional) Add a few drops of food coloring to create a pastel-colored play dough.
- Knead everything well until the essential oil and food coloring (if used) are evenly incorporated.
- Store the scented play dough in an airtight container to retain its moisture and fragrance.
#47 Construction Paper Flower Mobile
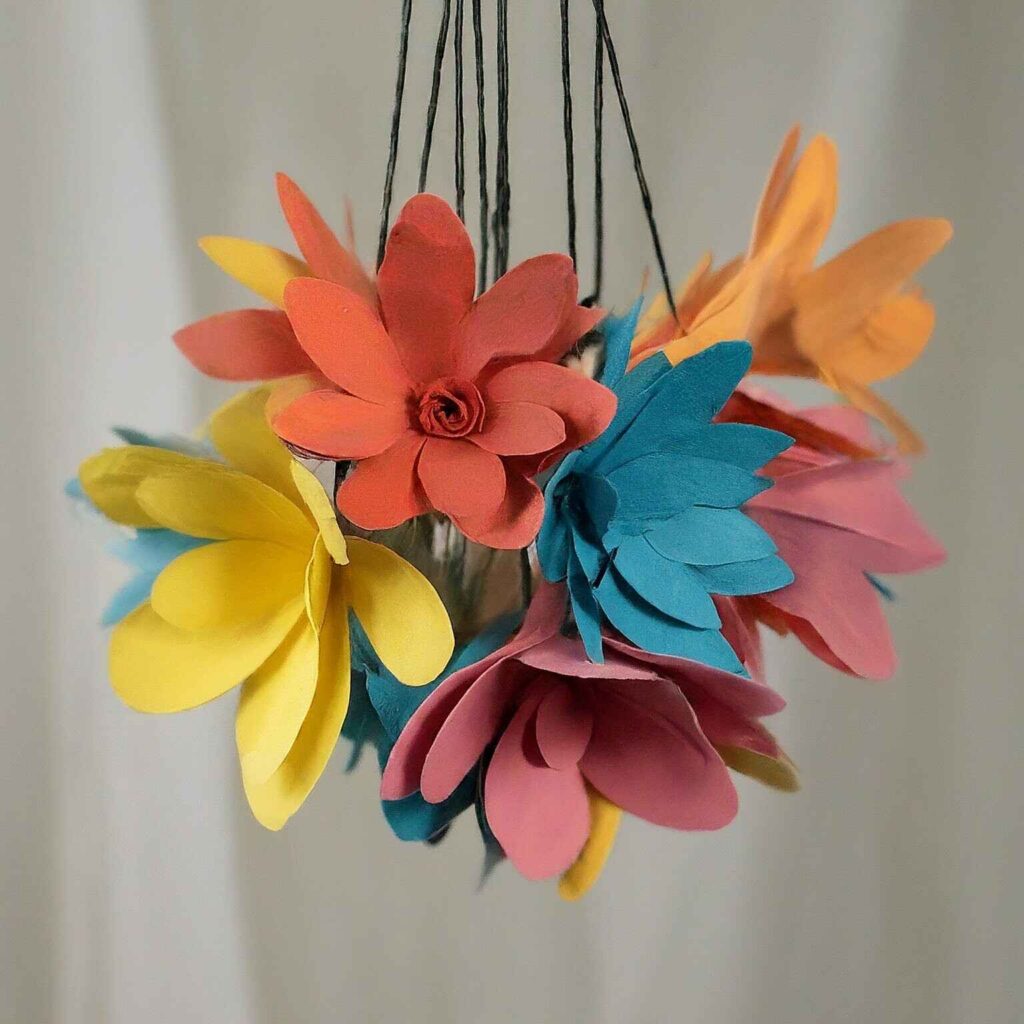
Create a vibrant and colorful mobile for Mom to decorate her space.
Items you’ll need:
- Construction paper (various colors)
- Straws (cut into short pieces)
- String or yarn
- Scissors
- Hole punch (optional)
How to Make It:
- Cut out various flower shapes from different colored construction paper. You can use a variety of sizes and designs.
- (Optional) Use a hole punch to create small holes near the top of each flower shape.
- Cut straws into short pieces to use as connectors for the mobile.
- Thread string or yarn through the holes (if punched) or loop it around the top of each flower shape.
- Tie the ends of the string or yarn to different points on a longer piece of string or yarn to create the mobile structure.
- Hang the mobile from the ceiling or a hook for Mom to enjoy.
#48 Salt Dough Handprint Keepsake
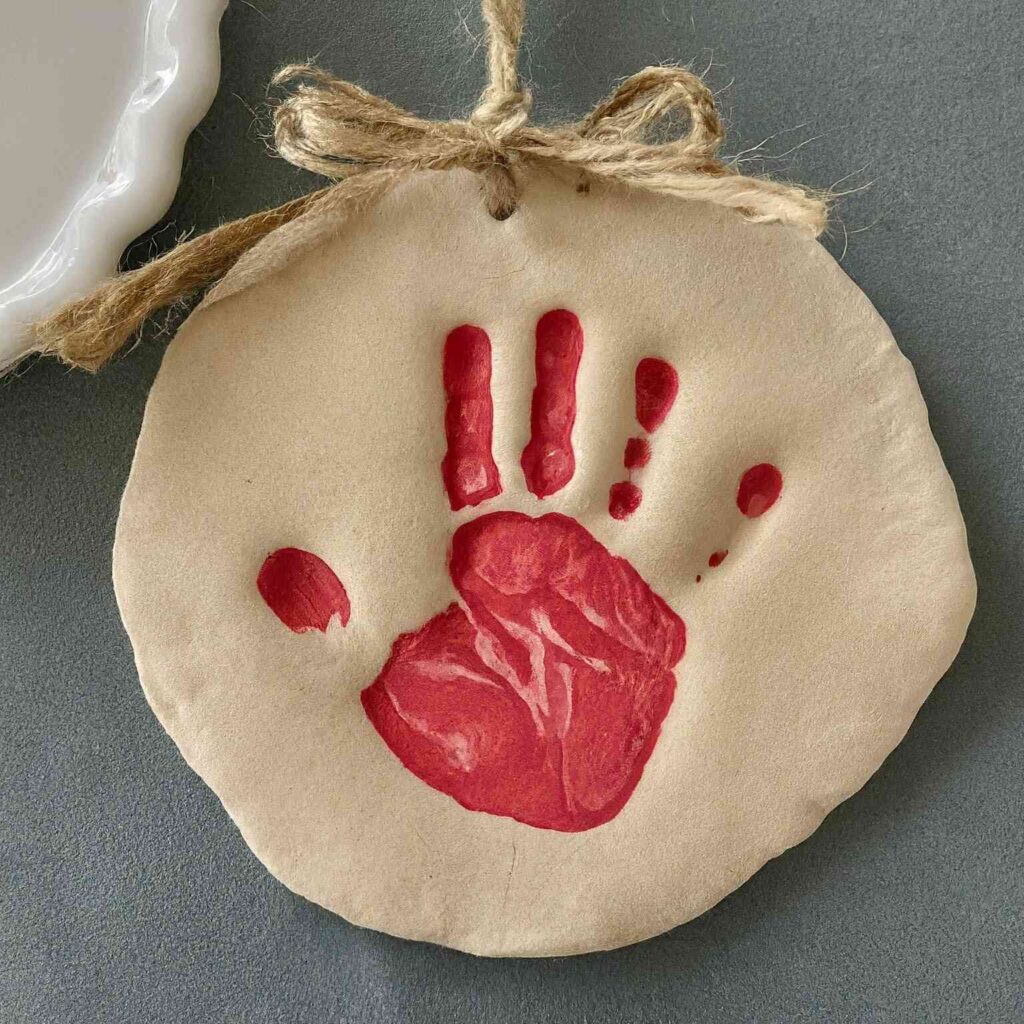
Items you’ll need:
- Flour (1 cup)
- Salt (1/2 cup)
- Water (about 1/2 cup)
- Rolling pin
- Cookie cutters (optional)
- Paint (optional)
- Ribbon or twine (optional)
#49 Decoupaged Tissue Paper Vase
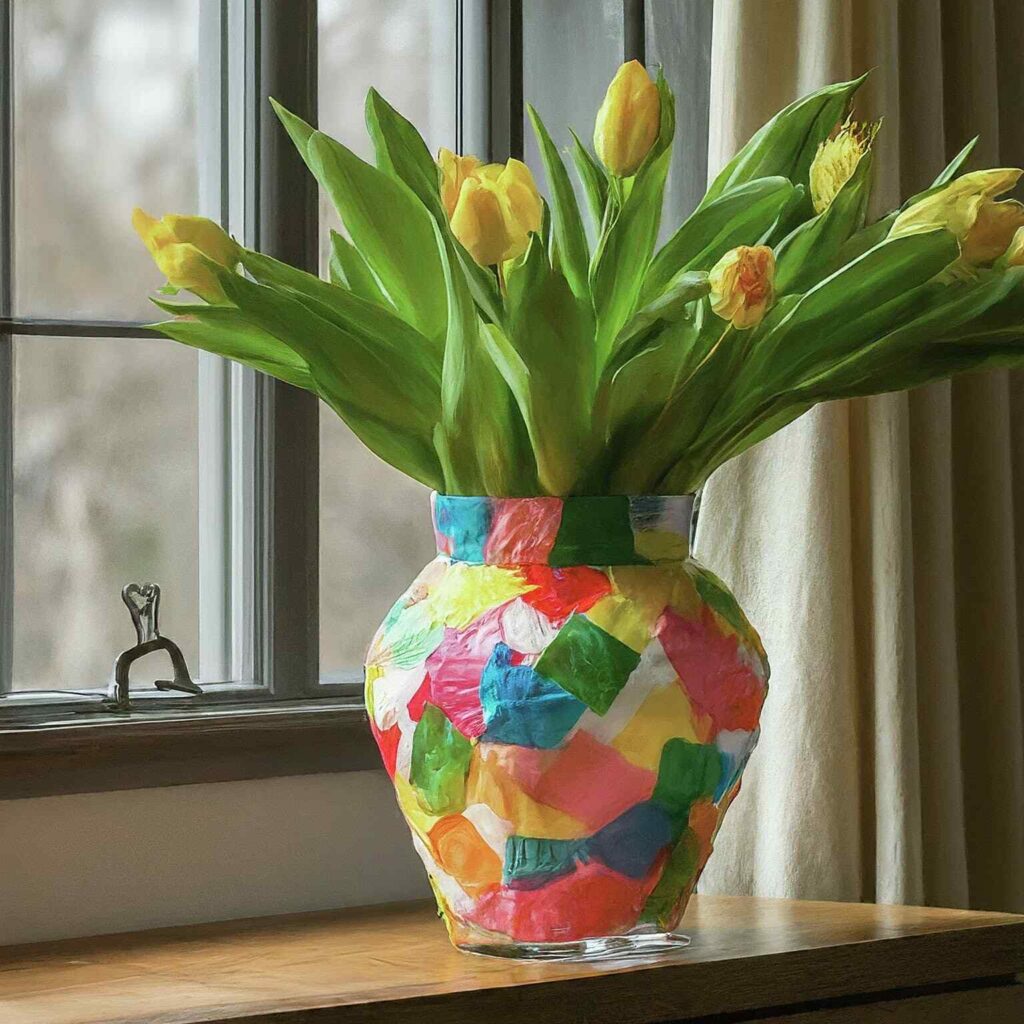
Items you’ll need:
- Plain glass vase
- Tissue paper (various colors and patterns)
- Mod podge or white glue diluted with water
- Scissors
- Paintbrush
#50 Yarn and Button Wall Hanging
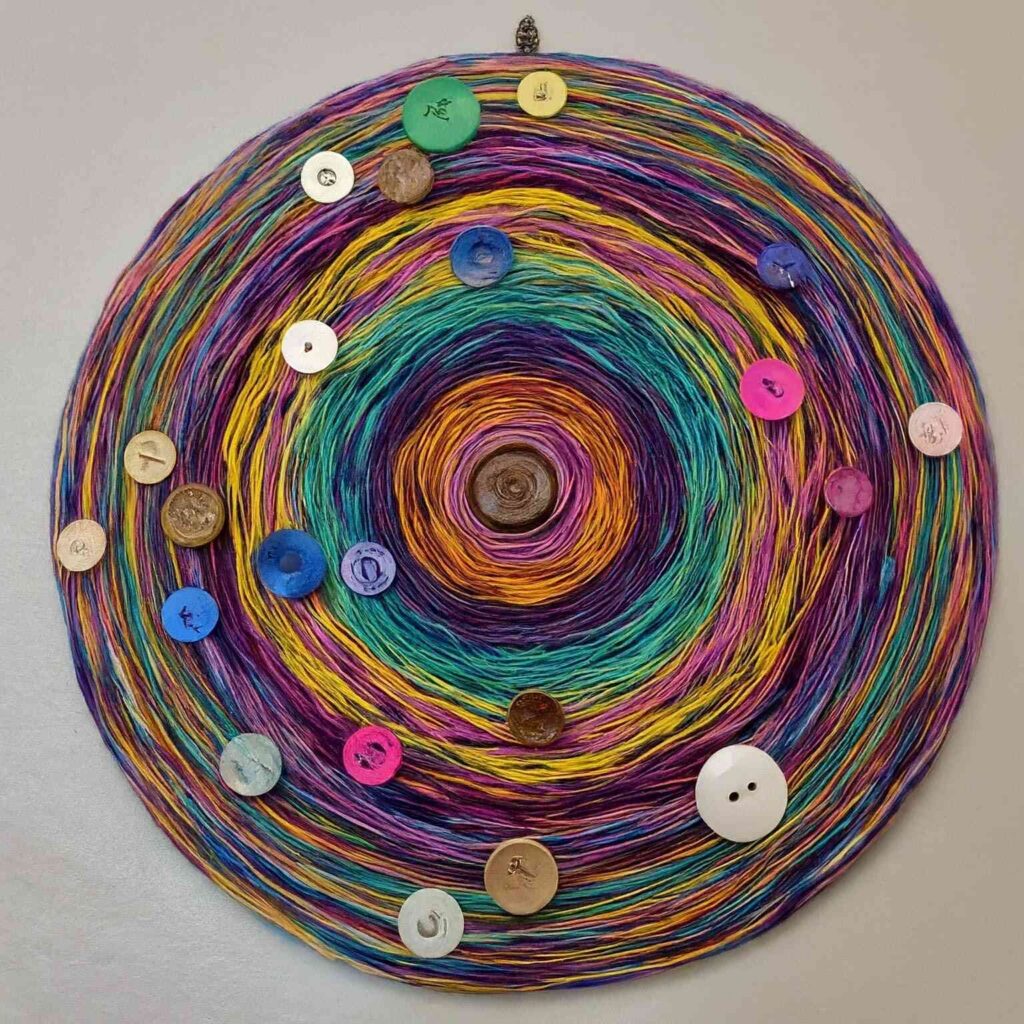
Create a beautiful and textured wall hanging for Mom to decorate her space.
Items you’ll need:
- Cardboard (cut into a desired shape)
- Yarn (various colors)
- Buttons (various sizes and colors)
- Hot glue gun (adult supervision required)
- Scissors (adult supervision recommended)
How to Make It:
(Note: Adult supervision required for hot glue gun and scissors)
- Wrap yarn around the cardboard in different directions and colors to create a woven or wrapped design. You can secure the yarn ends with tape or glue as you go.
- Once the cardboard is covered in yarn, use the hot glue gun (with adult supervision) to adhere buttons of various sizes and colors onto the yarn surface.
- Get creative. You can arrange the buttons in a pattern, create a specific design, or simply add them randomly for a textured look.
#51 Painted Pasta Box Planter
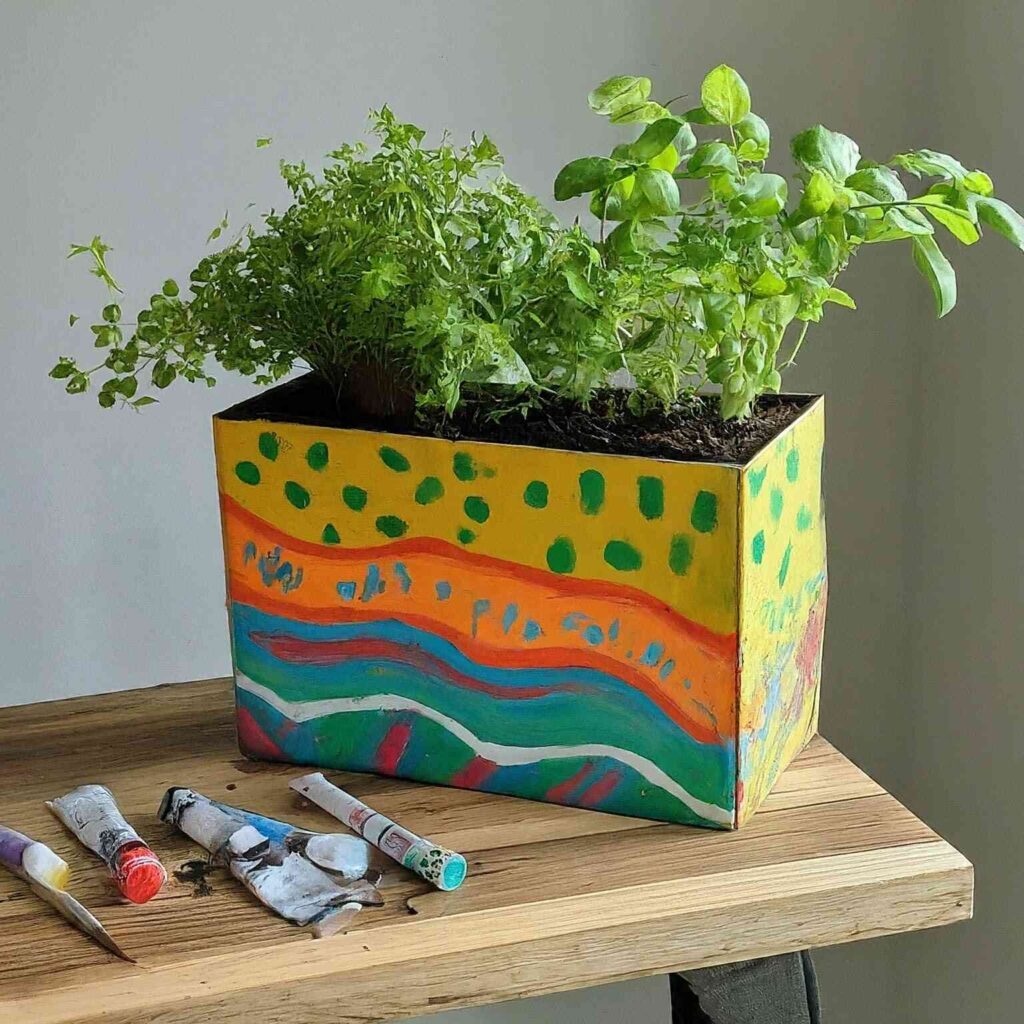
Transform an empty pasta box into a colorful and charming planter for Mom’s favorite herbs or small flowers.
Items you’ll need:
- Empty pasta box (clean and dry)
- Acrylic paints (various colors)
- Paintbrushes
- Markers (optional)
- Potting soil
- Small plant (herb or flower)
- Spoon (optional)
How to Make It:
- Paint the entire pasta box with acrylic paints. You can paint a solid color, create designs, or add polka dots and stripes.
- Let the paint dry completely.
- (Optional) Once dry, you can use markers to add details like facial features to turn the box into a cute little planter friend.
- Make sure the pasta box has drainage holes in the bottom. If not, carefully poke a few small holes with a spoon (optional, adult supervision recommended) for excess water to drain.
- Fill the pasta box with potting soil and plant your chosen herb or flower.
#52 DIY Coupon Book of Funny Faces
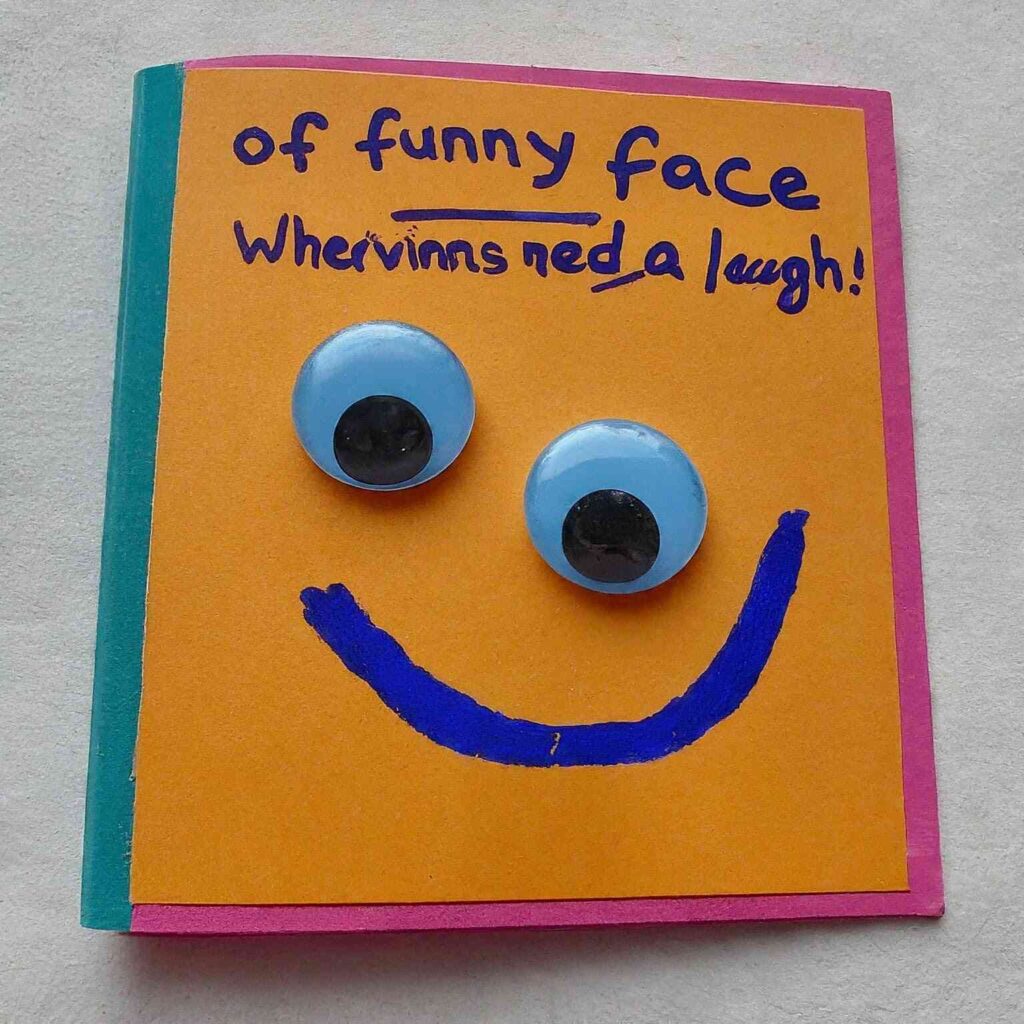
Create a fun twist on a traditional coupon book – coupons offering Mom funny faces from her child.
Items you’ll need:
- Construction paper
- Markers, crayons, or pens
- Scissors
- Stapler (optional)
- Ribbon or twine (optional)
How to Make It:
- Fold several pieces of construction paper in half to create small coupon booklets.
- On the front cover of each booklet, have your child draw funny faces expressing different emotions (silly, happy, surprised, etc.).
- Inside each booklet, write down “coupons” offering Mom a funny face from her child whenever she needs a laugh.
- You can personalize the coupons with messages about how much your child loves to make Mom smile.
- Staple the folded pieces of construction paper together to create a booklet.
- Tie a ribbon or twine around the booklet for a finishing touch (optional).
#53 Nature Collage Photo Frame
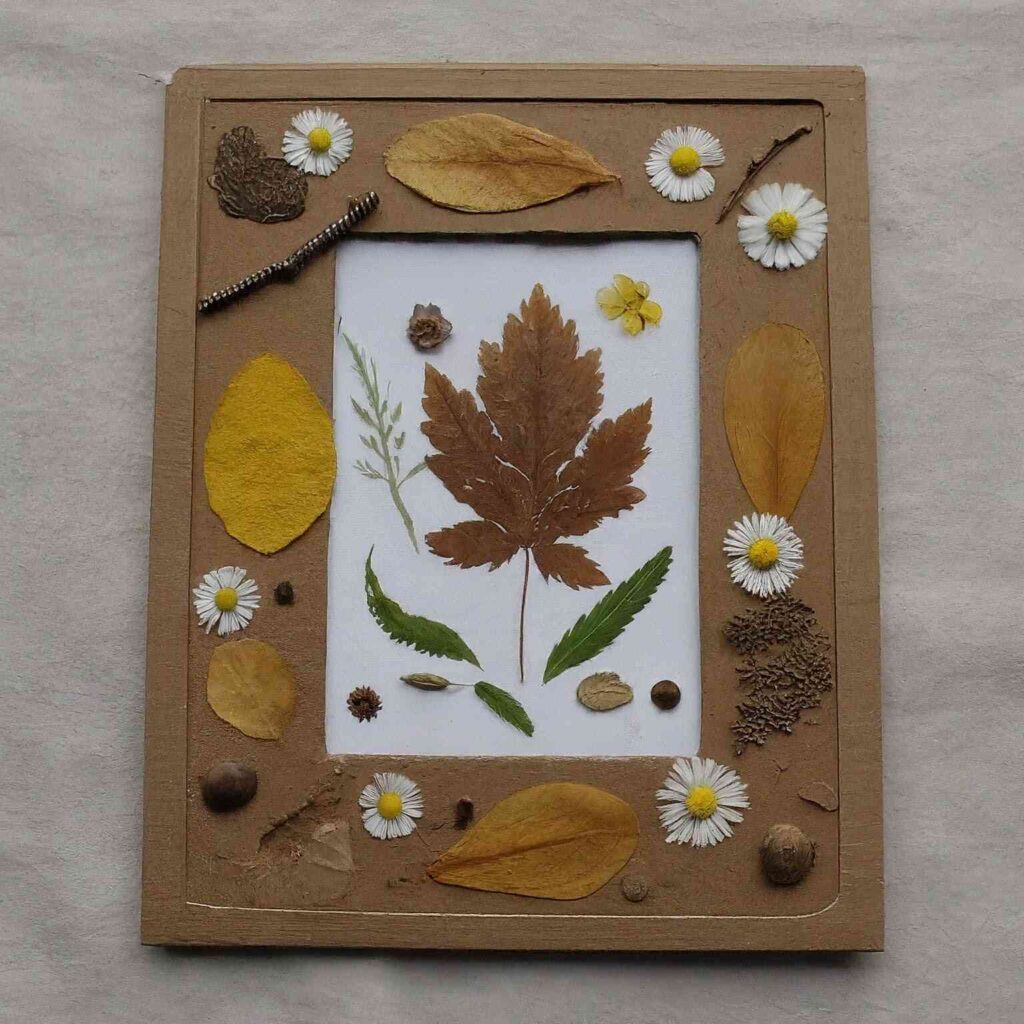
Turn found natural treasures into a beautiful and personalized photo frame for Mom.
Items you’ll need:
- Cardboard picture frame (unfinished or plain)
- Glue (school glue or white glue)
- Dried leaves, flowers, seeds, or small twigs (collected on a nature walk)
- Paint (optional)
- Paintbrush (optional)
- Photo (optional)
#54 DIY Seed Paper Cards
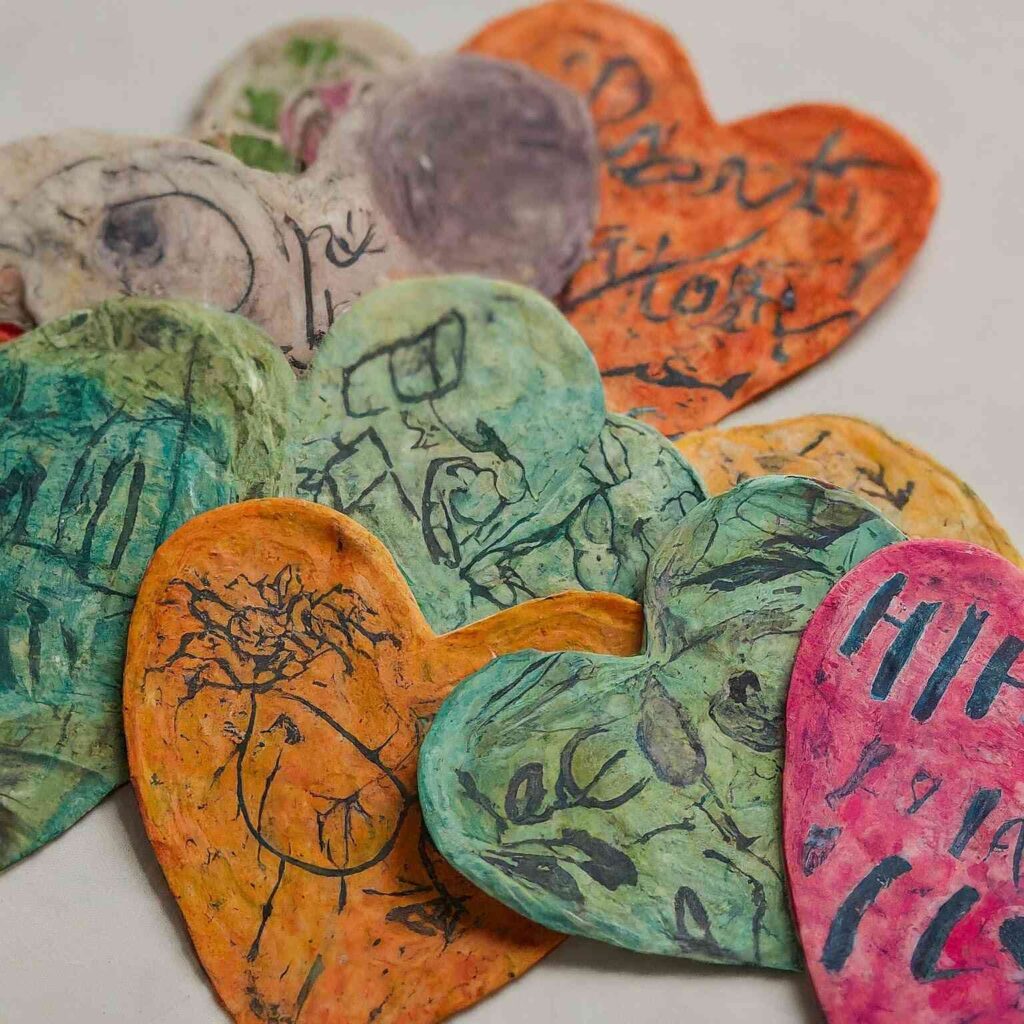
Create eco-friendly cards embedded with wildflower seeds for Mom to plant and grow flowers.
Items you’ll need:
- Recycled paper (toilet paper rolls, cardstock scraps, etc.)
- Blender
- Water
- Wildflower seeds
- Cookie cutters (optional)
- Mesh screen (optional)
- Flowers for pressing (optional)
- Paint (optional)
- Paintbrush (optional)
How to Make It:
- Tear or cut recycled paper into small pieces and place them in a blender with enough water to create a pulp. Blend until smooth.
- Pour the paper pulp into a container with a shallow layer of water.
- (Optional) If using cookie cutters, dip them in the water and then gently press them into the pulp to create shaped seed paper.
- If not using cookie cutters, use a mesh screen (optional) to scoop a thin layer of pulp and spread it evenly onto a flat surface lined with a cloth or paper towel.
- Sprinkle wildflower seeds onto the wet paper pulp.
- Let the seed paper dry completely for several hours or overnight.
- (Optional) Once dry, you can decorate the seed paper with paint or by pressing dried flowers onto the surface.
#55 Beaded Pipe Cleaner Keychain
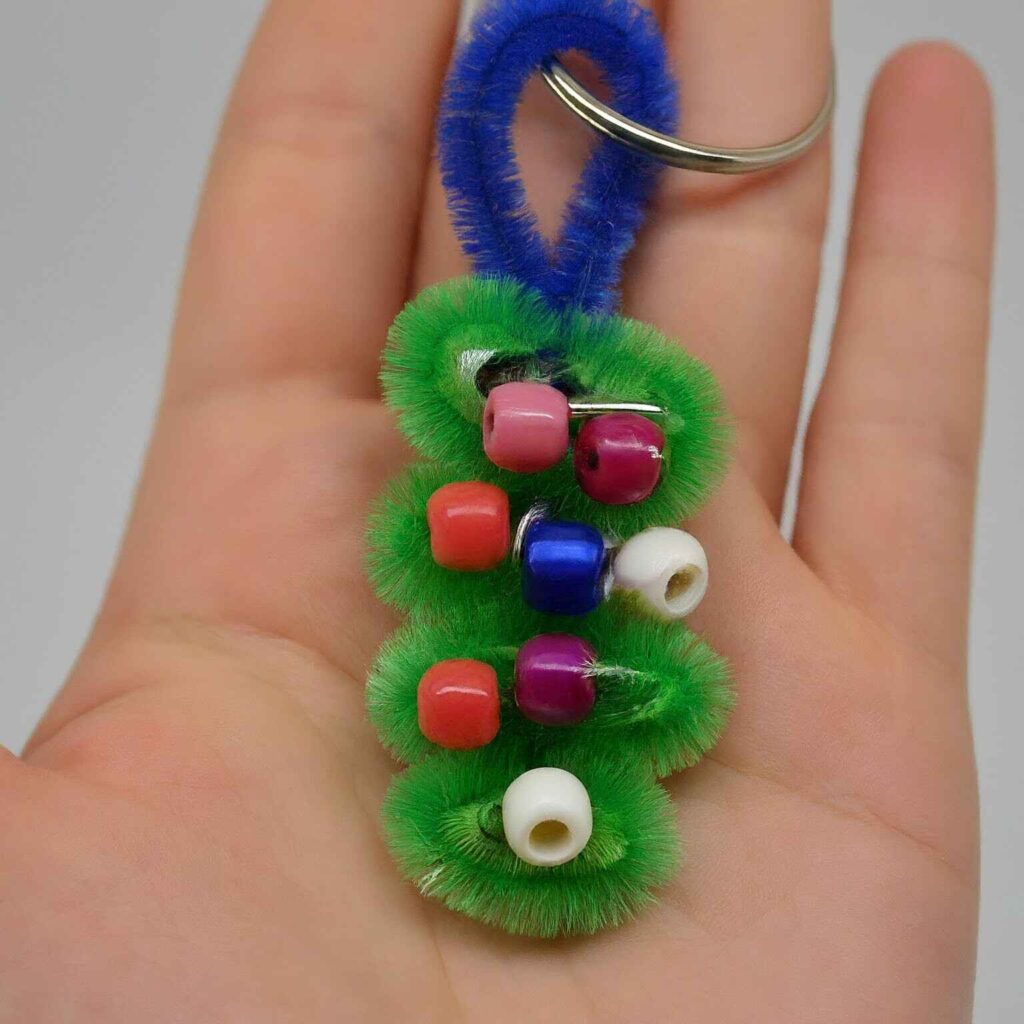
Create a colorful and personalized keychain for Mom to carry her keys in style.
Items you’ll need:
- Pipe cleaners (various colors)
- Pony beads (various colors and shapes)
- Scissors
- Key ring
How to Make It:
- Cut a pipe cleaner to a desired length for the keychain base.
- Thread pony beads onto the pipe cleaner, creating a colorful pattern or design.
- Once you reach the desired length, fold the end of the pipe cleaner back and loop it around the other end to create a secure loop.
- Attach the looped end of the pipe cleaner to a key ring using another pipe cleaner or a jump ring (adult supervision recommended for attaching jump rings).
#56 Sock Puppet Bouquet
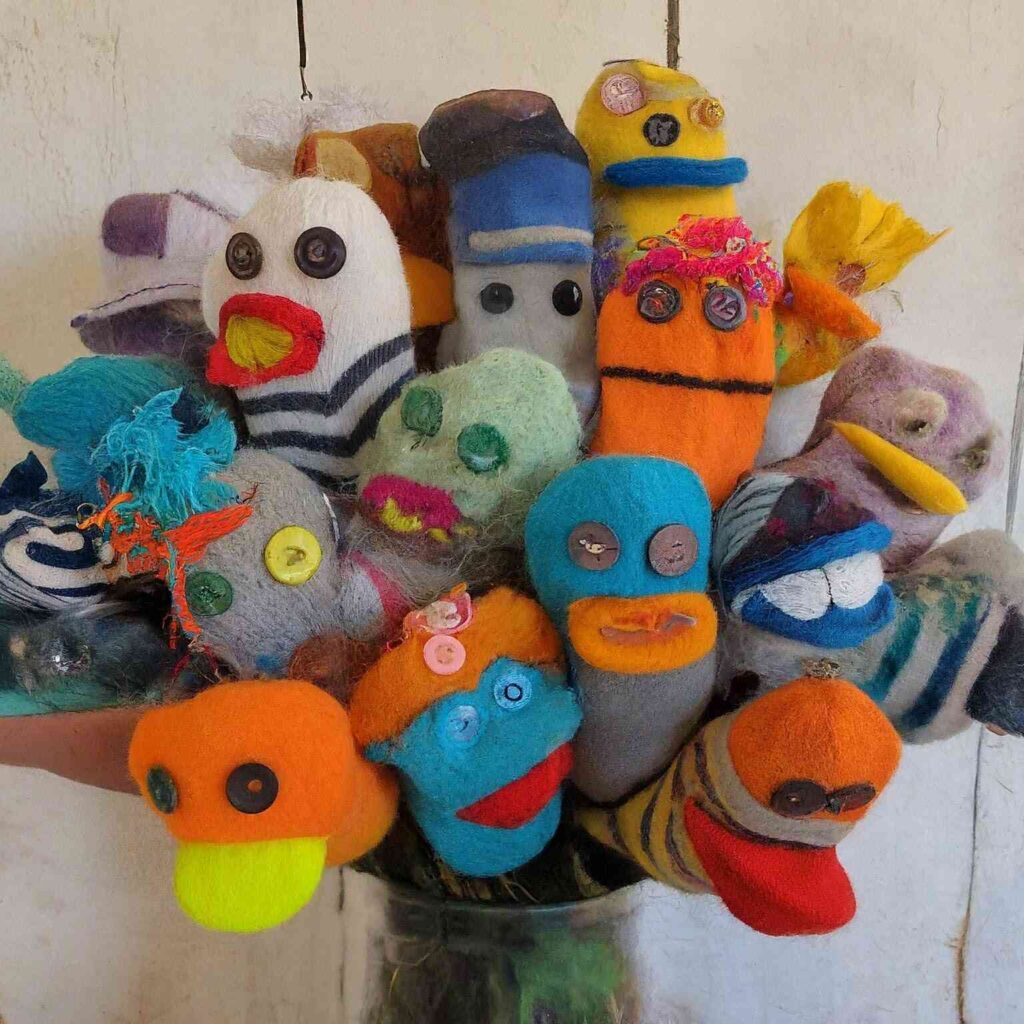
Transform old socks into a playful and silly bouquet of sock puppets for Mom to enjoy.
Items you’ll need:
- Clean, mismatched socks (various colors and patterns)
- Buttons (various sizes and colors)
- Yarn or ribbon (scraps)
- Scissors (adult supervision recommended)
- Fabric scraps (optional)
- Hot glue gun (adult supervision required)
How to Make It:
(Note: Adult supervision recommended for scissors and hot glue gun)
- Cut off the toe section of each sock to create the base of the puppet.
- Stuff the remaining sock portion with cotton balls or fabric scraps to create a round head shape.
- Decorate the sock puppet faces with buttons for eyes and a mouth. You can also use fabric scraps (optional) to create hair, a nose, or other facial features.
- Use yarn or ribbon scraps to tie around the sock base to secure the stuffing and create a defined neck for the puppet.
- (Optional) Use the hot glue gun (with adult supervision) to securely attach additional embellishments like ribbons or small felt shapes.
#57 Painted Rock Succulent Garden
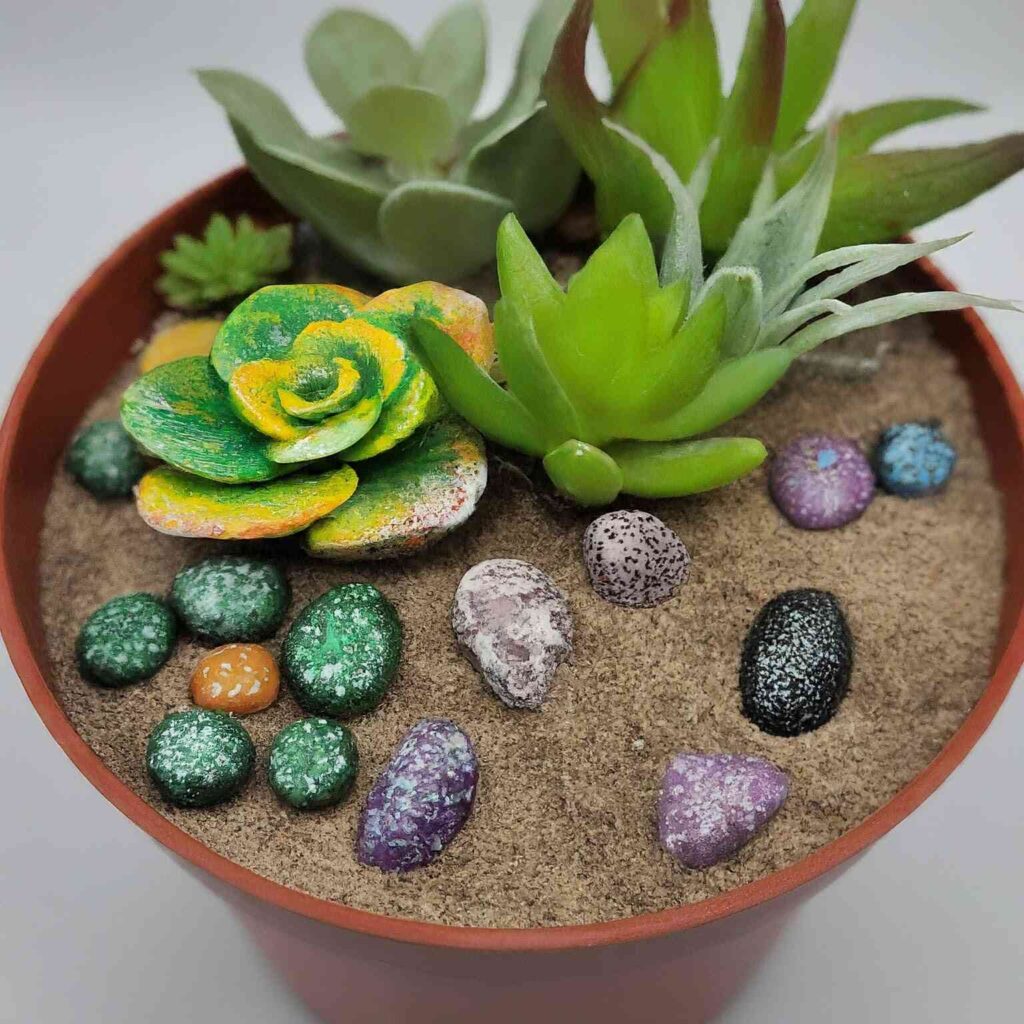
Create a miniature succulent garden using painted rocks for a low-maintenance gift Mom can cherish.
Items you’ll need:
- Smooth rocks (various sizes)
- Acrylic paints (various colors)
- Paintbrushes
- Small pot or container
- Sand or potting soil
- Artificial succulent plants (various shapes and sizes)
How to Make It:
- Paint the smooth rocks with acrylic paints to create colorful and decorative designs resembling succulents. You can use a variety of colors and patterns to represent different succulent varieties.
- Let the painted rocks dry completely.
- Fill the pot or container with sand or potting soil.
- Arrange the painted rocks and artificial succulent plants in the pot to create a miniature succulent garden.
#58 DIY Coupon Book of Chores with a Twist
Create a fun twist on a traditional chore coupon book – offering to complete chores with a silly twist.
Items you’ll need:
- Construction paper
- Markers, crayons, or pens
- Scissors
- Stapler (optional)
- Ribbon or twine (optional)
How to Make It:
- Fold several pieces of construction paper in half to create small coupon booklets.
- Decorate the front covers of the booklets with drawings or messages for Mom.
- Inside each booklet, write down “coupons” offering to complete chores with a silly twist. Here are some ideas:
- “One Free Dishwashing Extravaganza (while wearing a funny hat.)”
- “Laundry Folding Fiesta (Done by You…While Singing at the Top of Your Lungs.)”
- “Vacuuming Voucher (Let’s Make the Dust Disappear with Funny Dance Moves.)”
- “Gardening Assistant for a Day (Wearing Mismatched Socks.)”
- “Help with Errands Coupon (Sunglasses on, Let’s Go on an Adventure.)”
- You can personalize the coupons with even sillier details or funny drawings about how much fun completing chores with Mom can be.
- Staple the folded pieces of construction paper together to create a booklet.
- Tie a ribbon or twine around the booklet for a finishing touch (optional).
#59 DIY Scented Bath Bombs with Herbs
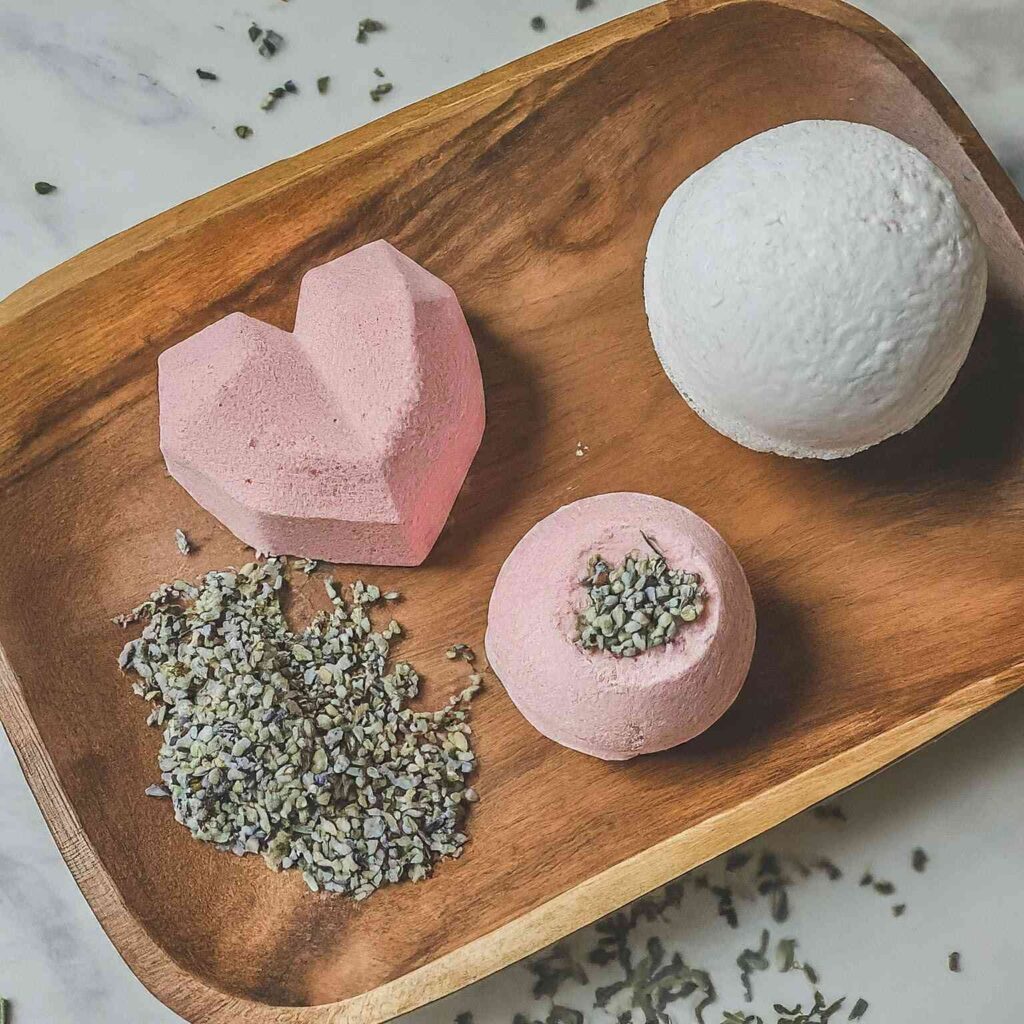
Items you’ll need:
- Baking soda (2 cups)
- Dried lavender or other fragrant herbs (optional)
- Citric acid (1 cup)
- Epsom salts (1 cup)
- Cornstarch (1/2 cup)
- Carrier oil (like coconut oil or almond oil) (1 tablespoon)
- Essential oil (a few drops of a relaxing scent) (optional)
- Water (in a spray bottle)
- Silicone mold (various shapes)
That is all for now. Did you like the ideas in this post?
I bet you did 😁.
I can also bet that you will like these other related articles. Check them out below:

