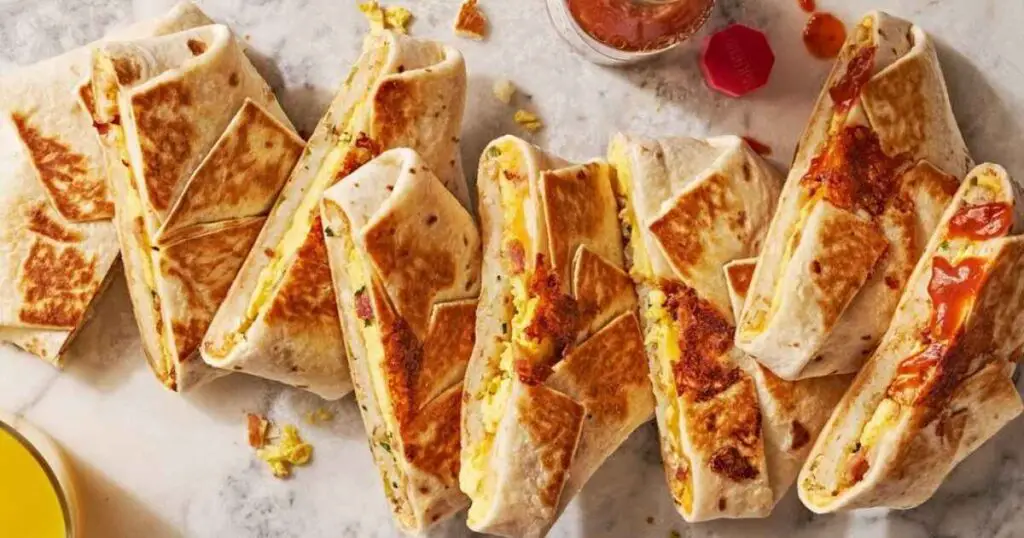
Breakfast Crunchwrap is a handheld breakfast wrap packed with your favorite ingredients like eggs, bacon, cheese, and hash browns. It’s a delicious and easy breakfast for busy mornings!
Hello, friend! Tired of the same old boring breakfast? Get ready to take your mornings to a whole new level of deliciousness with this Breakfast Crunchwrap recipe.
This ain’t your regular breakfast sandwich.
It’s a fun and easy way to enjoy all your favorite morning flavors in one handy package. Imagine crispy hash browns, fluffy scrambled eggs, savory sausage or bacon, and melted cheese, all wrapped up in a warm tortilla and grilled to perfection.
It’s a breakfast explosion in your mouth, and the best part is, you can customize it with your favorite ingredients.
So let’s get cracking and whip up this amazing breakfast treat!
Utensils You Need:
Gather these tools to create your breakfast masterpiece:
- Large skillet or griddle
- Spatula
- Cutting board
- Knife
The Recipe

Breakfast Crunchwrap
Ingredients
- 2 large flour tortillas
- 2 large eggs
- ¼ cup shredded cheese (cheddar, Monterey Jack, or your favorite)
- 2 slices cooked bacon or sausage, crumbled
- ¼ cup cooked hash browns
- Salt and pepper to taste
- Optional toppings: salsa, sour cream, hot sauce
Instructions
- Heat a large skillet or griddle over medium heat.
- While the skillet is heating, scramble the eggs in a separate pan. Season with salt and pepper.
- Lay one tortilla flat on the cutting board.
- In the center of the tortilla, layer the hash browns, scrambled eggs, cheese, and crumbled bacon or sausage.
- Season with salt and pepper to taste and add any other desired toppings.
- Fold the edges of the tortilla up and towards the center, overlapping them to create a sealed package.
- Place the crunchwrap in the skillet and cook for 2-3 minutes per side, or until golden brown and crispy.
- Repeat with the second tortilla and filling.
- Serve warm and enjoy!
Notes
- Feel free to get creative with your fillings! You can add other vegetables like spinach, onions, or peppers.
- If you don’t have hash browns, you can use tater tots or even diced potatoes.
- For a vegetarian option, omit the bacon or sausage and add extra vegetables or beans.
Alternative Ingredients:
If you do not have the ingredients I listed above, do not worry. You can swap them out for the alternatives below:
| Ingredient | Alternative |
| Flour tortilla | Corn tortilla or whole wheat tortilla |
| Bacon/sausage | Ham, turkey bacon, or any cooked protein |
| Hash browns | Tater tots or diced potatoes |
| Cheddar cheese | Any type of cheese that melts well |
What to Serve with Breakfast Crunchwrap:
You can pair this delicious Breakfast Crunchwrap with the following:
- A side of fresh fruit for a balanced breakfast.
- A cup of coffee or orange juice.
- Salsa or hot sauce for extra flavor.
Frequently Asked Questions:
Can I make breakfast crunchwraps ahead of time?
Yes, you can assemble the crunchwraps and store them in the refrigerator for up to 24 hours before cooking.
Can I freeze breakfast crunchwraps?
Yes, you can freeze them for up to 2 months. Thaw in the refrigerator overnight and cook as directed.
Can I use a different type of tortilla?
Yes, you can use any type of tortilla you like, such as corn or whole wheat.
Can I add other ingredients to my crunchwrap?
Absolutely! Feel free to get creative and add any ingredients you enjoy, such as avocado, salsa, sour cream, or hot sauce.
How do I prevent my crunchwrap from falling apart?
Make sure to fold the edges of the tortilla tightly to seal in the filling. You can also use a toothpick to secure the edges if needed.


